 Our first app, Migrato, is live on the Shopify App Store

Shopify to Shopify Data Migration
Move supported data from one Shopify store to another by exporting from the source and importing into the target. 7 min read
 Updated 13 October 2026
 Applies to Migrato on all plans
When to use it
Migrato can be used to migrate supported Shopify data from one Shopify store to another.
This is useful when:
-
 Creating a new Shopify store.
-
Moving from one Shopify store to another.
-
Creating a development or staging store.
-
Migrating a store to a new Shopify environment.
-
Moving selected data between stores.
-
Consolidating Shopify store data.
The migration process
A typical Shopify-to-Shopify migration follows this process:
- Source Shopify store
- Export data
- Migration file
- Target Shopify store
- Import data
Step 1: Prepare the source Shopify store
Open the Shopify store from which the data will be migrated and review the data that needs to be transferred.
For example:
-
Products
-
Smart Collections
-
Custom Collections
-
Orders
-
Draft Orders
-
Customers
-
Companies
-
Discounts
-
Pages
-
Menus
-
Blog Posts
-
Files
-
Metaobjects
-
Redirects
-
Activity
-
Payouts
-
Shop
-
Other supported Migrato entities
The entities and fields available for migration depend on the current Migrato implementation and Shopify API support.
Step 2: Export data from the source store
From the source Shopify store:
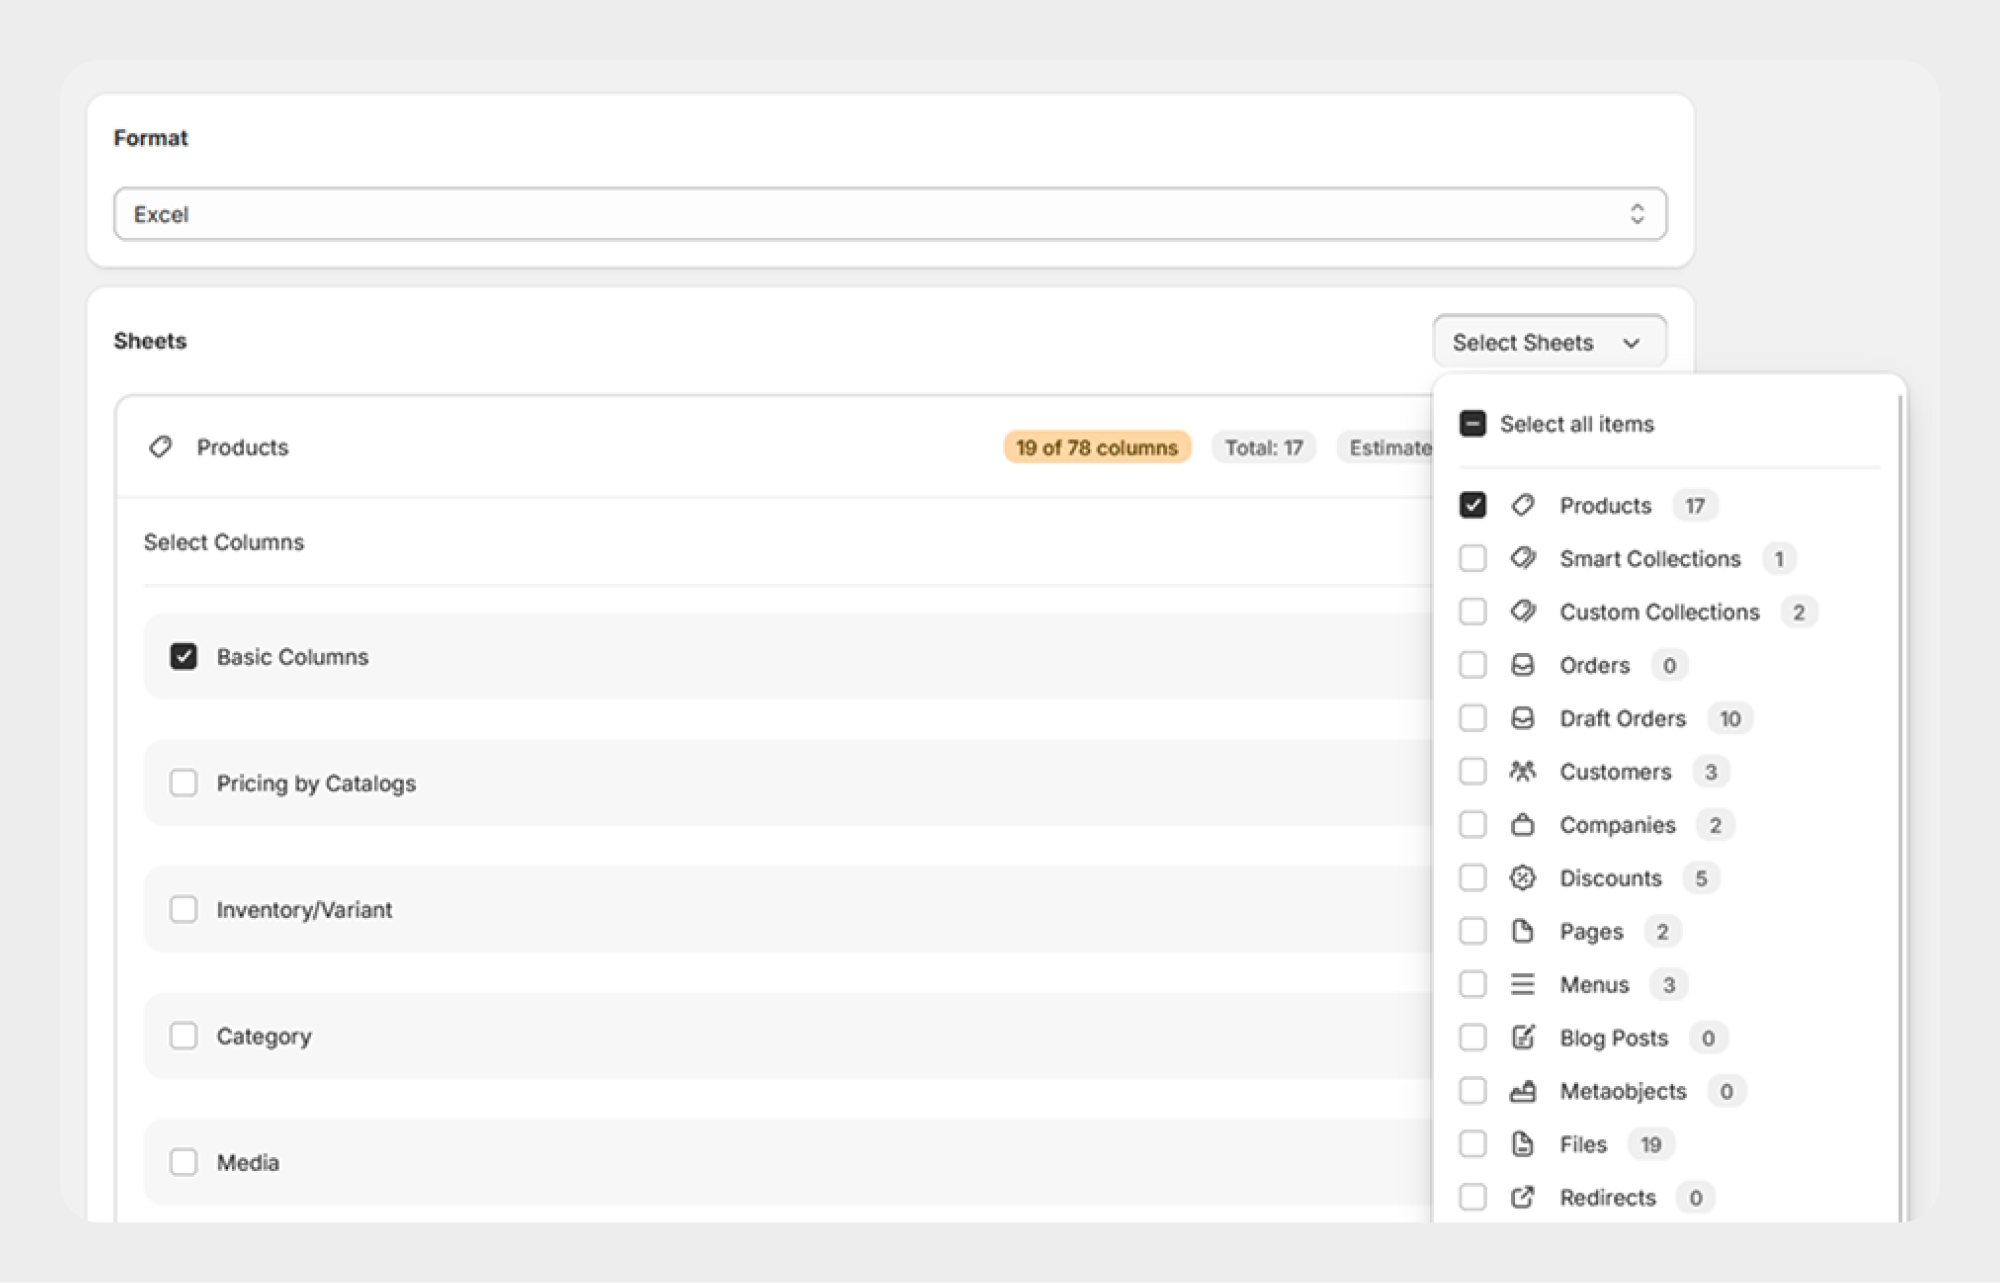
- Open Apps → Migrato.
- Open Export.
- Select the required entity.
- Select the fields to migrate.
- Apply filters if only specific records need to be migrated.
- Start the export.
- Download or access the generated export file.
Step 3: Review the exported data
Review the exported file before importing it into the destination store.
Check:
-
Column names
-
Product or record identifiers
-
Handles
-
References between records
-
Image URLs
-
Metafields
-
Customer information
-
Collection relationships
-
Other related data
Make any required adjustments before starting the destination import.
Step 4: Open the target Shopify store
Open the Shopify store where the data needs to be migrated.
Go to Apps → Migrato → Import.
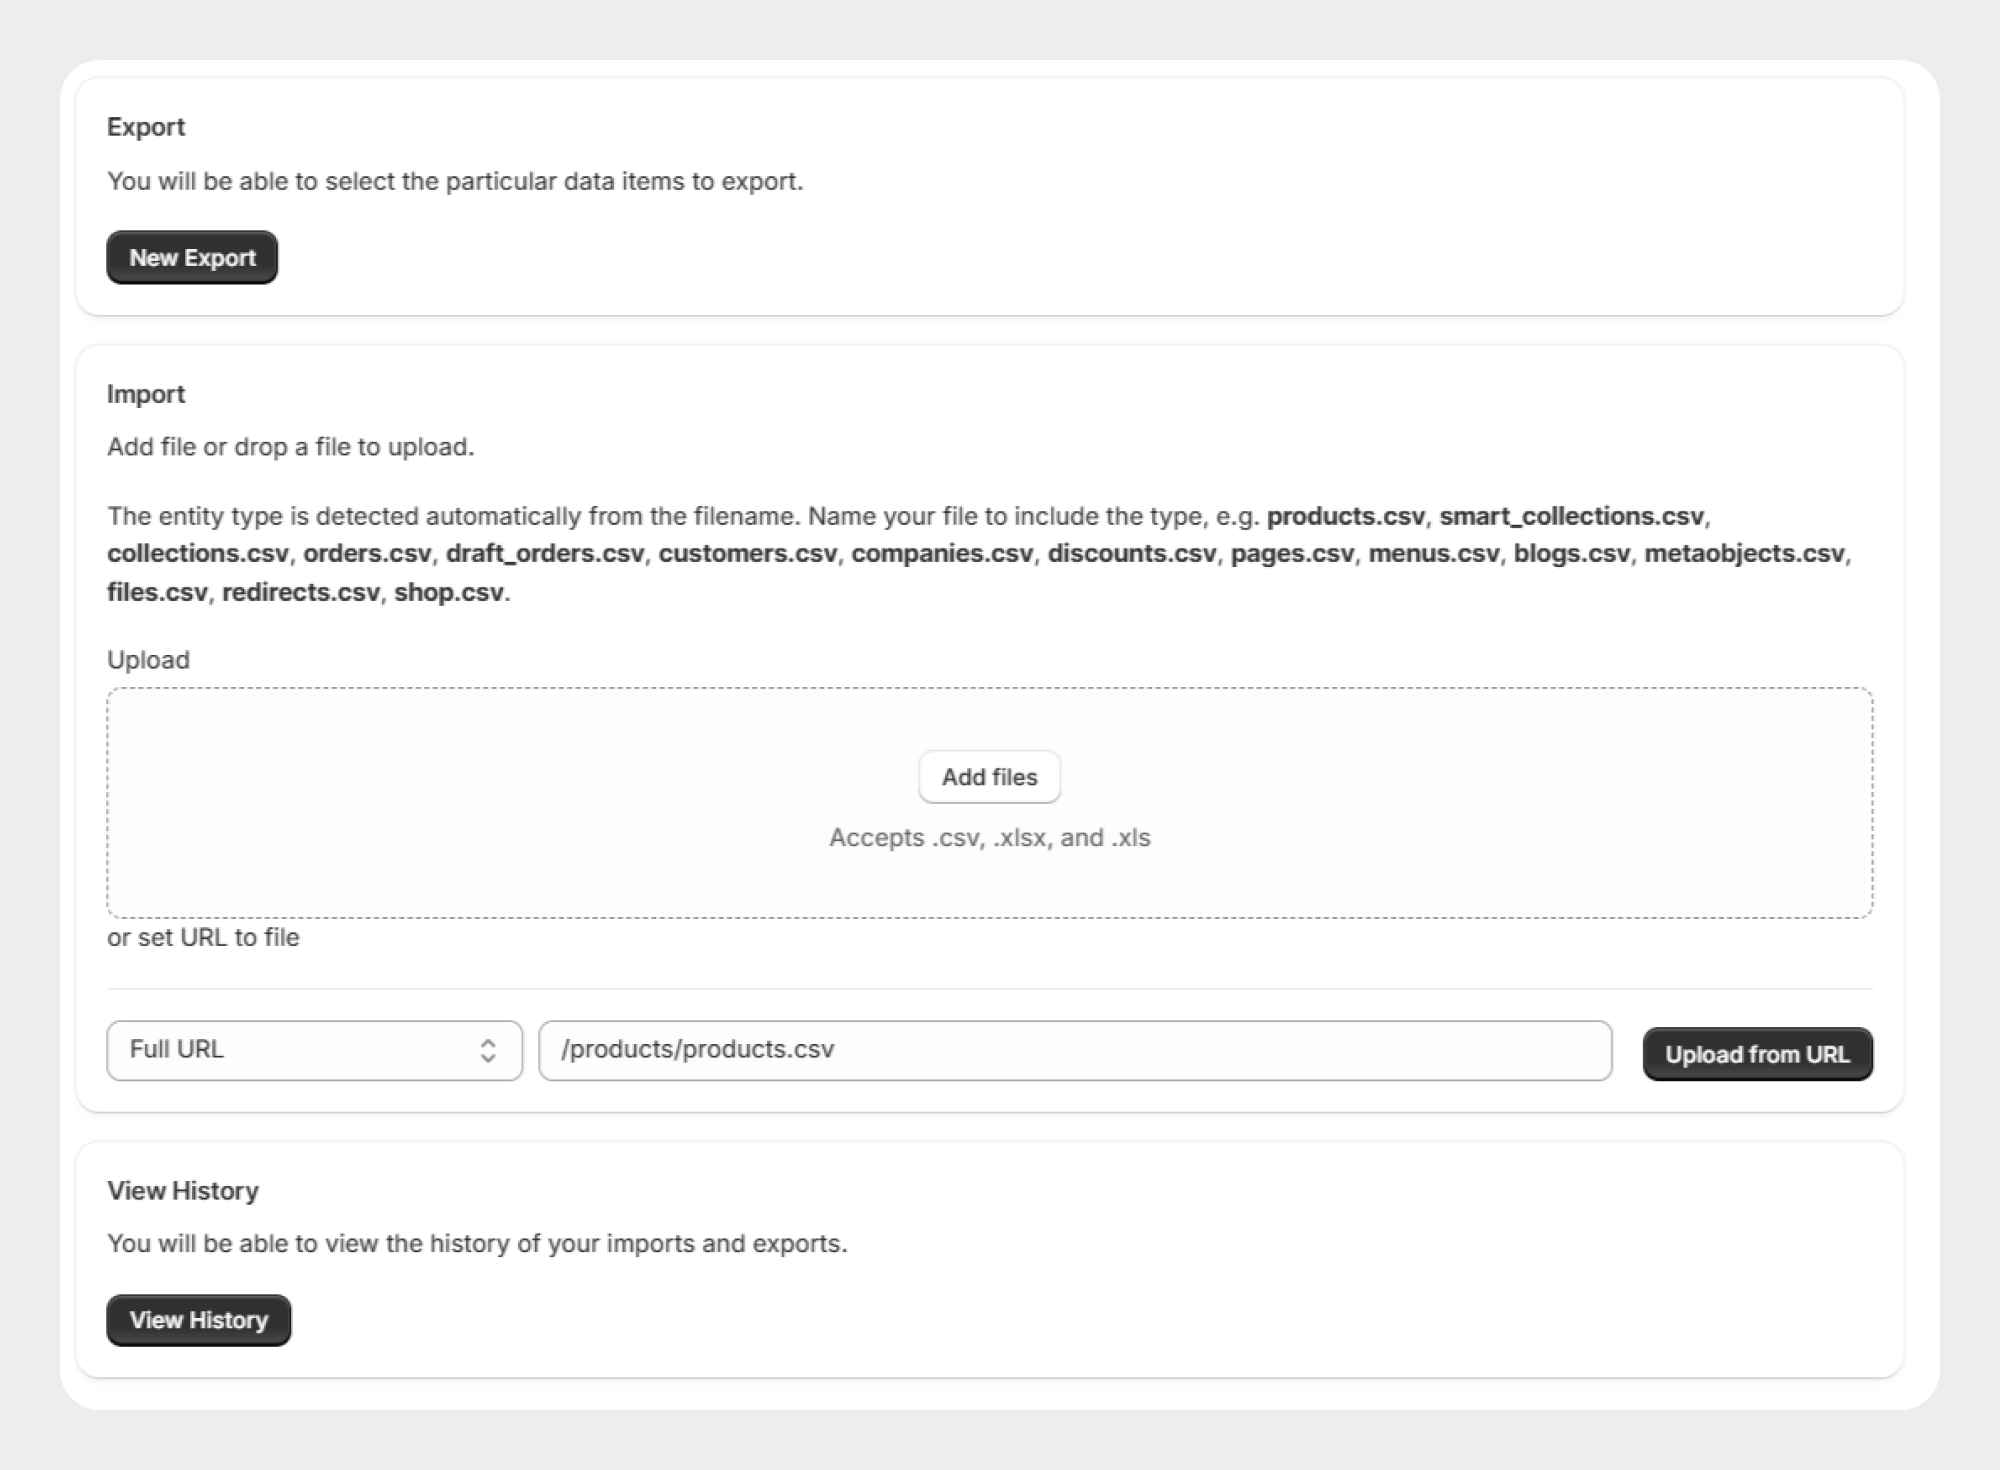
Step 5: Upload the migration file
Upload the file exported from the source Shopify store.
Migrato will process the file and display the available sheet and data information.
Step 6: Select the import operation
Select the appropriate operation for the destination store. For example:
Review how Shopify identifiers and handles are used before importing data into the destination store. Avoid using destructive operations unless the expected result has been confirmed.
Step 7: Review and start the migration
Review:
- Source file.
- Selected entity.
- Imported records.
- Import operation.
- Available options.
Click Import to start the Shopify-to-Shopify migration.
Step 8: Monitor the migration
Monitor the migration job from All Jobs.
The job information can show:
-
Entity
-
Import operation
-
Record count
-
Processing state
-
Date and time
-
Duration
-
Result files
Step 9: Verify the target store
After the migration completes, verify the migrated data in the destination Shopify store.
For product migrations, for example, verify:
-
Products
-
Variants
-
SKUs
-
Prices
-
Inventory
-
Images
-
Collections
-
Tags
-
Metafields
For other entities, verify the relevant records and relationships.
Example: Shopify store product migration
A typical product migration can be:
- Store A: Export products
- Review the product export
- Prepare the migration file
- Store B: Import products
- Review the import results
- Verify the products in Store B
Migrating selected data
You do not necessarily need to migrate the entire dataset. Use Migrato filters to select only the records required for migration.
For example:
| Requirement | Possible approach |
|---|---|
| Migrate only active products | Filter products by Active status. |
| Migrate products from one vendor | Filter products by Vendor. |
| Migrate products from a collection | Filter by Collection. |
| Migrate products updated recently | Filter by Updated At. |
| Migrate selected customers | Filter customers using supported customer fields. |
| Migrate selected orders | Apply supported order filters. |
This can help reduce the migration dataset and make the migration easier to validate.
 Free plan forever