 Our first app, Migrato, is live on the Shopify App Store

Scheduling Import/Export
Run imports and exports at a selected date and time, or repeat them automatically at a defined interval. 9 min read
 Updated 13 October 2026
 Applies to Migrato on all plans
Migrato allows you to schedule import and export jobs to run at a selected date and time or repeat automatically at a defined interval. Scheduling can be used when data needs to be imported or exported regularly without starting each operation manually.
You can configure scheduling while preparing an import or export job, including the schedule date and time, repeat interval, and supported result-file settings. Scheduled jobs can then be reviewed and managed from the scheduled jobs area of Migrato.
Make sure the import file, selected columns, filters, and other job settings are correctly configured. Scheduling runs the configured operation using the settings saved with the job.
Scheduling an export
You can schedule an export after selecting the required entity, columns, filters, and other export settings.
Step 1: Open Export
From your Shopify Admin:
- Go to Apps → Migrato.
- Open the Export section.
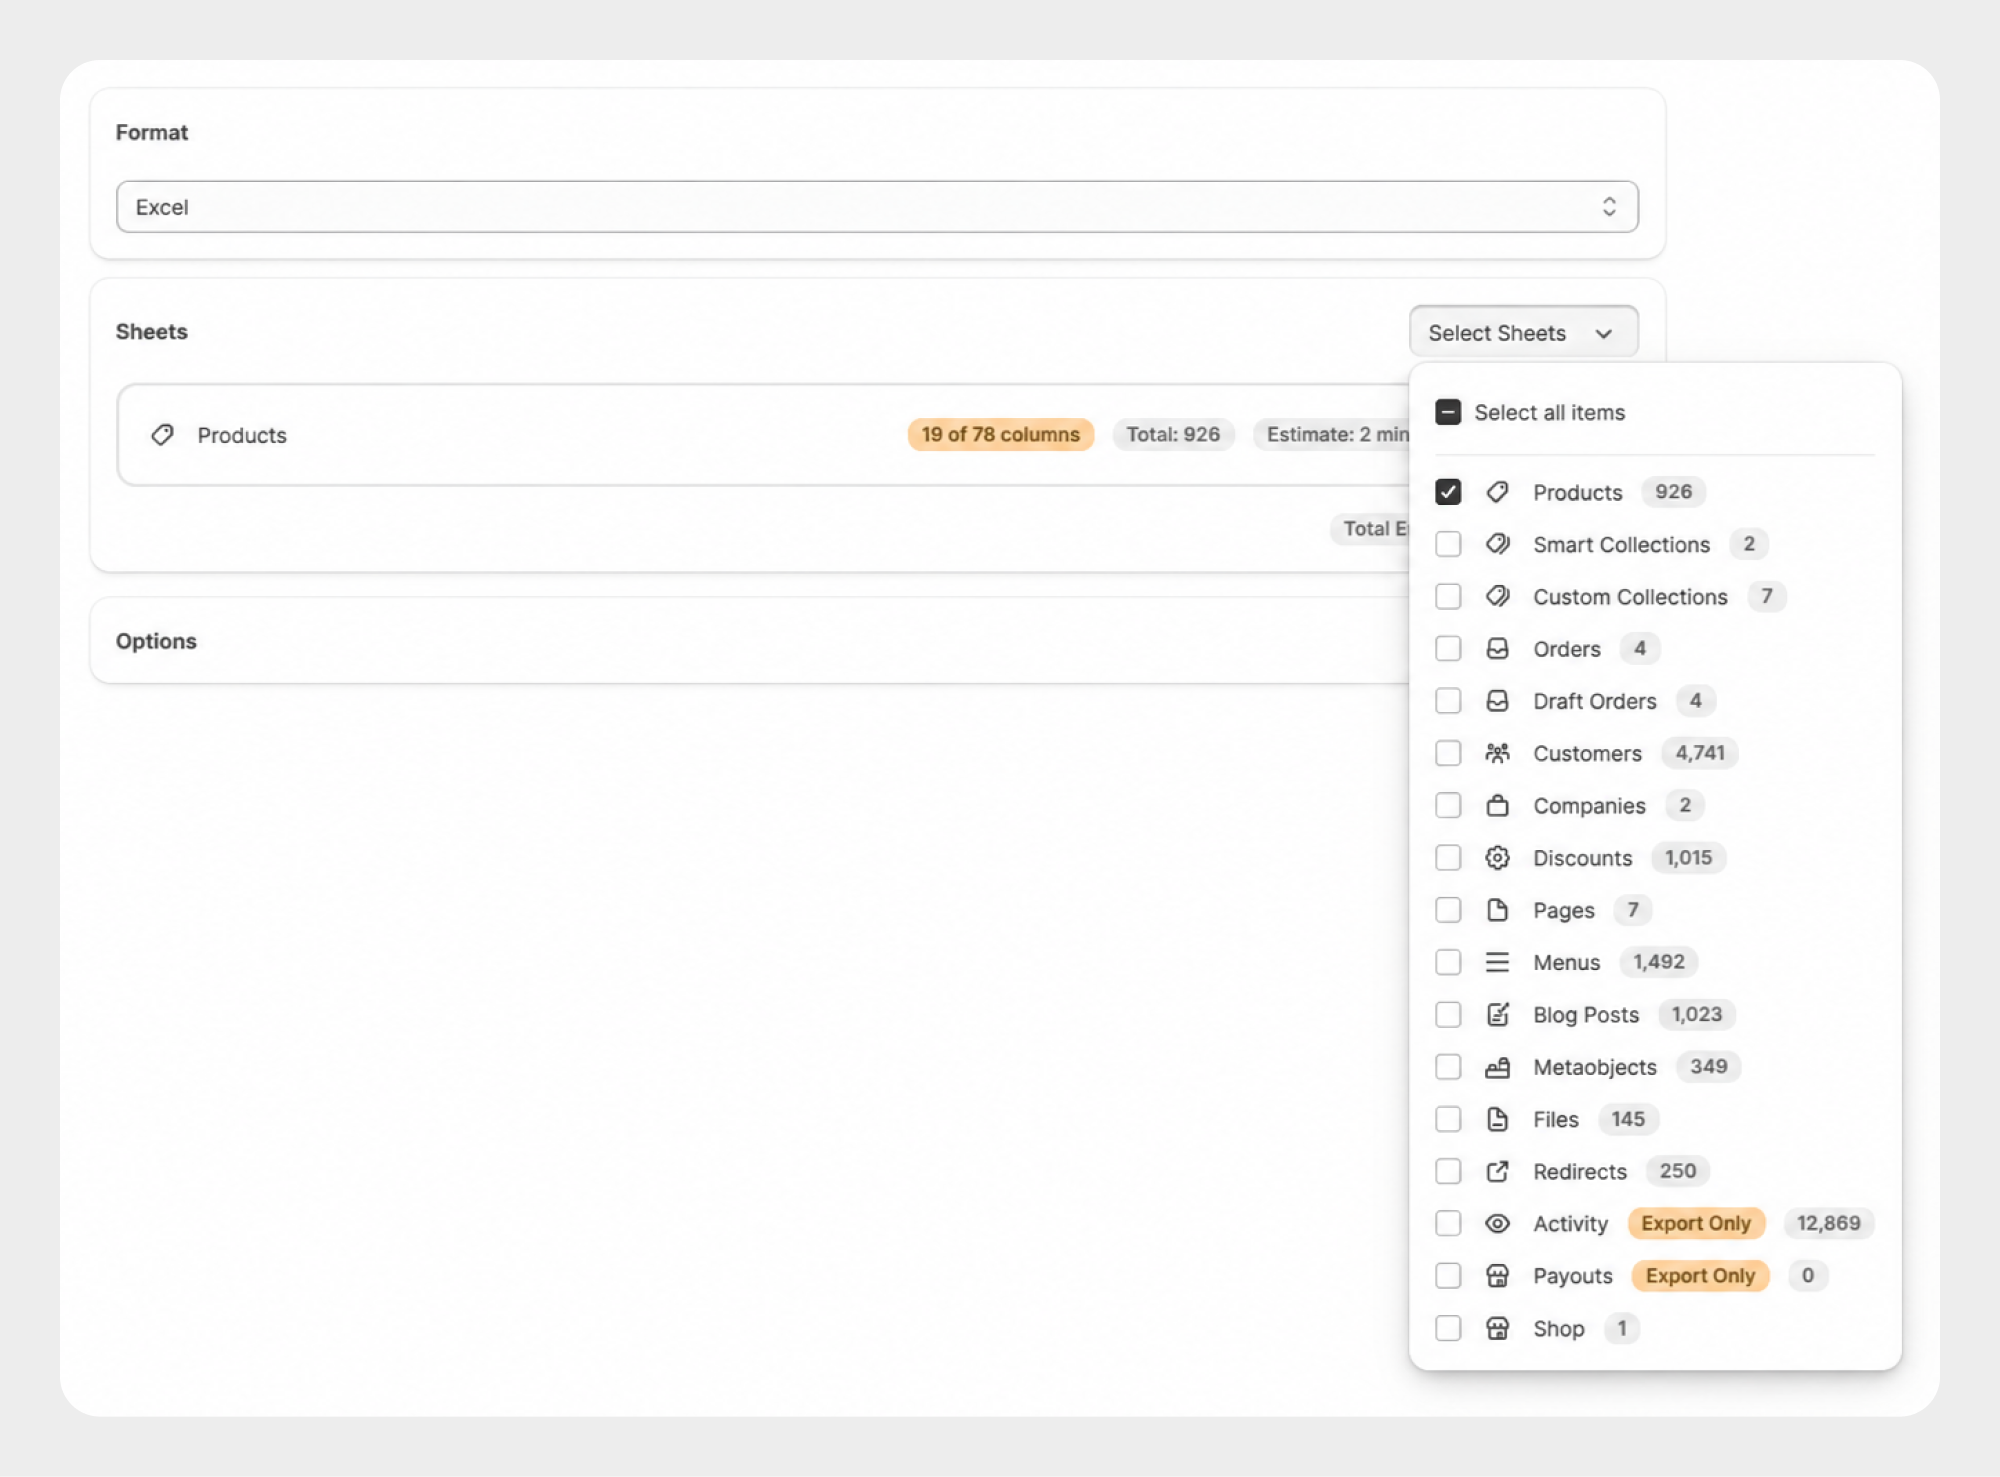
- Select the entity you want to export.
For example, you can select Products, Orders, Customers, Collections, or another supported entity.
Step 2: Configure the export
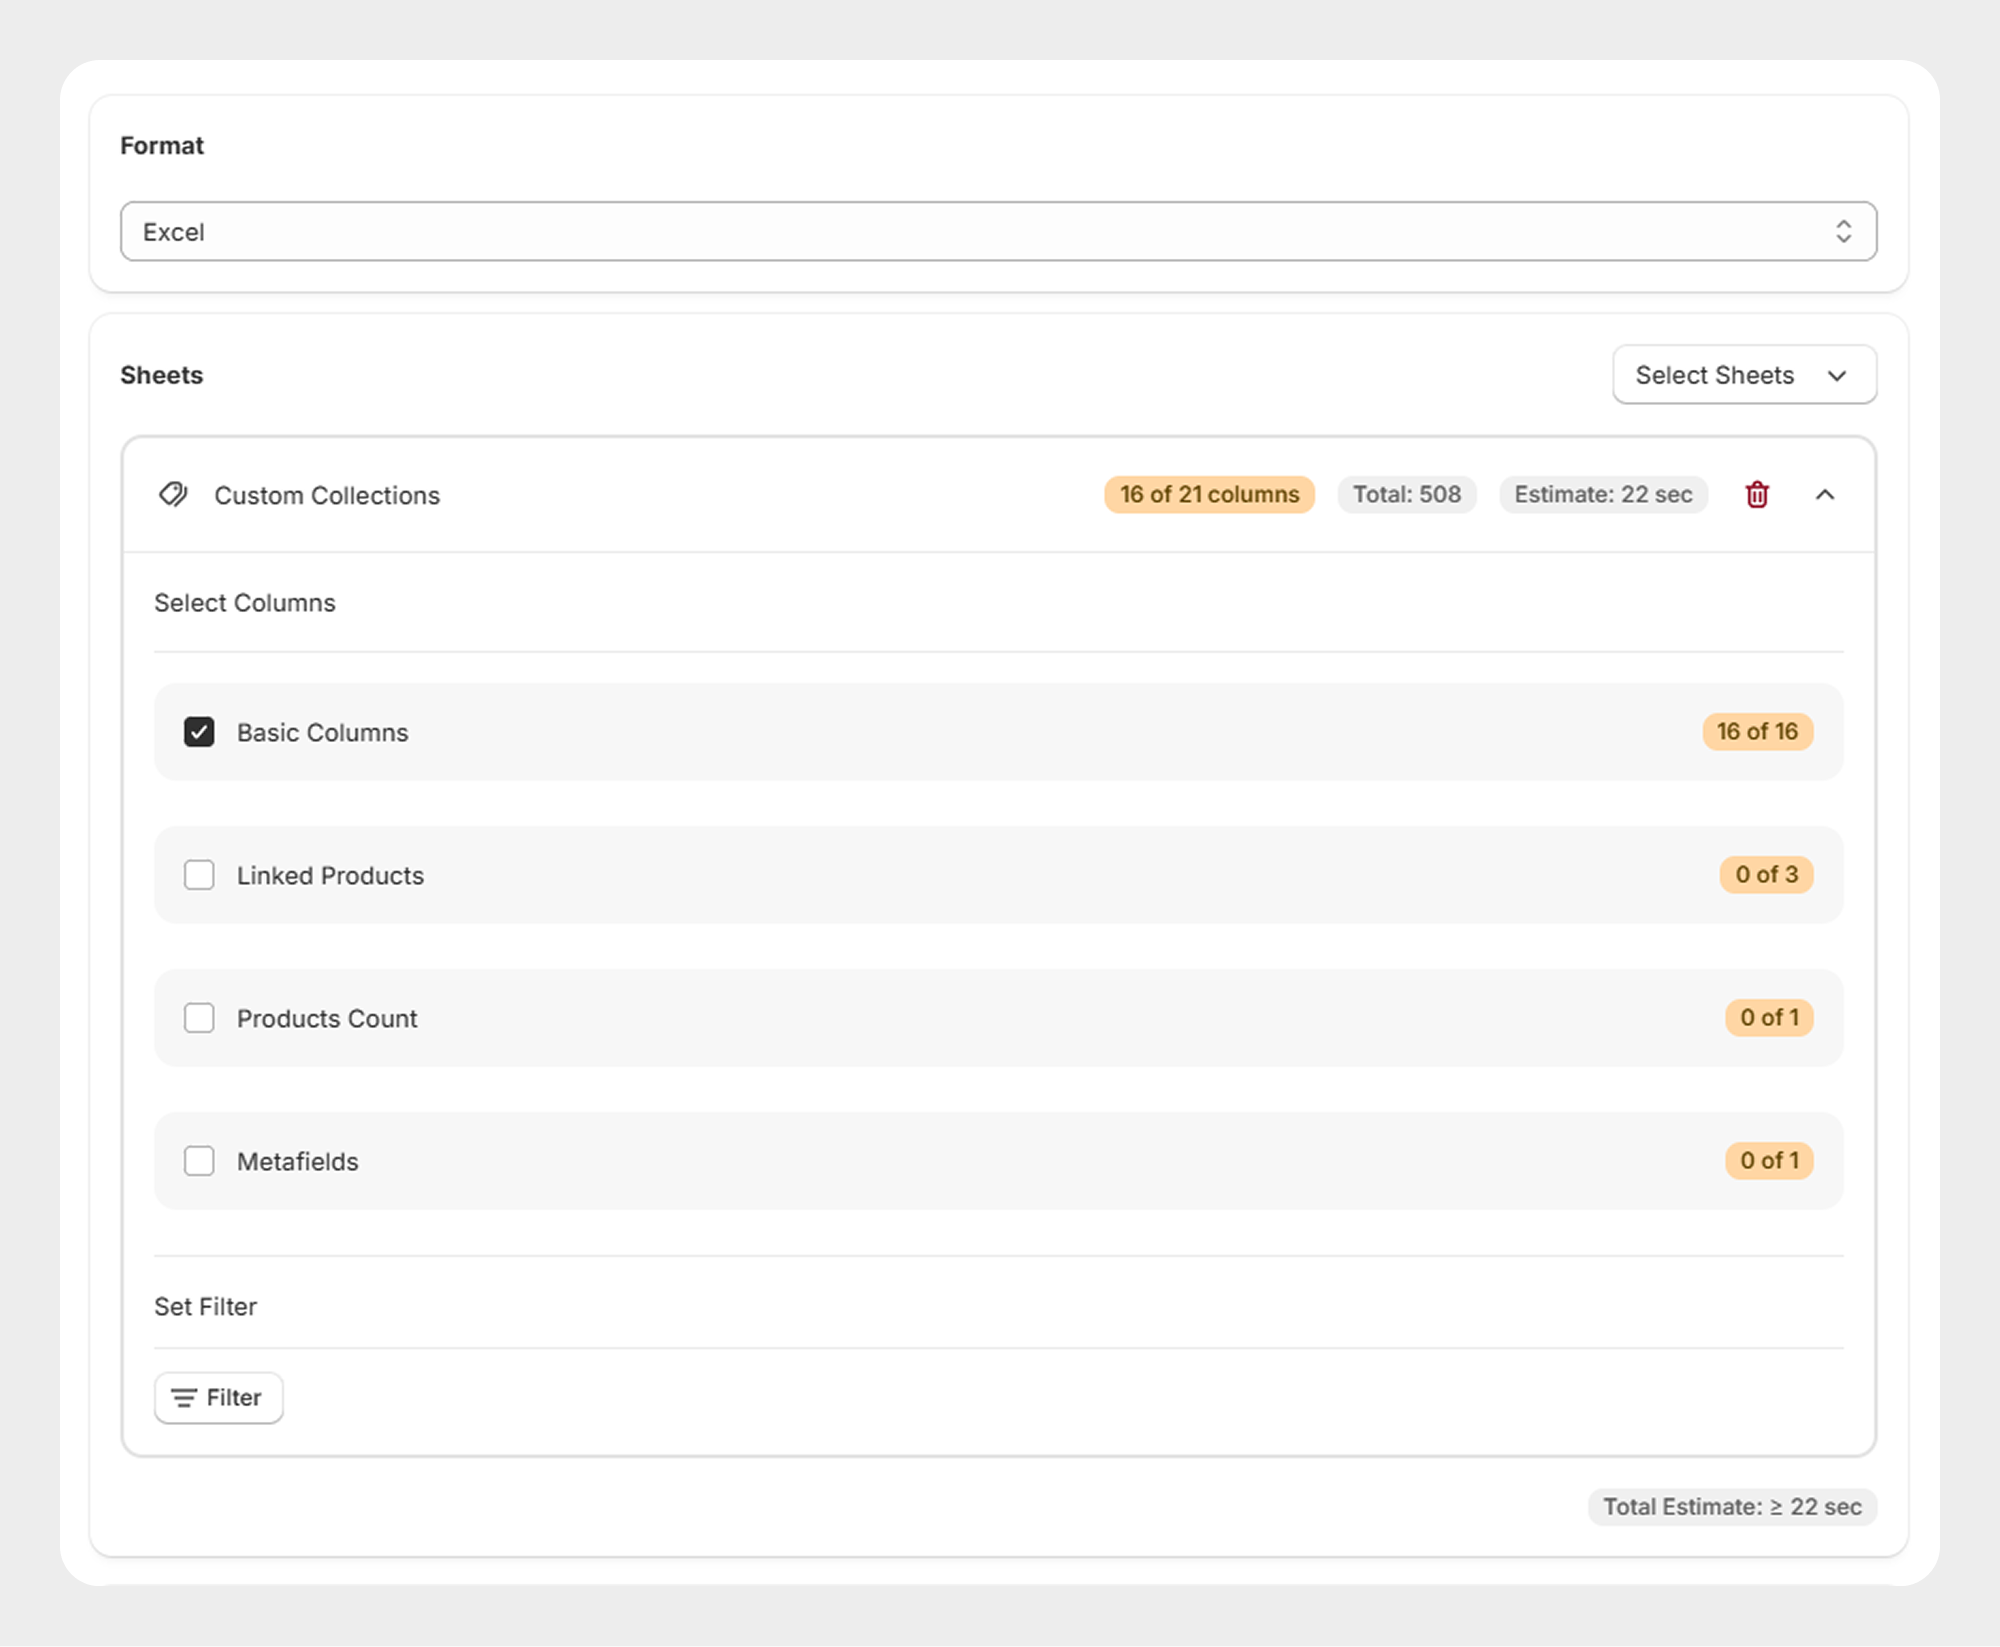
Configure the export according to your requirements.
You can:
-
 Select the required columns.
-
Add filters.
-
Review the selected fields.
-
Configure other available export options.
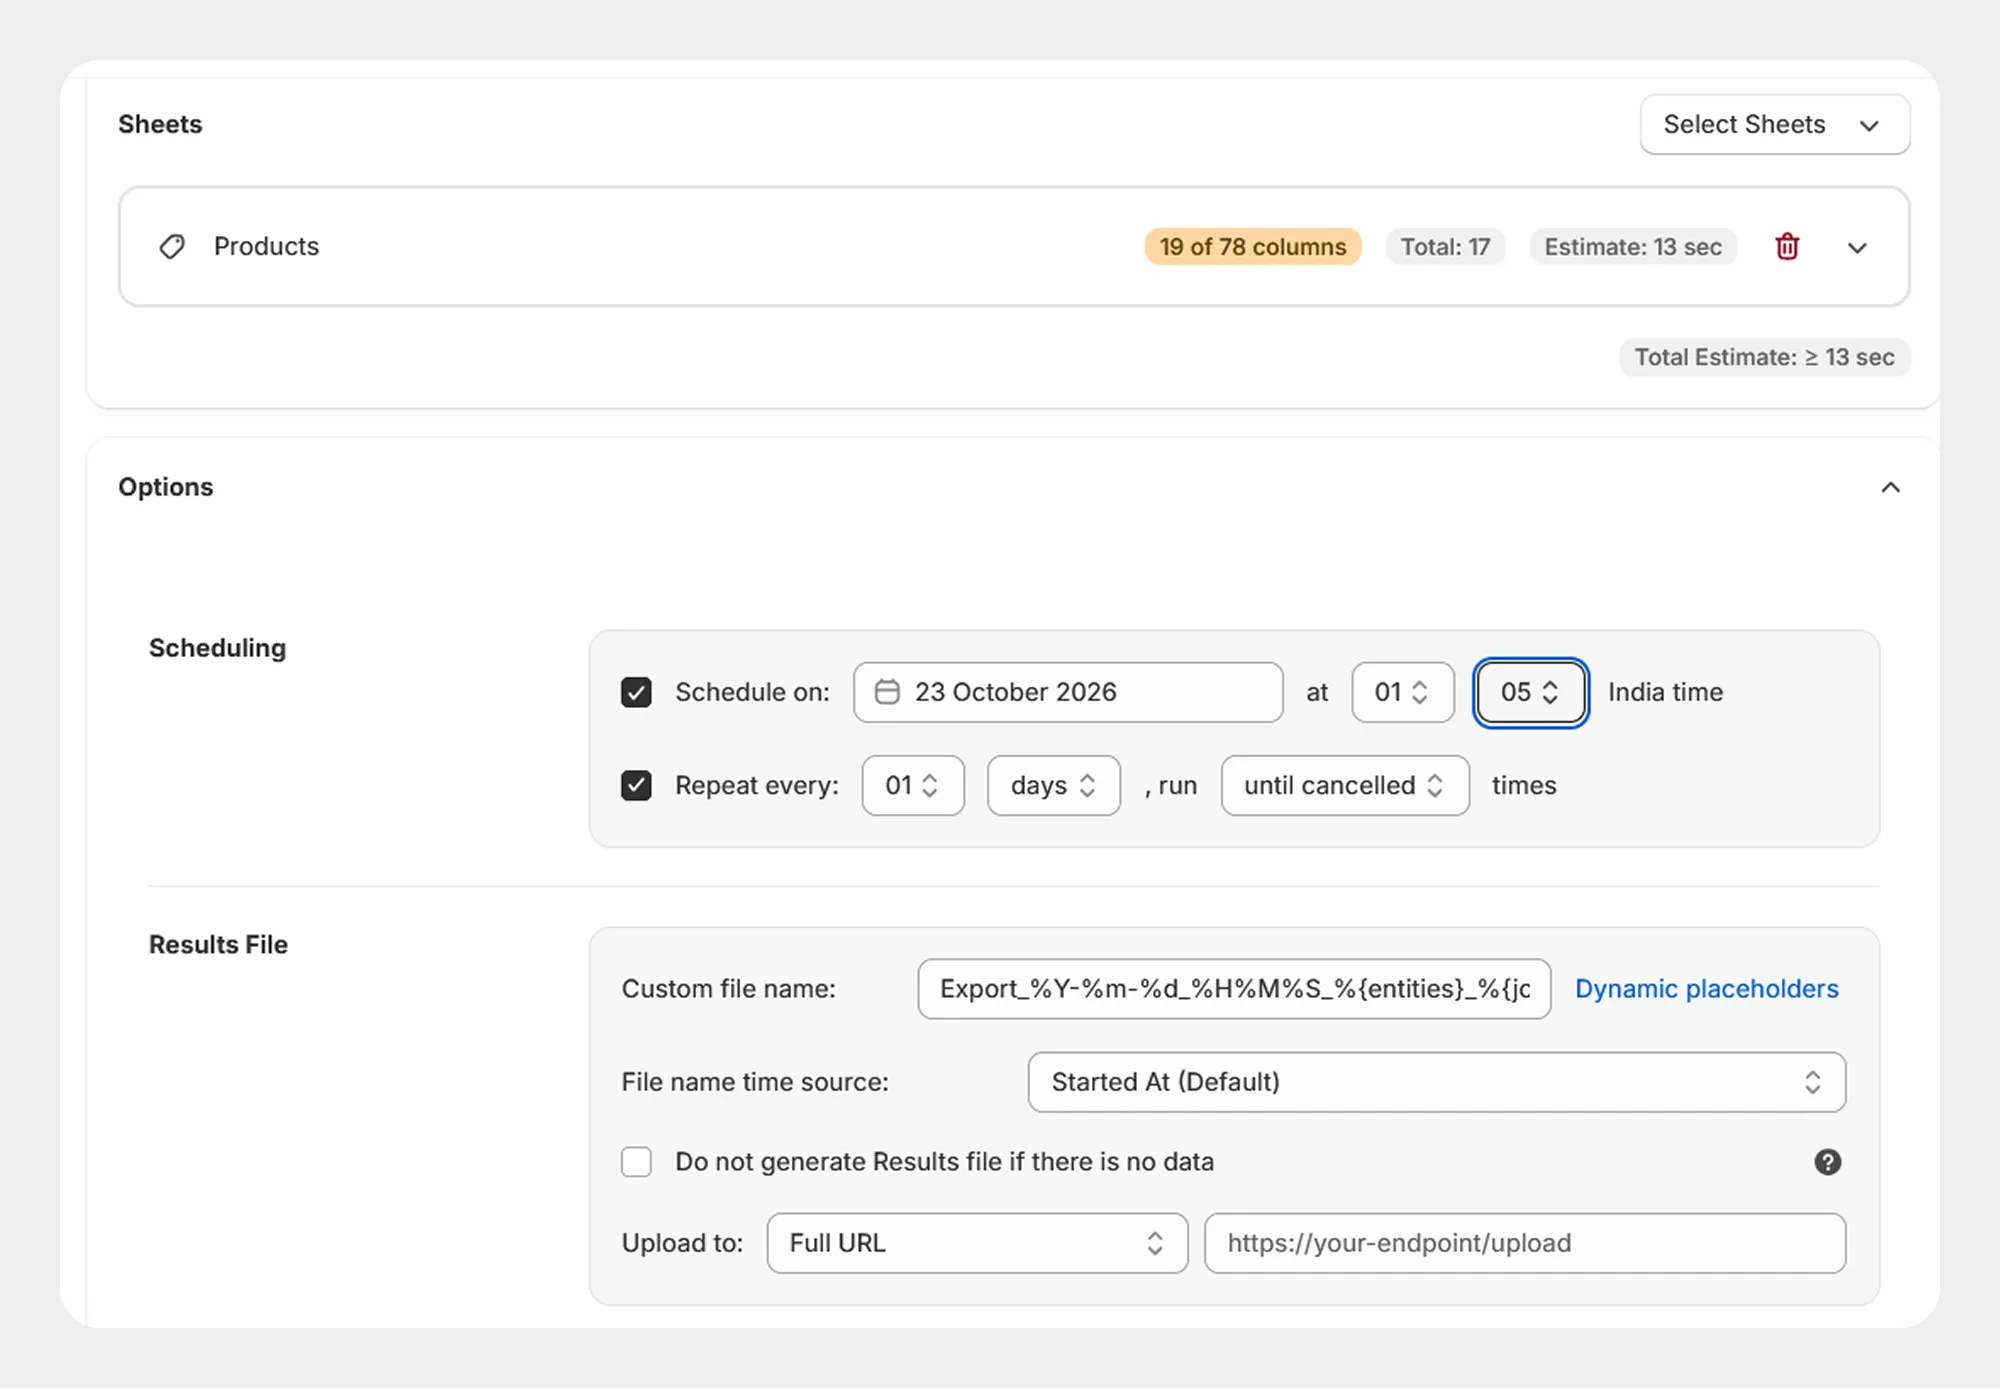
Open the Options section of the export configuration. The Scheduling section allows you to specify when the export should run.
The available scheduling settings shown in Migrato include:
Step 3: Open export options
| Setting | Description | Example |
|---|---|---|
| Schedule on | Specifies the date and time when the export should start. | 2026-09-01 at 10:00 |
| Repeat every | Specifies how frequently the export should run again. | Every 1 day |
| Run | Specifies how many times the recurring export should run or whether it should continue until cancelled. | Until cancelled |
| Time Zone | Displays the time zone used for the scheduled operation. | India time |
Step 4: Configure the schedule
Enable Schedule on and select the required:
-
Date
-
Hour
-
Minute
# One-time run
Schedule on:  September 1, 2026 at 10:00 AM

# Recurring run
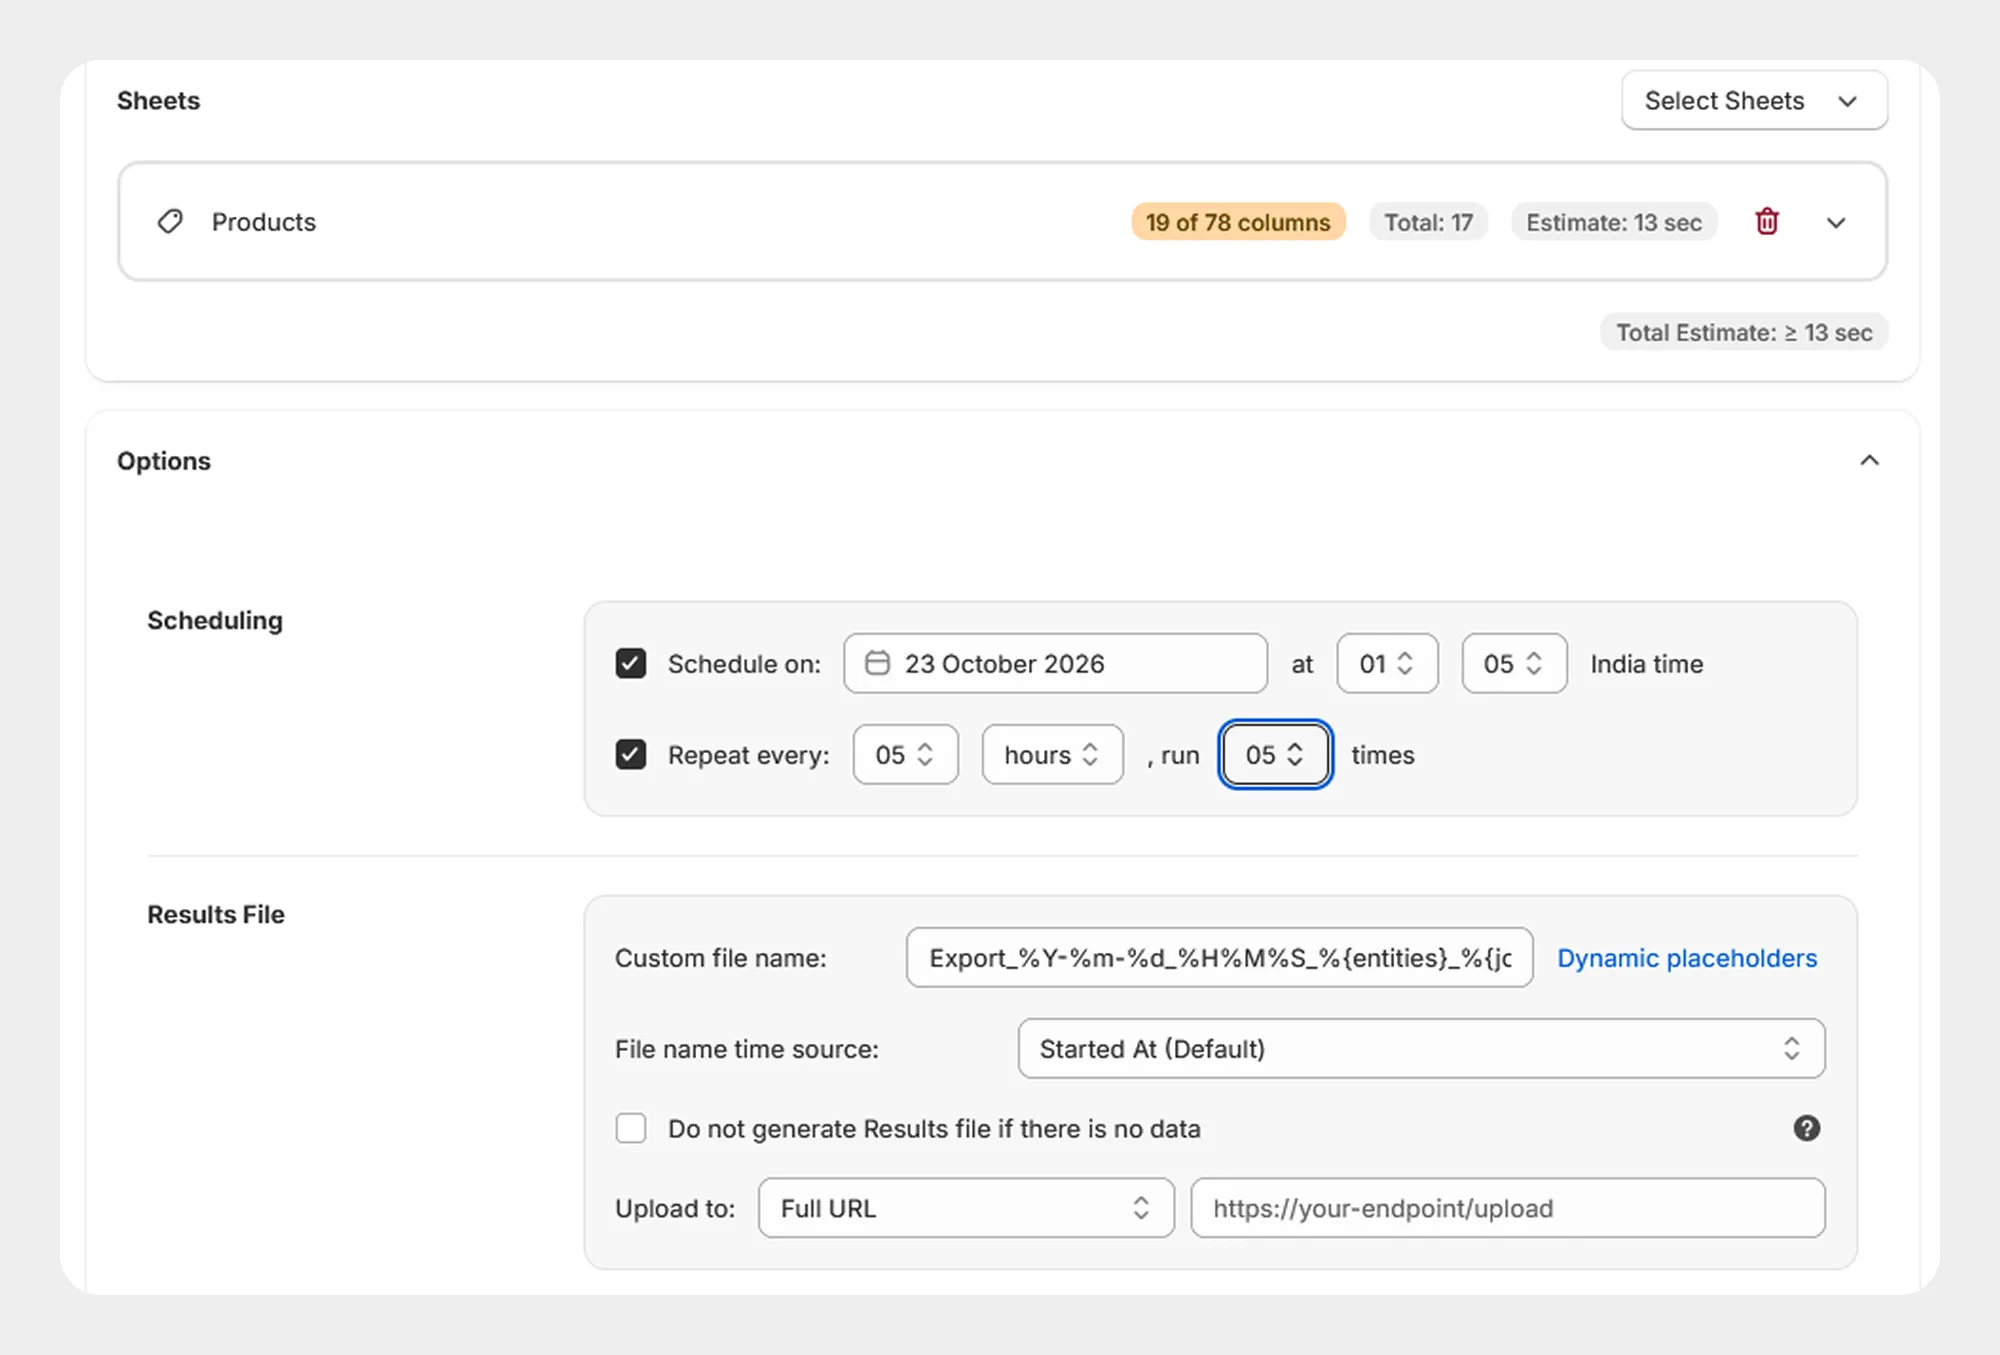
Repeat every: 1 day, run until cancelled
This allows the same export configuration to run automatically according to the selected schedule.
Step 5: Configure export result file
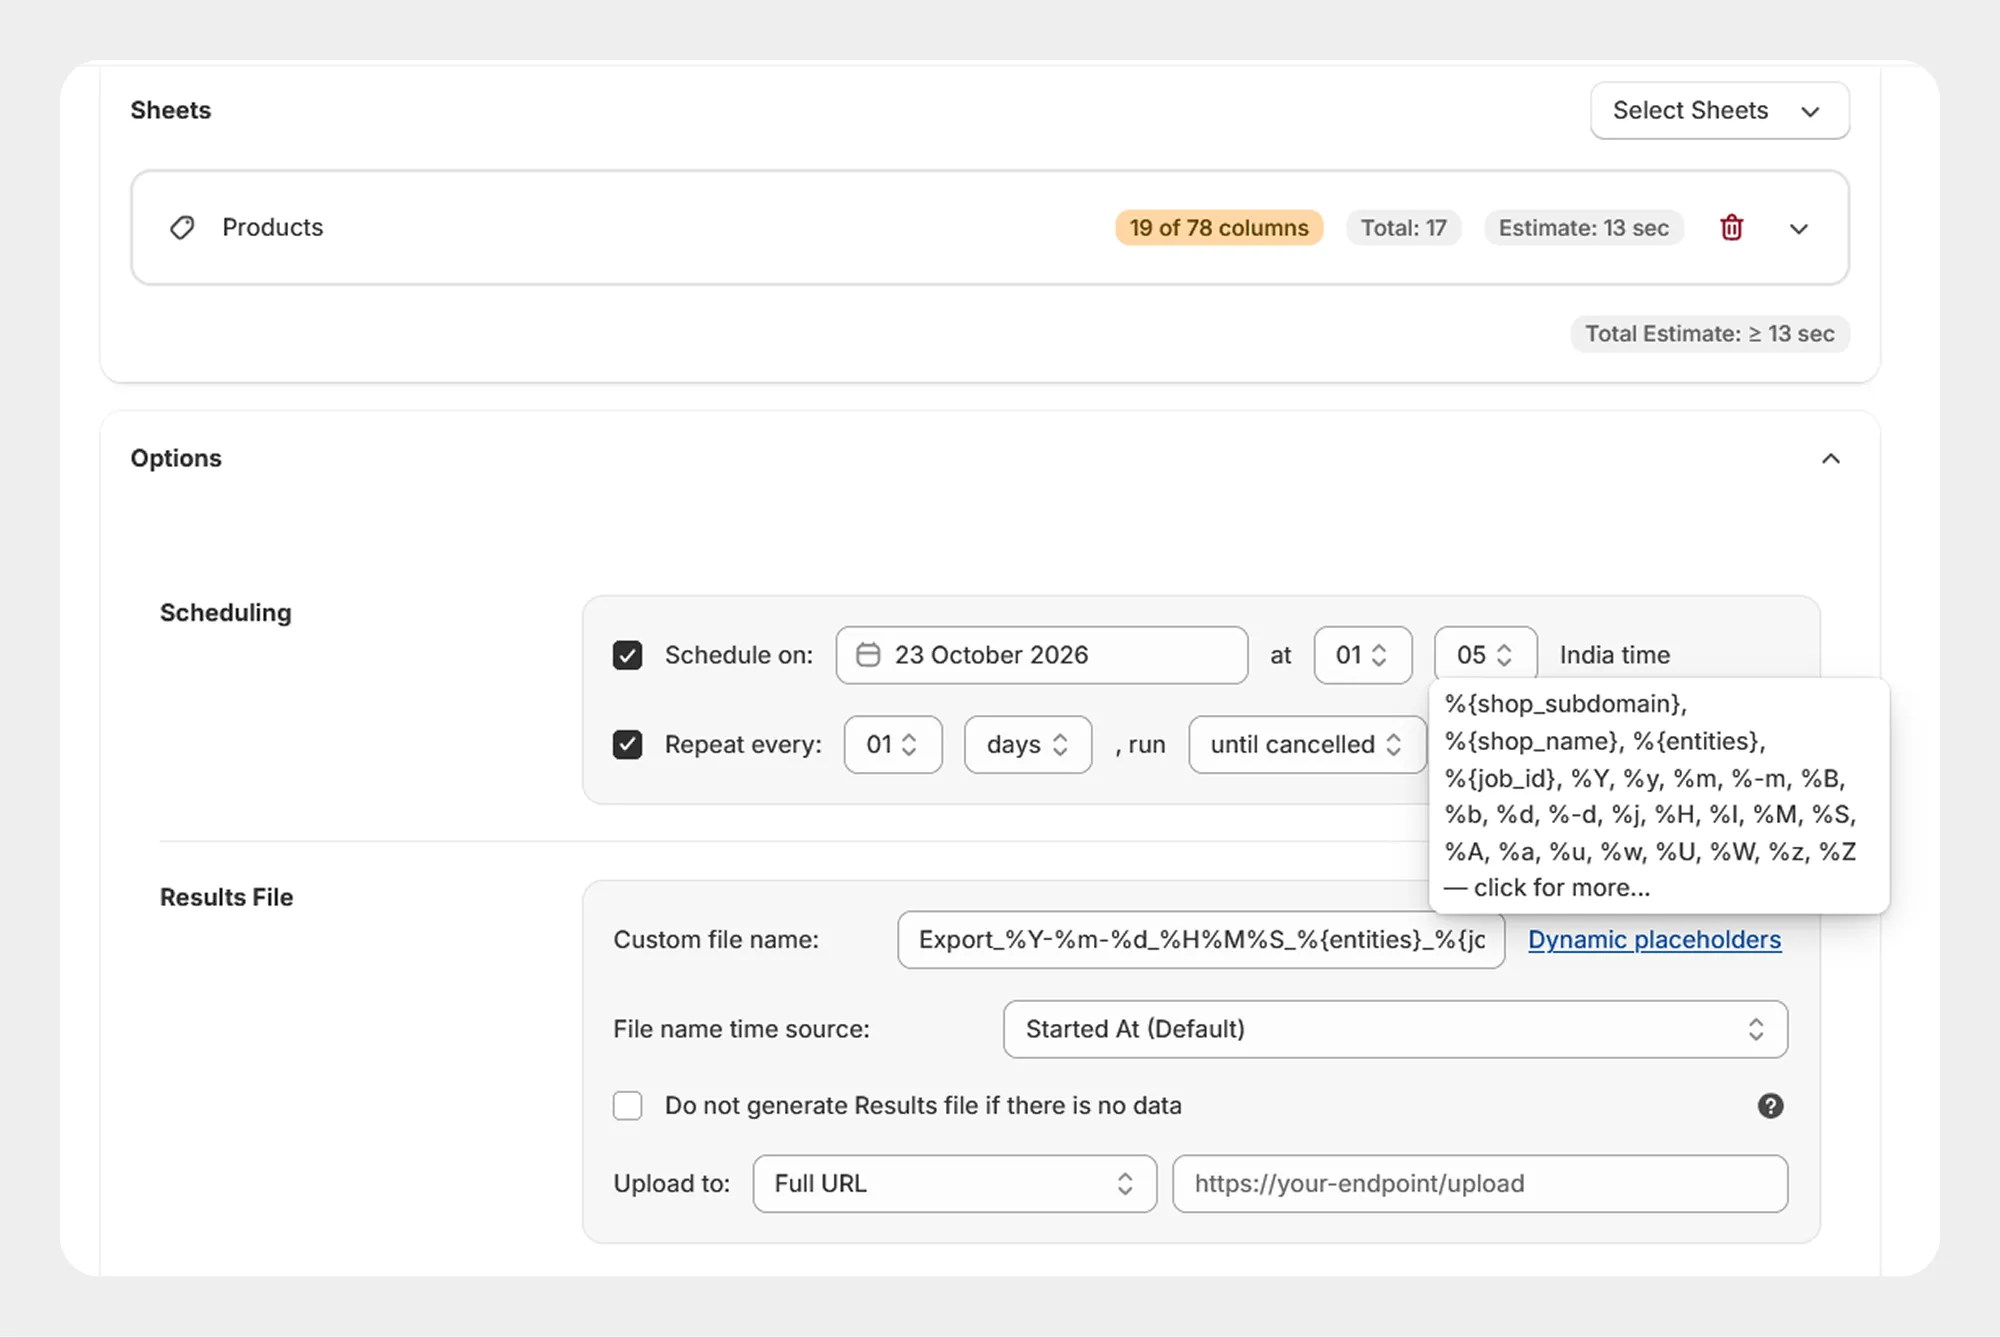
Migrato also provides result-file settings for scheduled exports.
Depending on the available configuration, you can specify:
Step 6: Review the scheduled export
Before scheduling the job, review:
-
Selected entity
-
Selected columns
-
Applied filters
-
Schedule date
-
Schedule time
-
Repeat interval
-
Number of repetitions or cancellation setting
-
Result-file settings
-
Upload destination, if configured
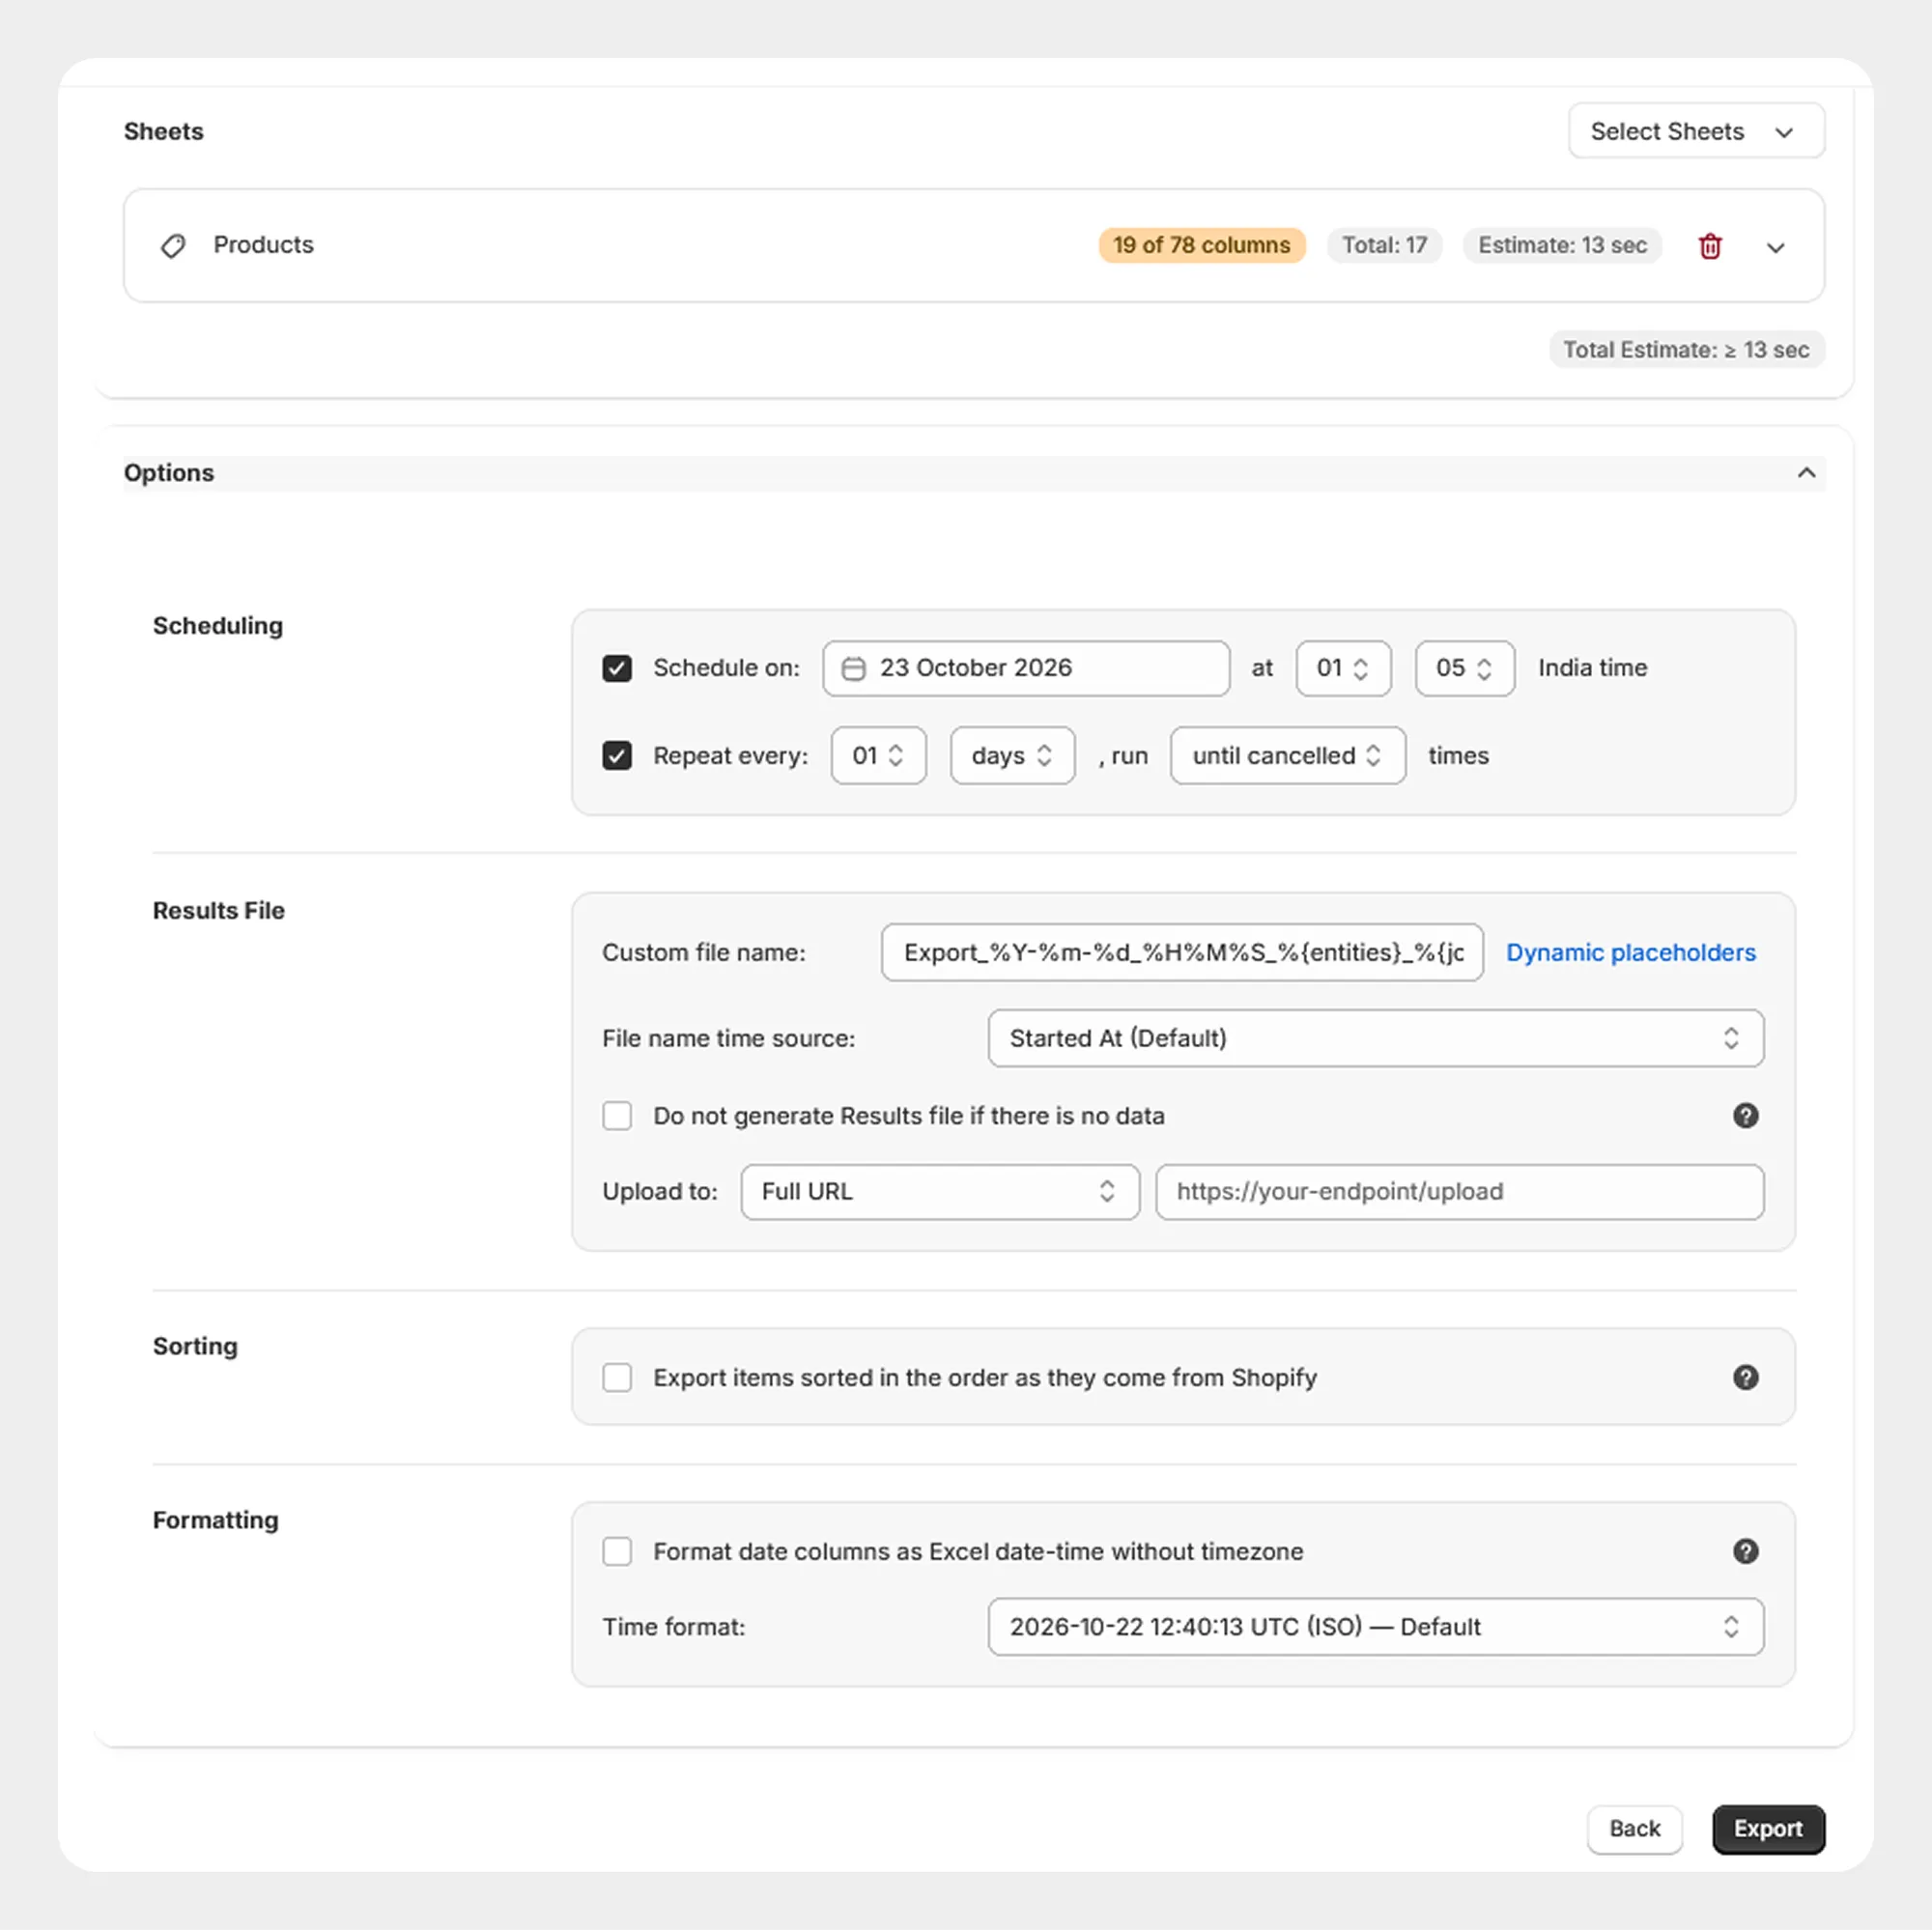
After reviewing the configuration, schedule the export using the available scheduling action.
Migrato saves the configured export as a scheduled job.
Step 7: Schedule the export
Scheduling an import
Migrato also allows import jobs to be scheduled for a future date and time or repeated automatically.
This can be useful when data is received regularly from an external source and needs to be imported into Shopify according to a predefined schedule.
Step 1: Open Import
From your Shopify Admin:
- Go to Apps → Migrato.
- Open the Import section.
- Add the file you want to import.
- Select the required entity.
Migrato supports the configured import file options for the selected entity.
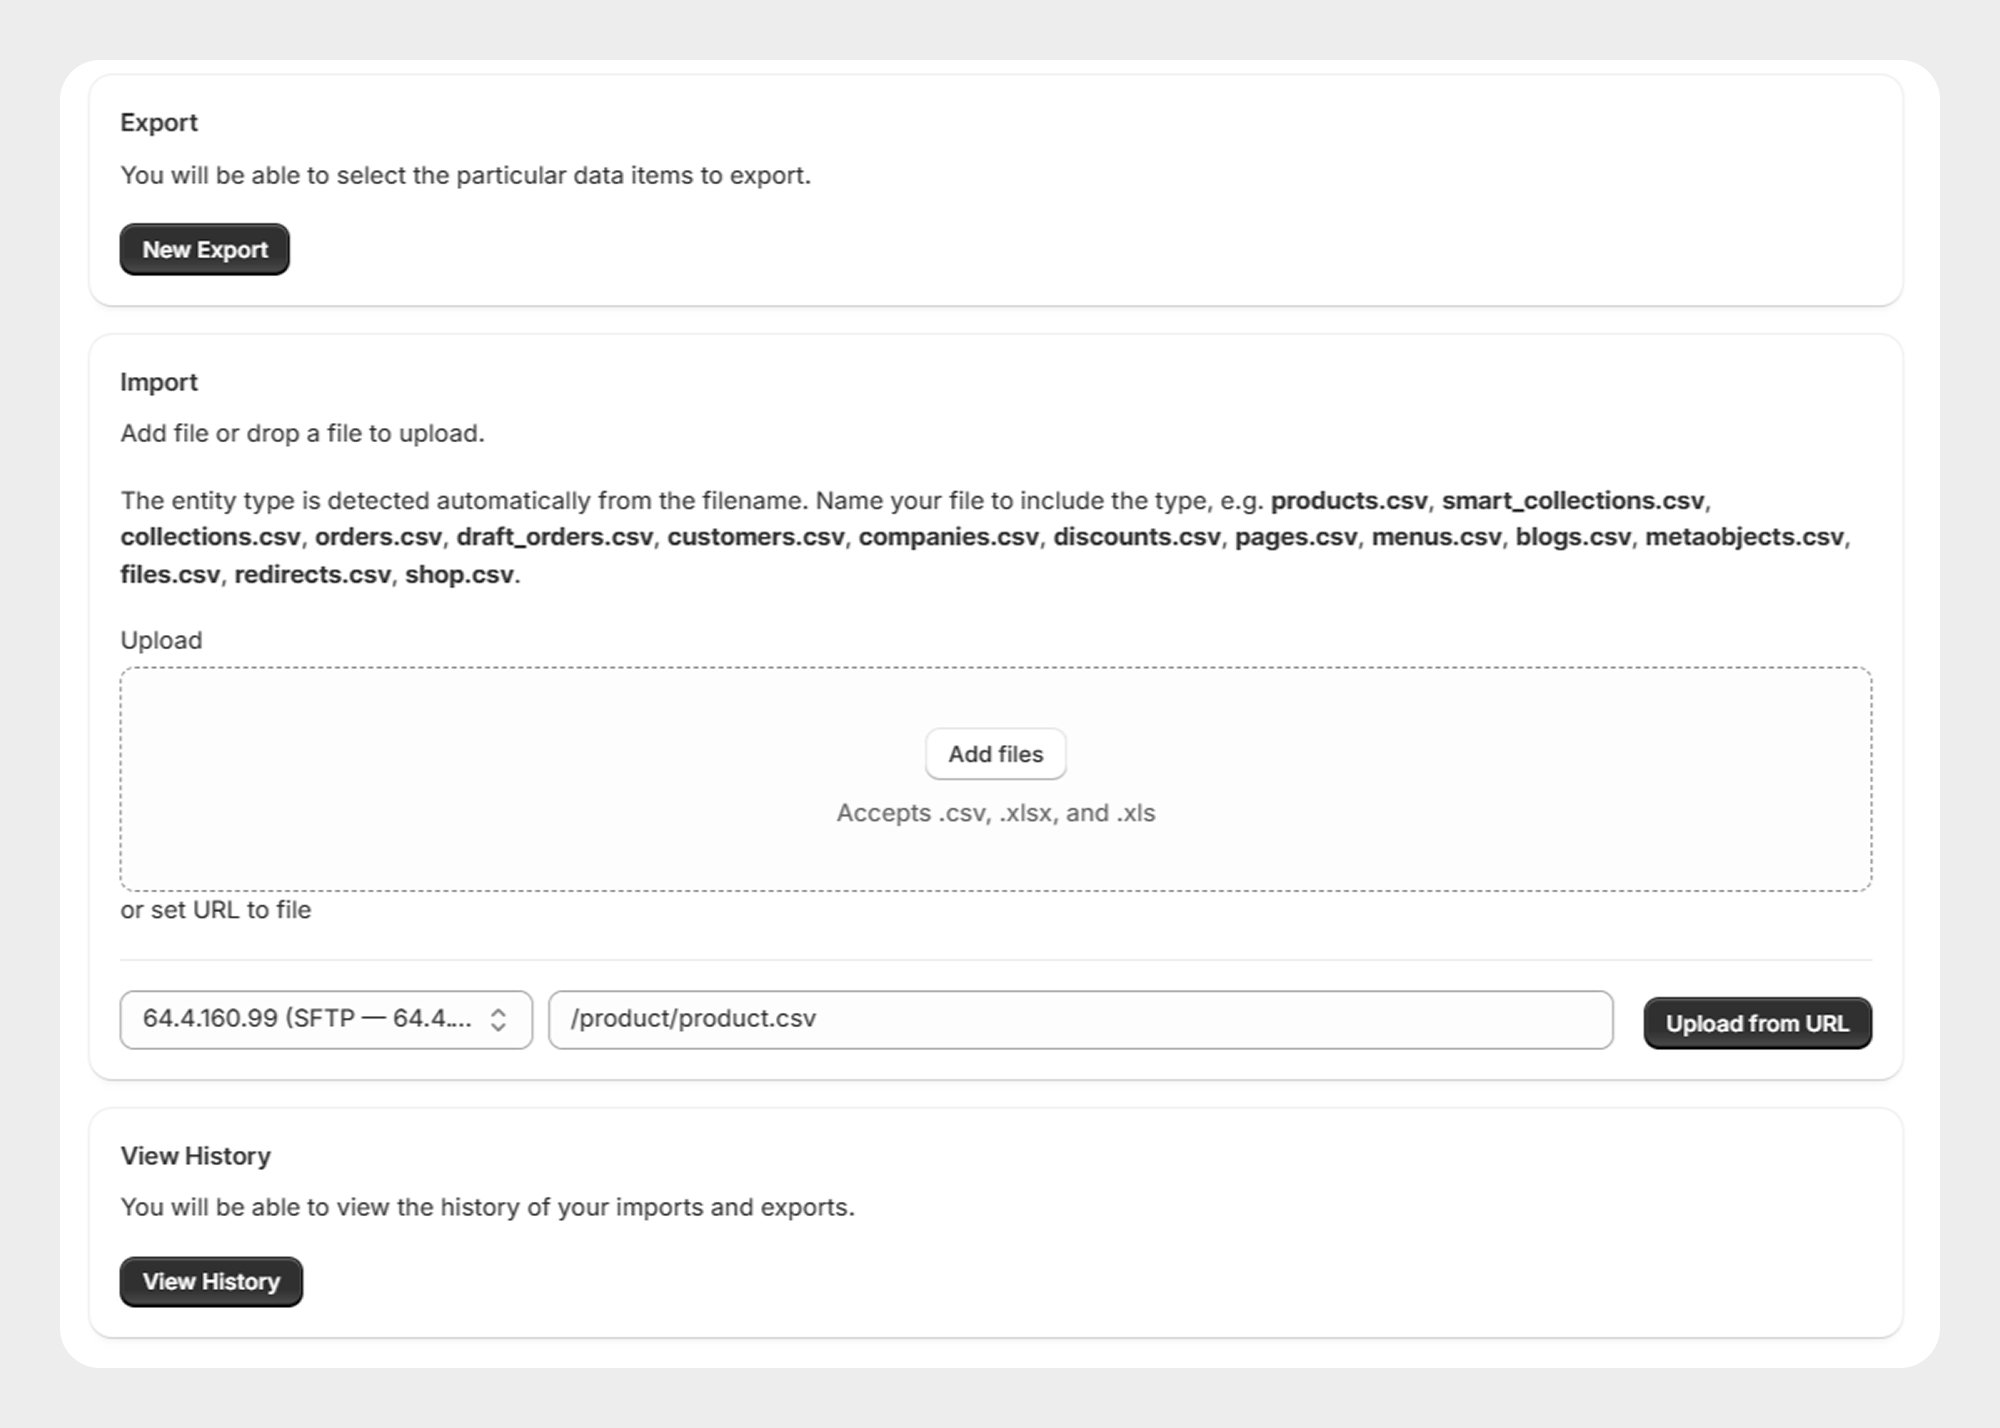
Step 2: Upload or provide the import file
Provide the file that contains the data to be imported.
Depending on the Migrato import configuration, you can upload the supported file directly or provide a supported file location. For example:
-
CSV
-
XLSX
-
Supported file URL
Review the file before scheduling the import.
Step 3: Select the import operation
Select the operation that should be performed when the scheduled import runs. Depending on the entity and Migrato configuration, supported operations may include:
The selected operation is stored with the scheduled import and is used when the job runs.
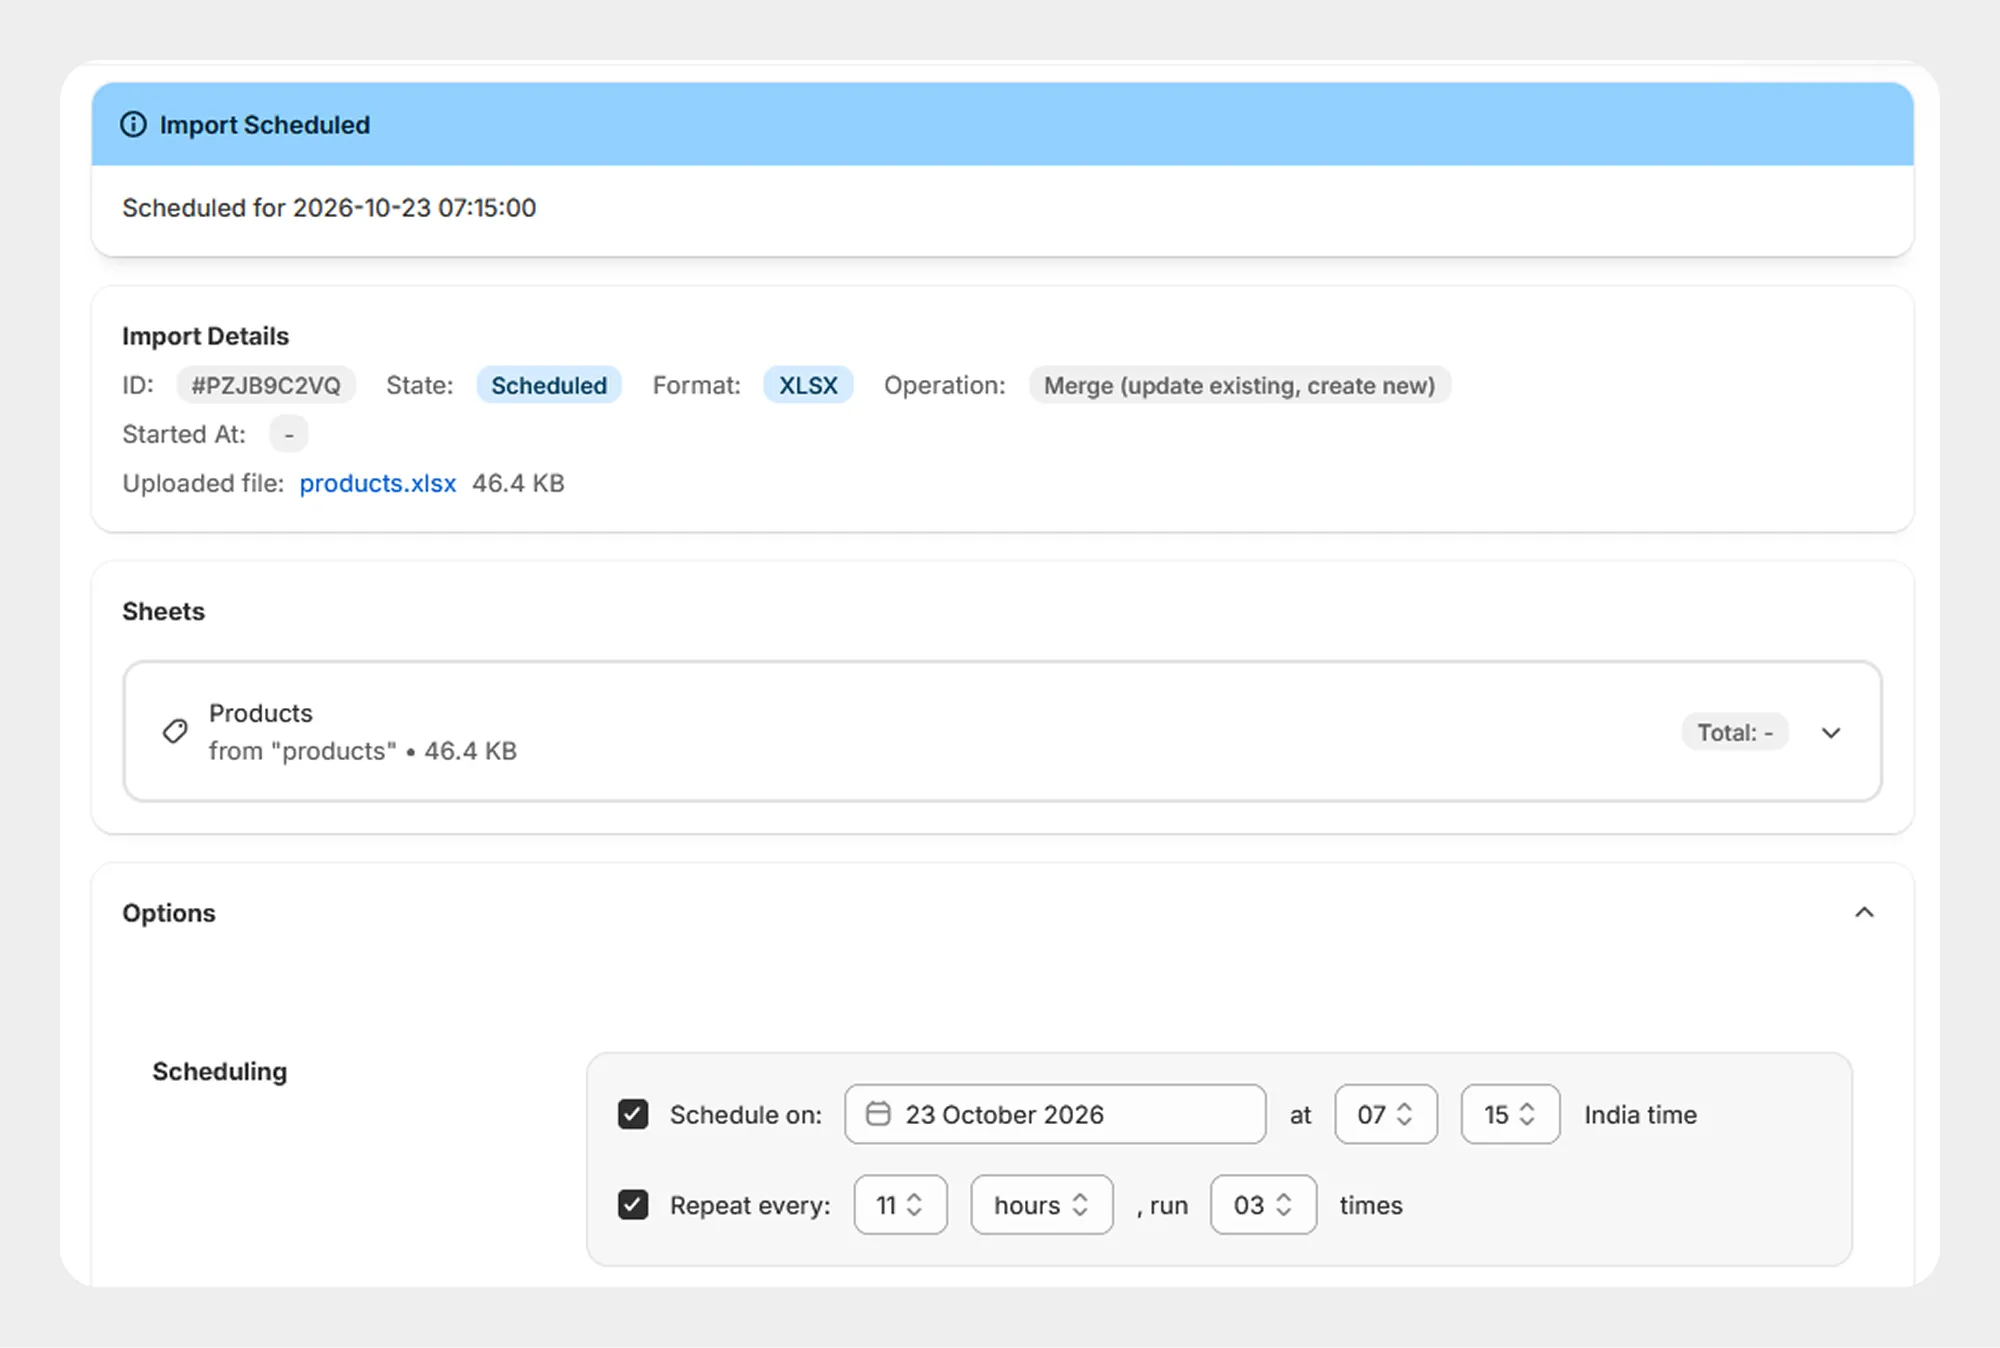
Open the Options section.The scheduling controls allow you to specify when the import should run and whether it should repeat.
The scheduling fields include:
Step 4: Configure import options
| Schedule on | Specifies the date and time when the export should start. | 2026-09-01 at 10:00 |
|---|---|---|
| Repeat every | Specifies how frequently the export should run again. | Every 1 day |
| Run | Specifies how many times the recurring export should run or whether it should continue until cancelled. | Until cancelled |
| Time Zone | Displays the time zone used for the scheduled operation. | India time |
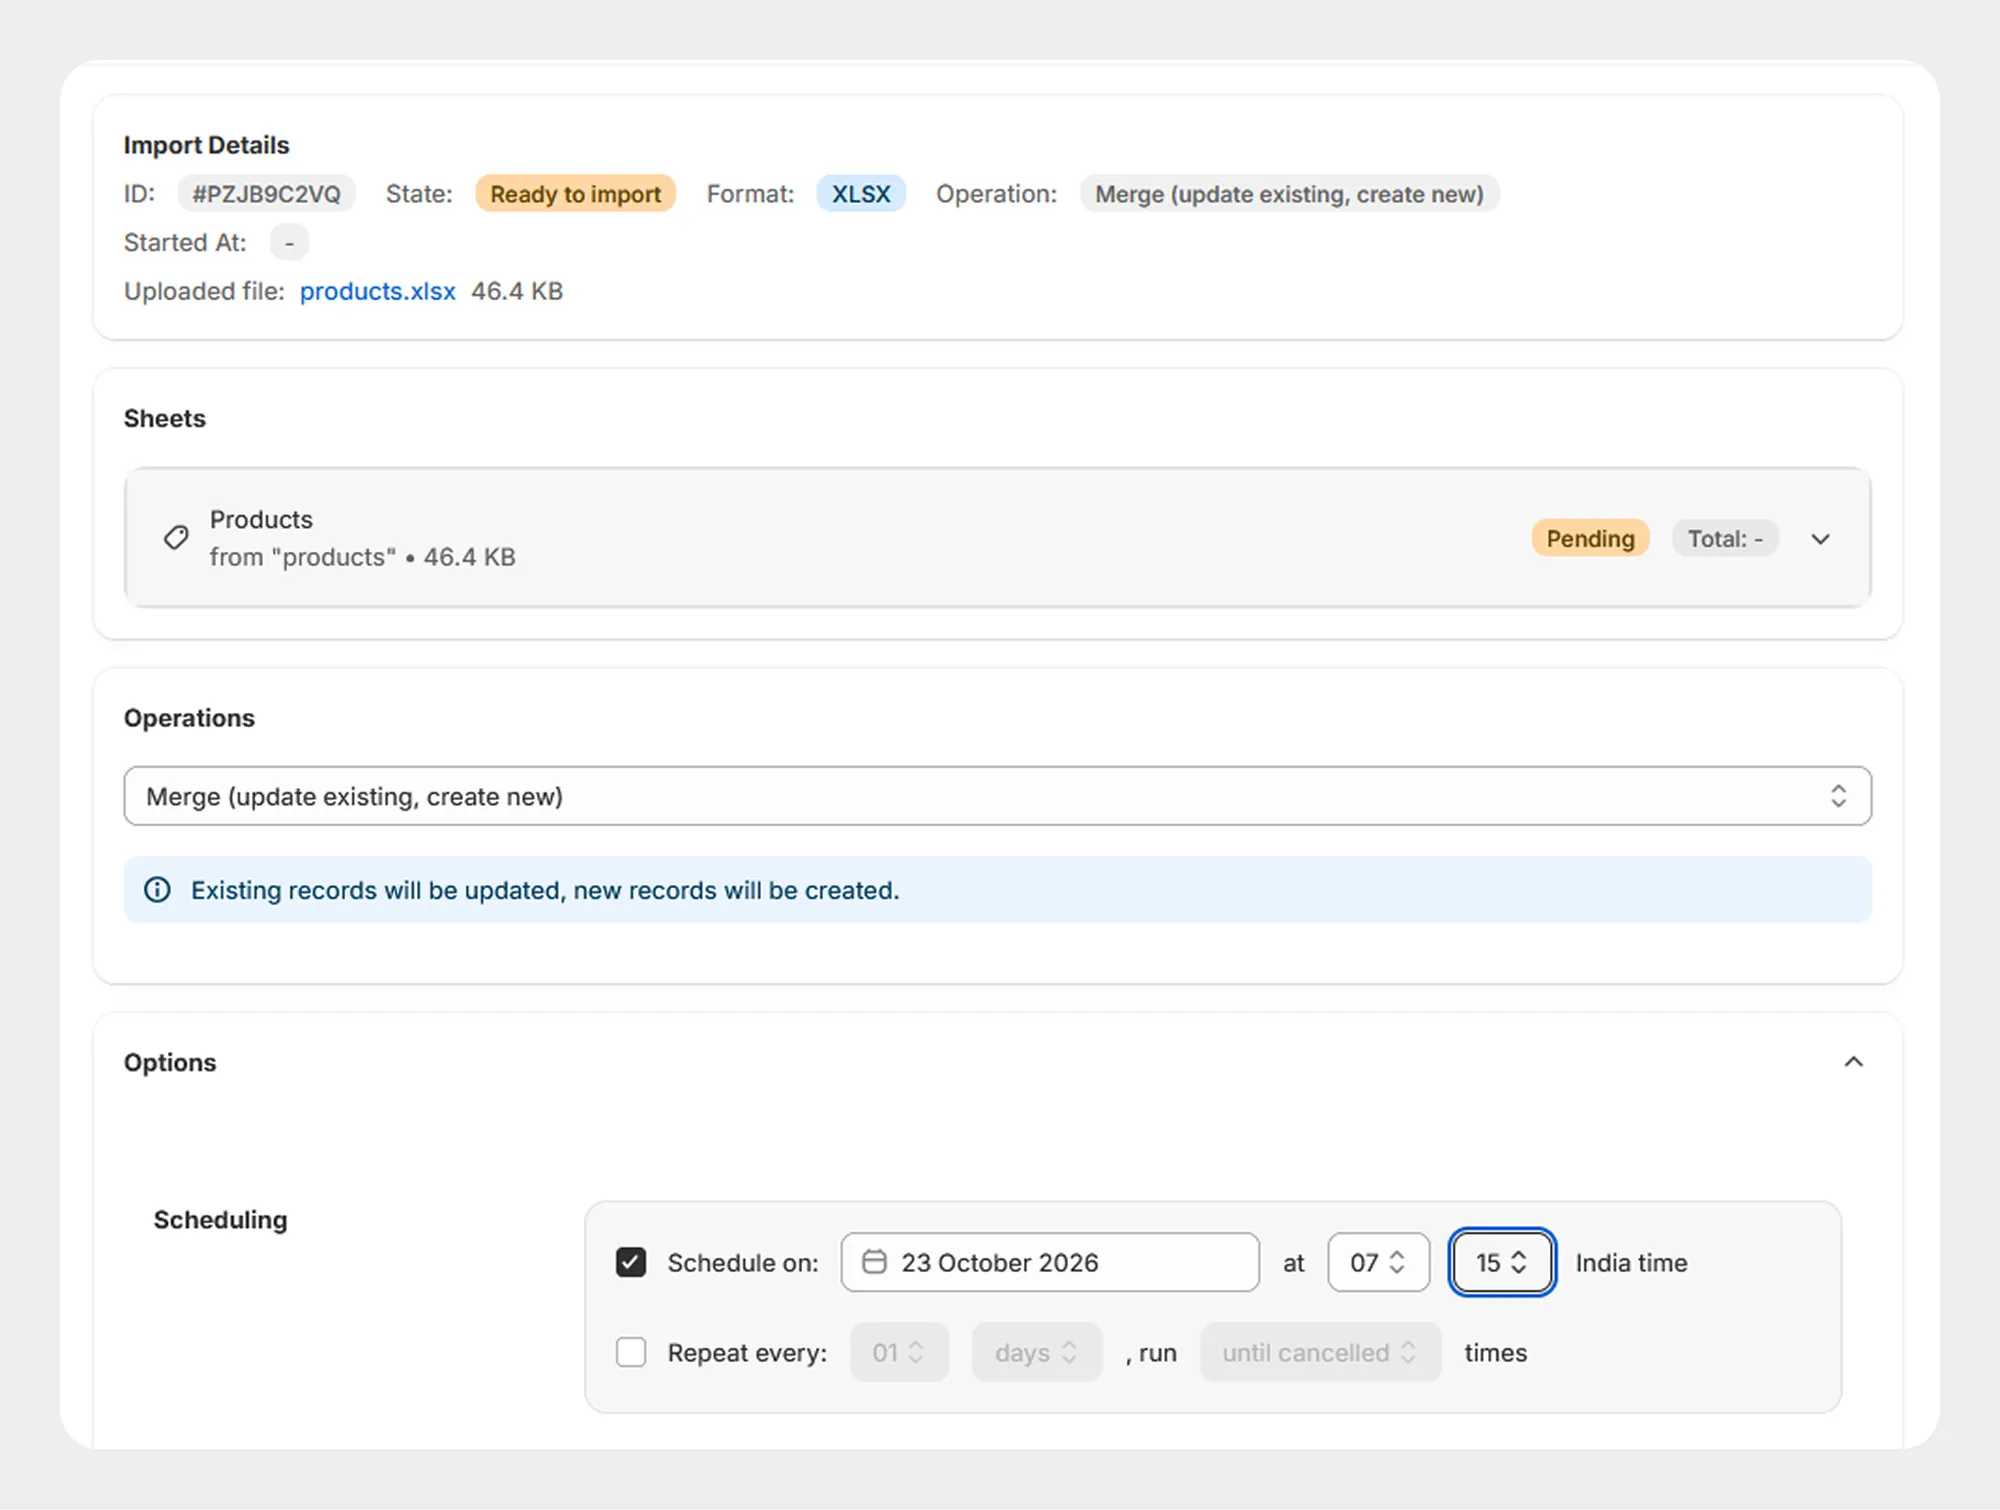
Step 5: Configure import result file
The import options can also include settings for the result file generated after processing the import.
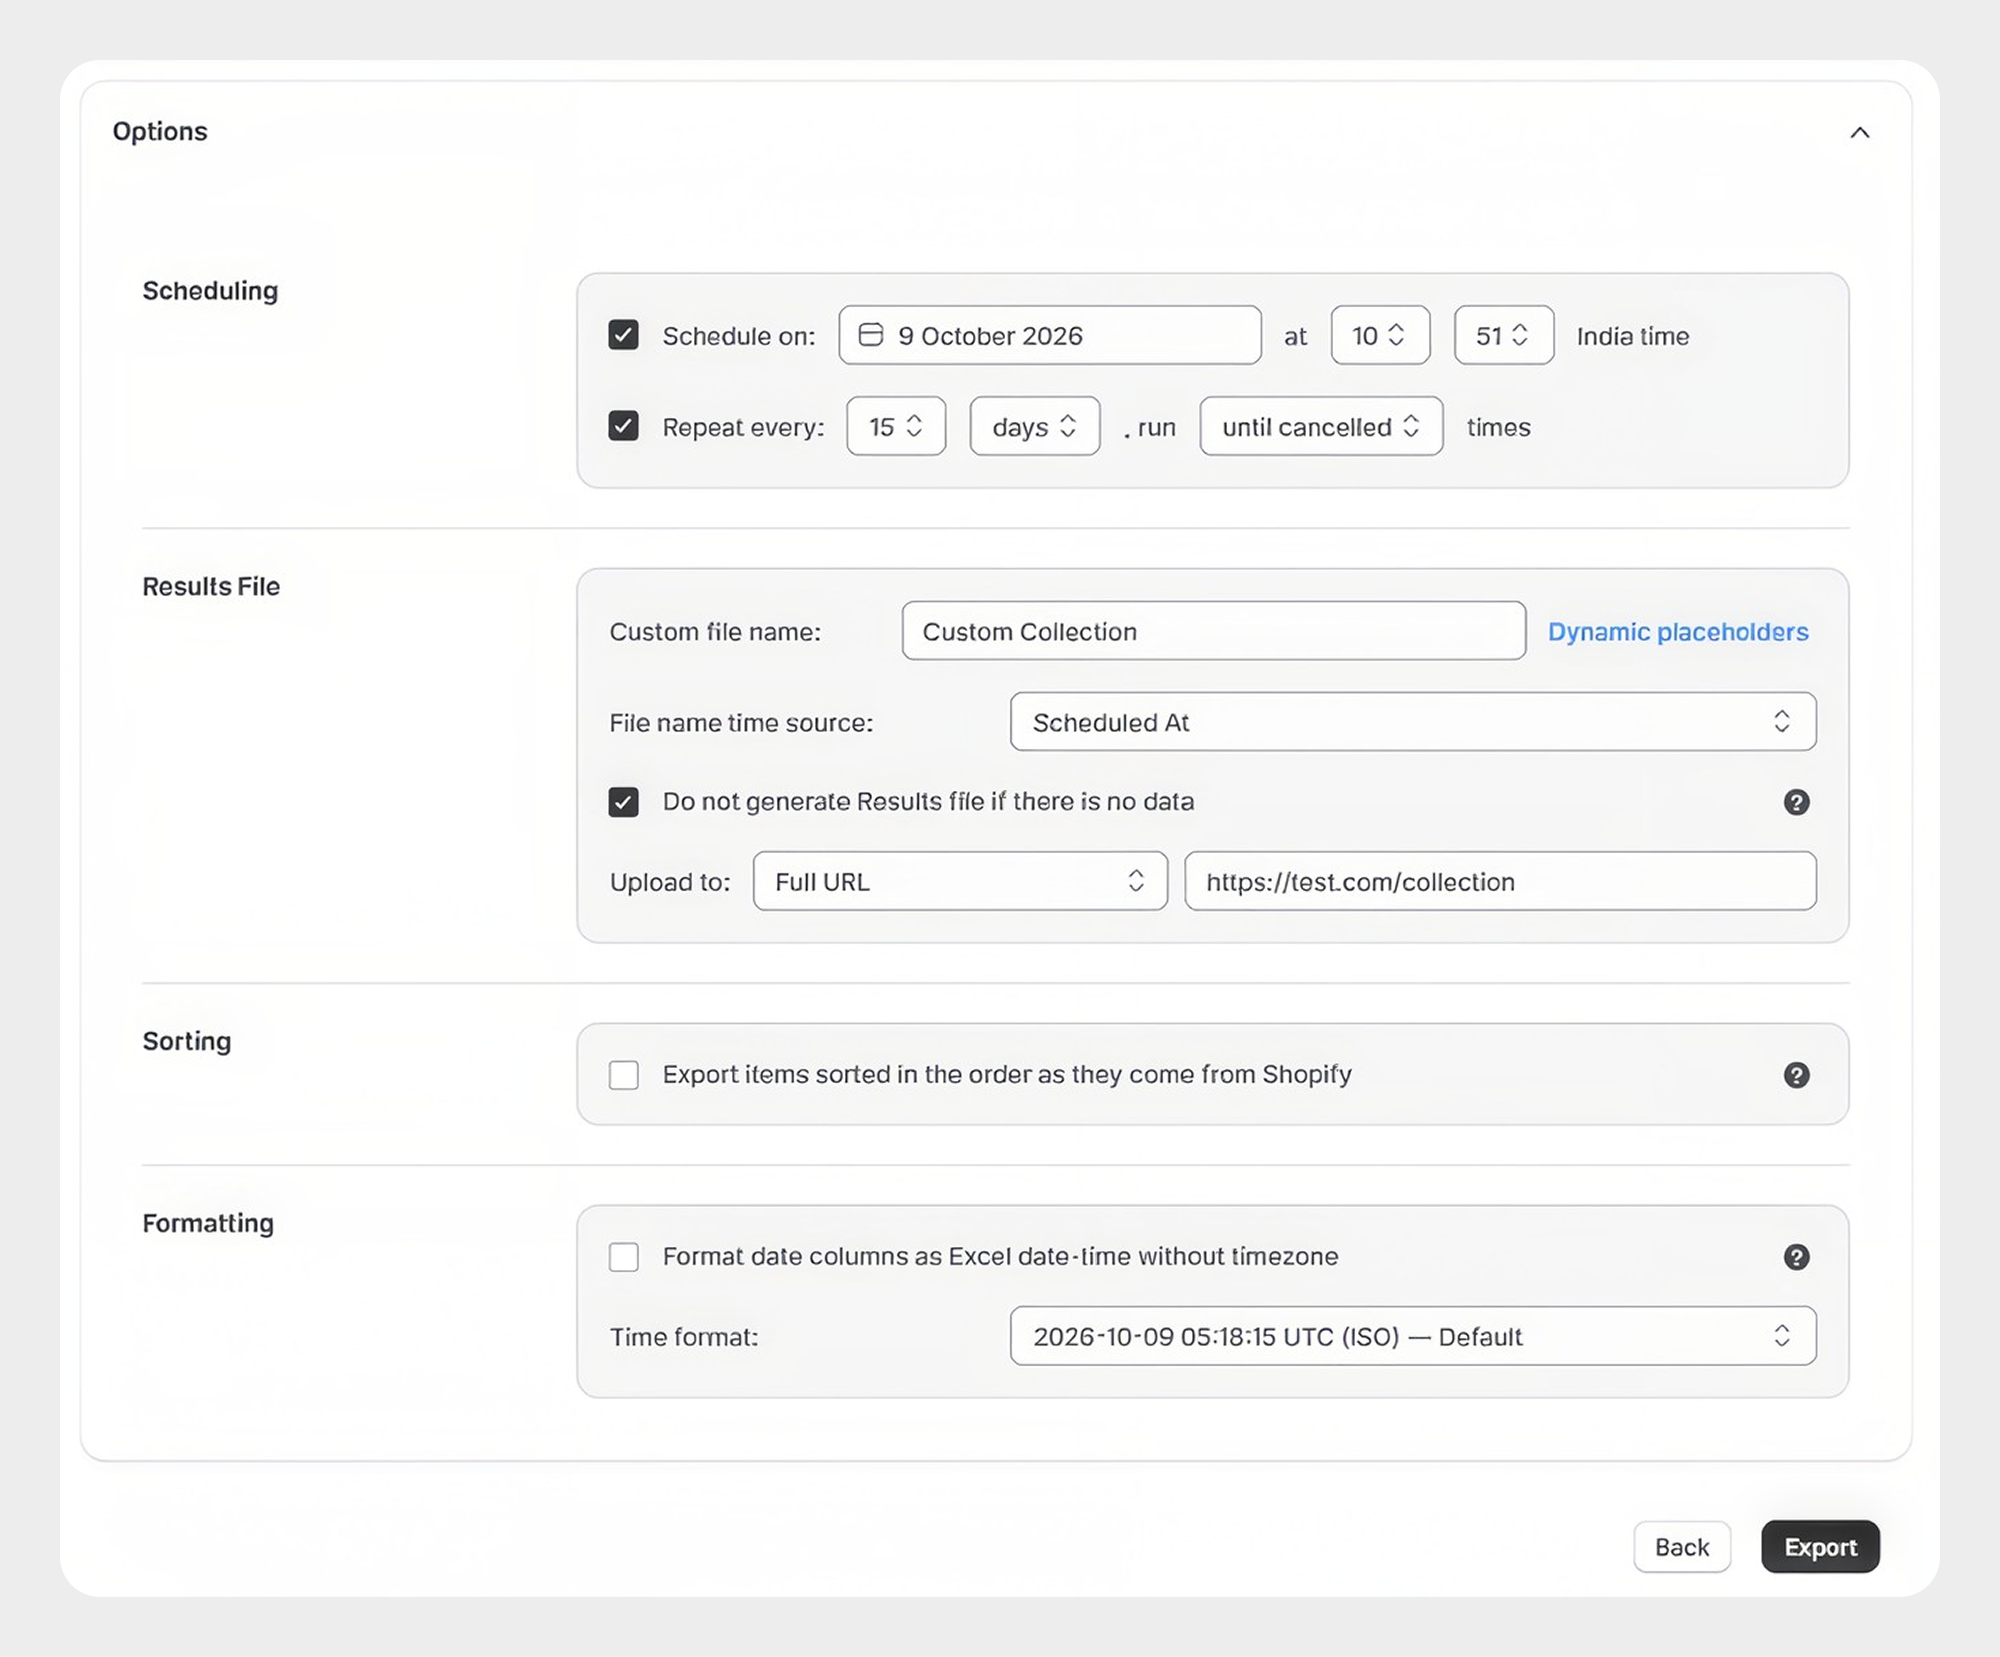
Step 6: Review the scheduled import
Before scheduling the import, review:
-
Import file
-
Selected entity
-
Selected operation
-
Import options
-
Schedule date
-
Schedule time
-
Repeat interval
-
Run limit
-
Result-file settings
-
Upload destination, if configured
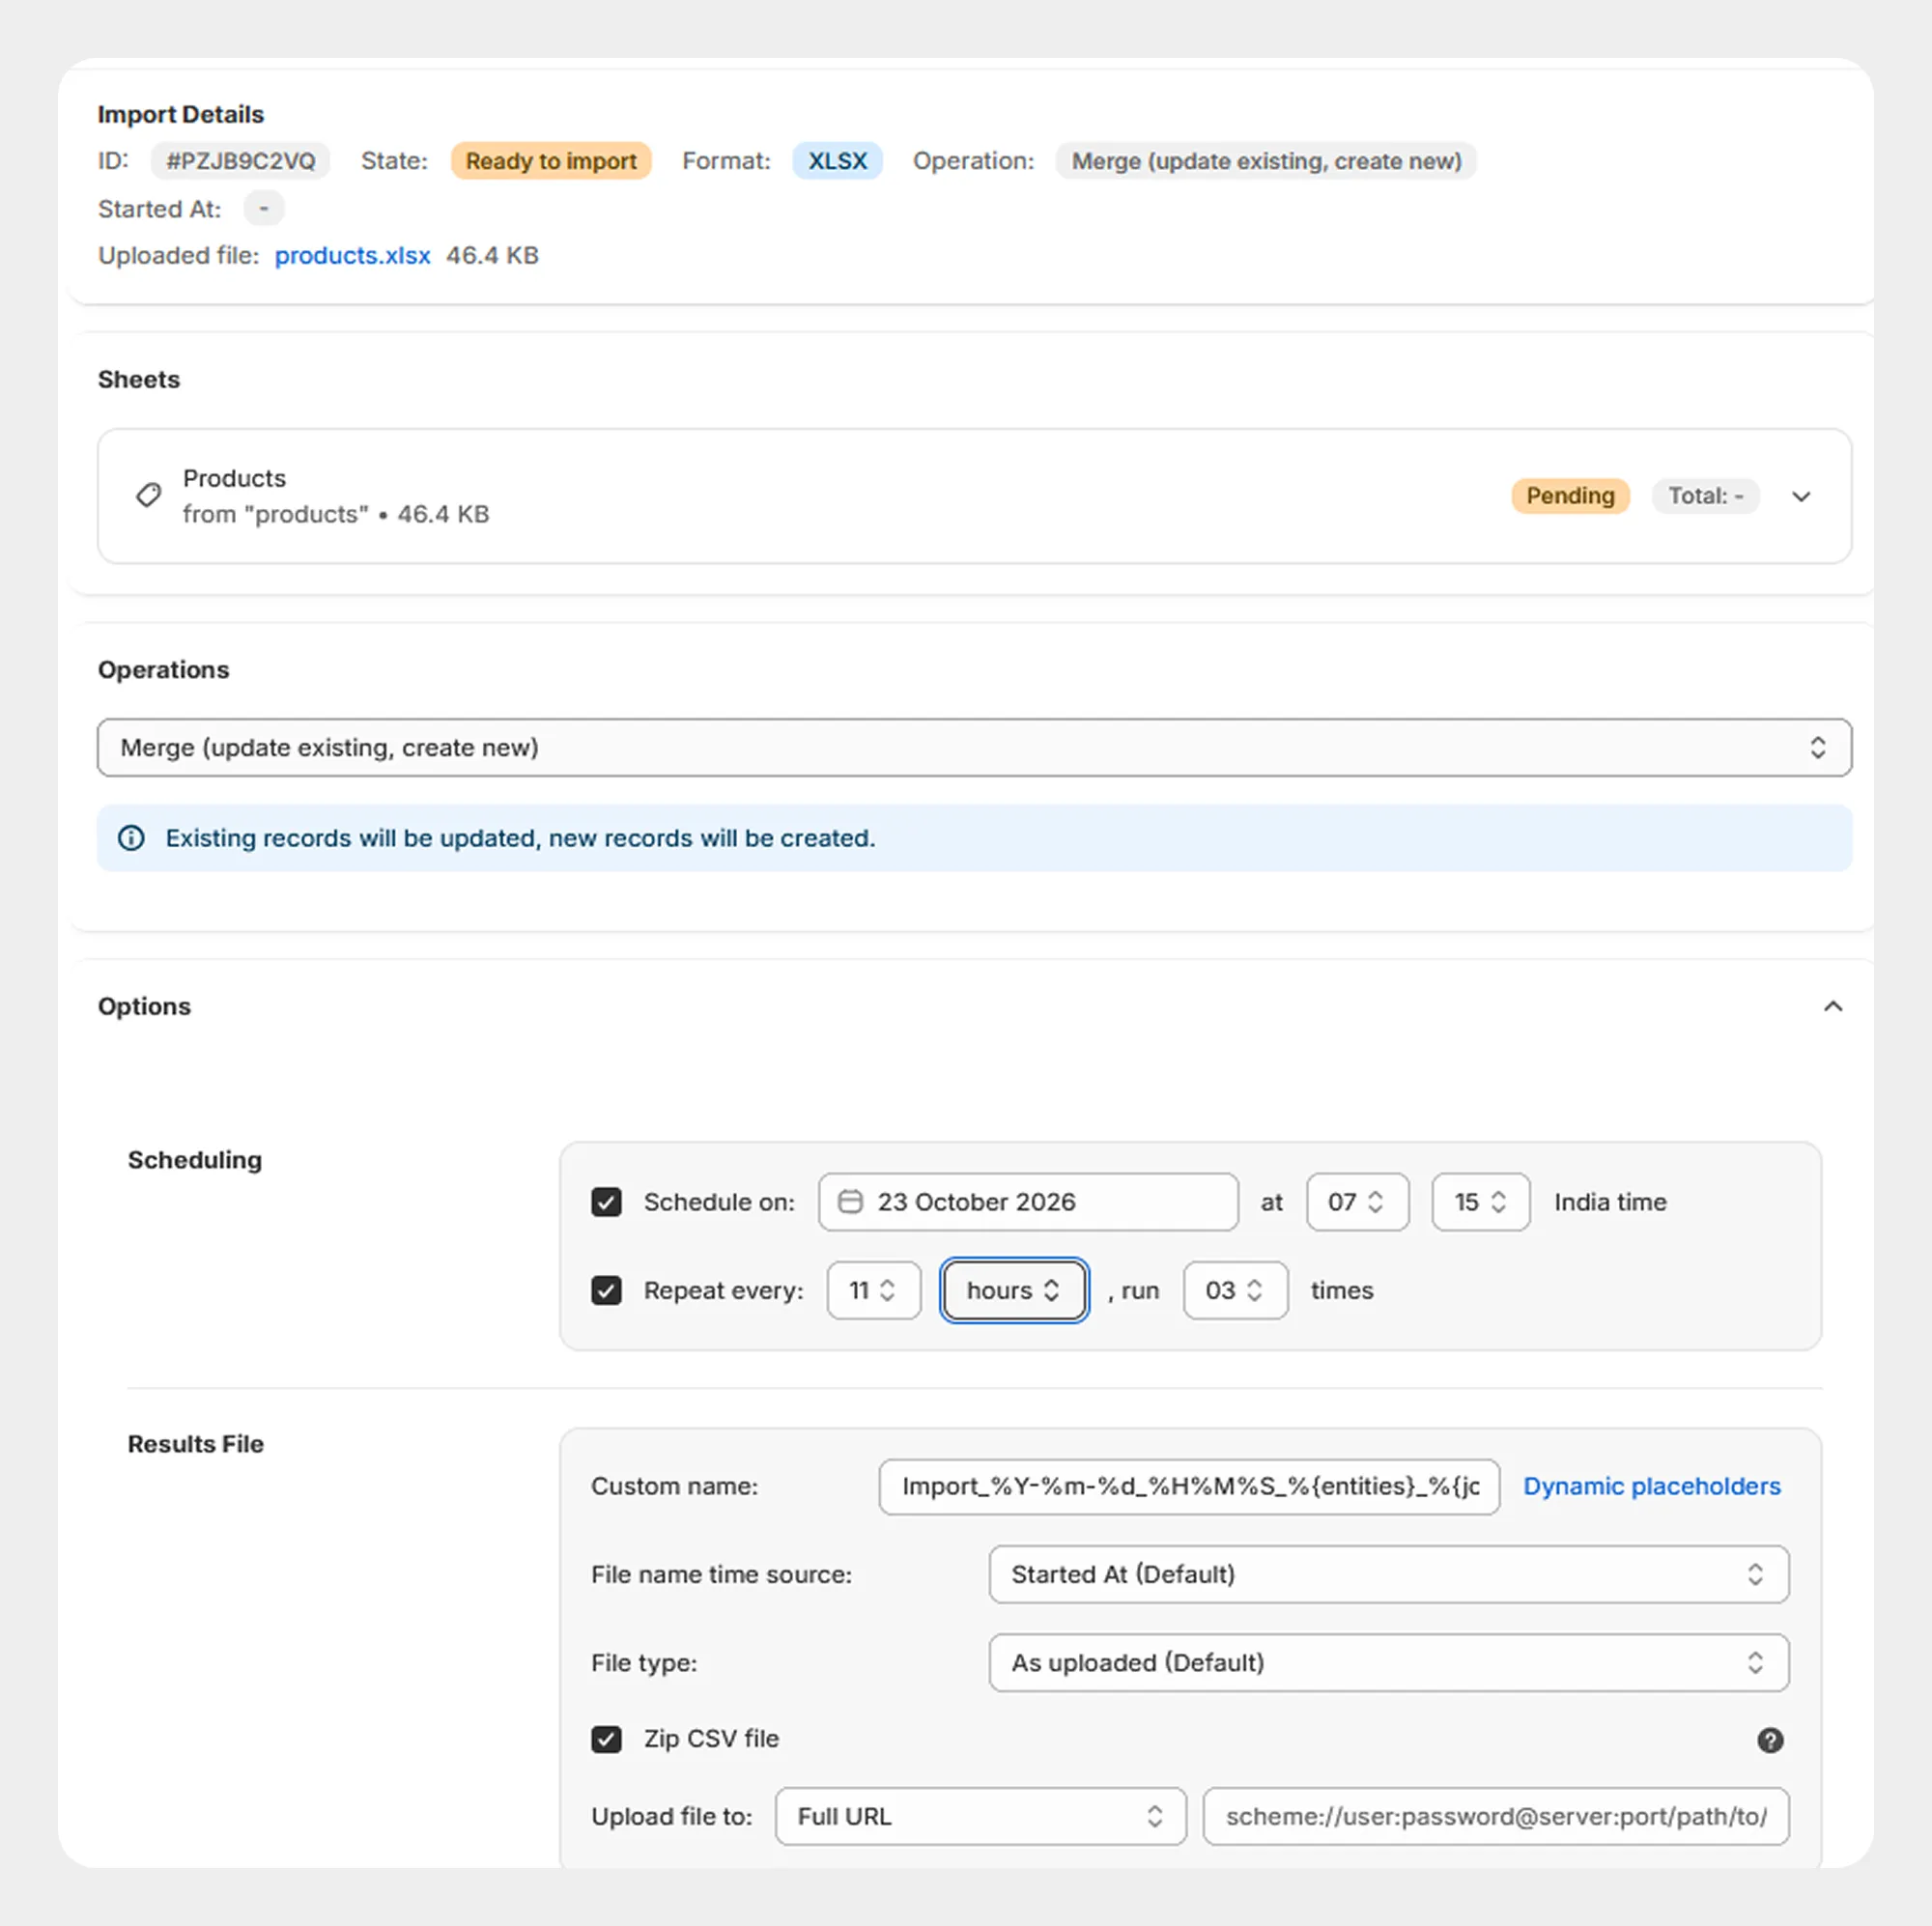
Step 7: Schedule the import
After confirming the import configuration and schedule, schedule the import job. Migrato saves the import configuration as a scheduled job.
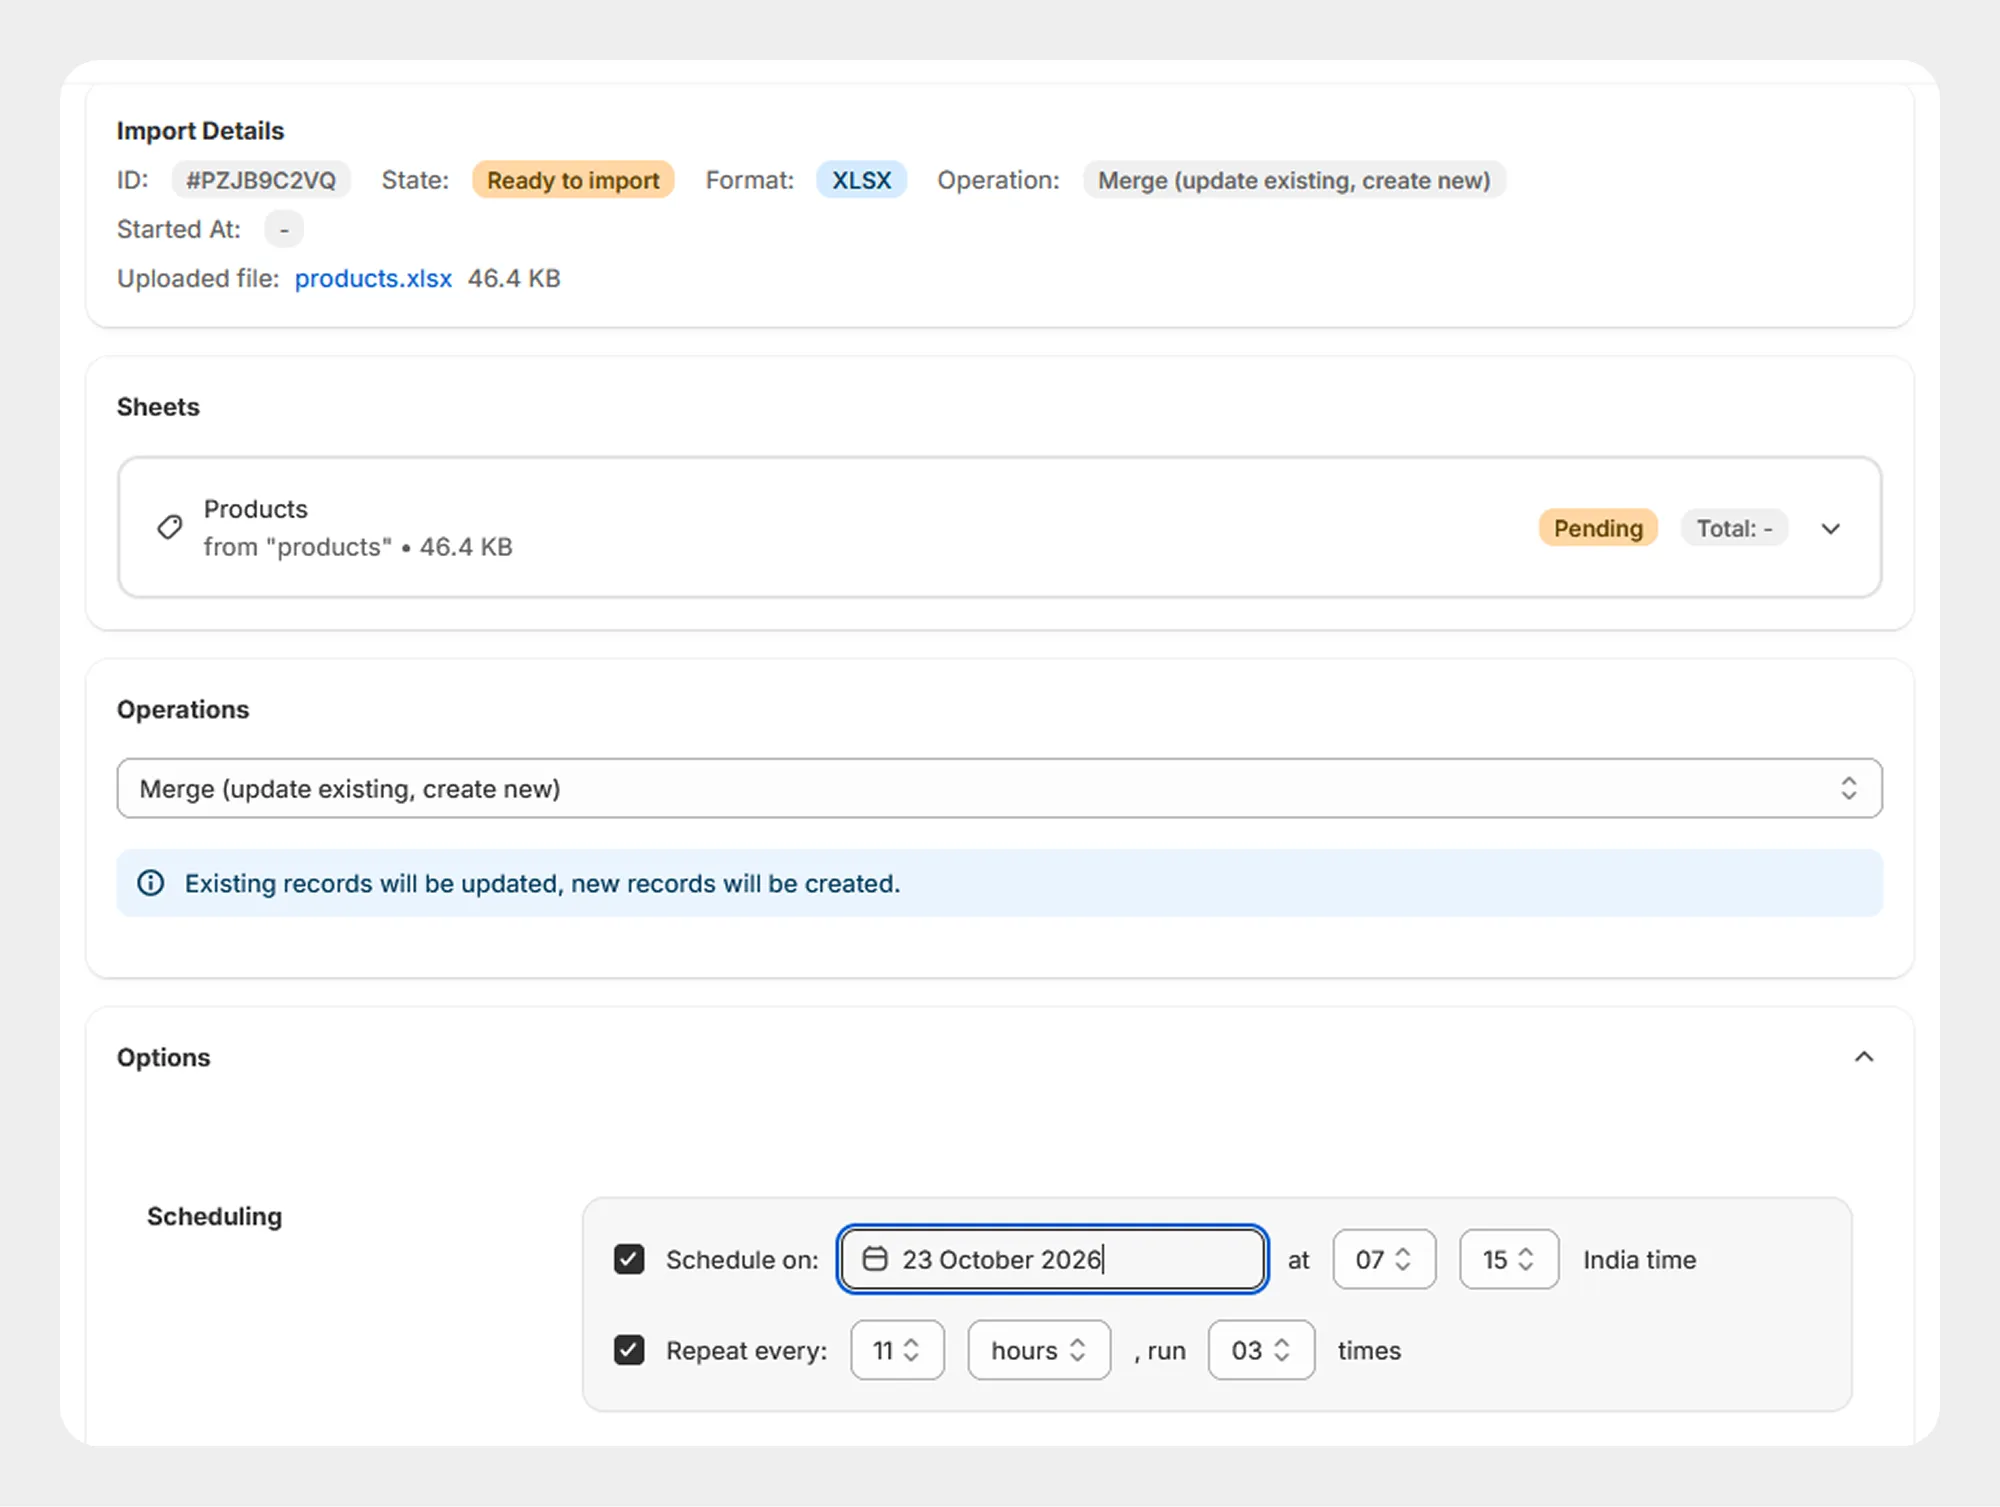
Scheduling examples
Four common schedules and how to configure them.
You want to export products once on a specific date.
| Entity | Products |
|---|---|
| Columns | Selected product columns |
| Filters | Status = Active |
| Schedule on | September 1, 2026 at 10:00 AM |
| Repeat every | Disabled |
Migrato will run the product export at the configured date and time.
You want to export orders every day.
| Entity | Orders |
|---|---|
| Columns | Required order columns |
| Filters | Created At = required date condition |
| Schedule on | September 1, 2026 at 11:00 PM |
| Repeat every | 1 day |
| Run | Until cancelled |
The same export configuration will run every day according to the configured schedule.
You want to create a weekly customer export.
| Entity | Customers |
|---|---|
| Columns | Customer ID, Email, First Name, Last Name, Updated At |
| Filters | Updated At = required condition |
| Schedule on | September 1, 2026 at 9:00 AM |
| Repeat every | 7 days |
| Run | Until cancelled |
Migrato will repeat the customer export at the configured interval.
You receive an updated product file regularly and want Migrato to import it automatically.
| Entity | Products |
|---|---|
| Import file | Product CSV/XLSX |
| Operation | Merge |
| Schedule on | September 1, 2026 at 2:00 AM |
| Repeat every | 1 day |
| Run | Until cancelled |
Migrato will execute the configured product import according to the schedule.
Scheduling with filters
Scheduling can be combined with filters to automate targeted exports.
For example, you can schedule an order export using:
-
Status = Open
-
Created At = selected date condition
-
Payment Status = Paid
The selected filters are saved as part of the export configuration and are applied when the scheduled job runs.
Similarly, a scheduled product export can use filters such as:
-
Status = Active
-
Vendor = selected vendor
-
Variant Inventory Quantity < 10
Review the filters carefully before scheduling a recurring job because the same configured filters will be applied each time the job runs.
Scheduling and result files
For scheduled jobs, result-file configuration is useful when files need to be identified or processed automatically.
You can configure a custom result-file name and use dynamic placeholders where supported. For example:
Export_%Y-%m-%d_%H%M%S
This can generate a different file name for each execution based on the configured time source.
The File name time source determines which job timestamp is used when generating the file name.
 Free plan forever