 Our first app, Migrato, is live on the Shopify App Store

Import / Export Discounts
How to import and export discounts in bulk with CSV and XLSX files. 6 min read
 Updated 14 October 2026
 Applies to Migrato on all plans
Migrato allows you to import and export Shopify discount data using CSV or XLSX files. You can select the required discount fields, export existing discount data, prepare discount data for import, and use filters to export only the discounts that match specific conditions.
You can use discount import/export to create, update, replace, merge, delete, or migrate discount data in bulk, depending on the operation supported by Migrato. This makes it easier to manage large numbers of discounts without handling each discount individually through Shopify Admin.
Migrato supports different types of Shopify discount information, including amount-based discounts, Buy X Get Y discounts, free shipping discounts, customer eligibility, usage limits, discount combinations, subscription purchase settings, and shareable links. Shopify's discount model supports fixed-amount and percentage-based amount-off discounts, Buy X Get Y discounts, and free-shipping discounts.

We recommend reviewing the Discount Template Documentation and downloading the Discount Demo CSV/XLSX file, if available, to understand the supported fields and expected data structure.
Import Discounts
Migrato allows you to bulk import Shopify discount data using CSV or XLSX files.
You can upload a prepared discount file directly to Migrato or provide a publicly accessible URL to the file.
Step 1: Open Discount Import
From your Shopify Admin:
- Go to Apps → Migrato.
- Open the Import section.
- Select Discounts as the entity you want to import.
- Add the discount file you want to import.
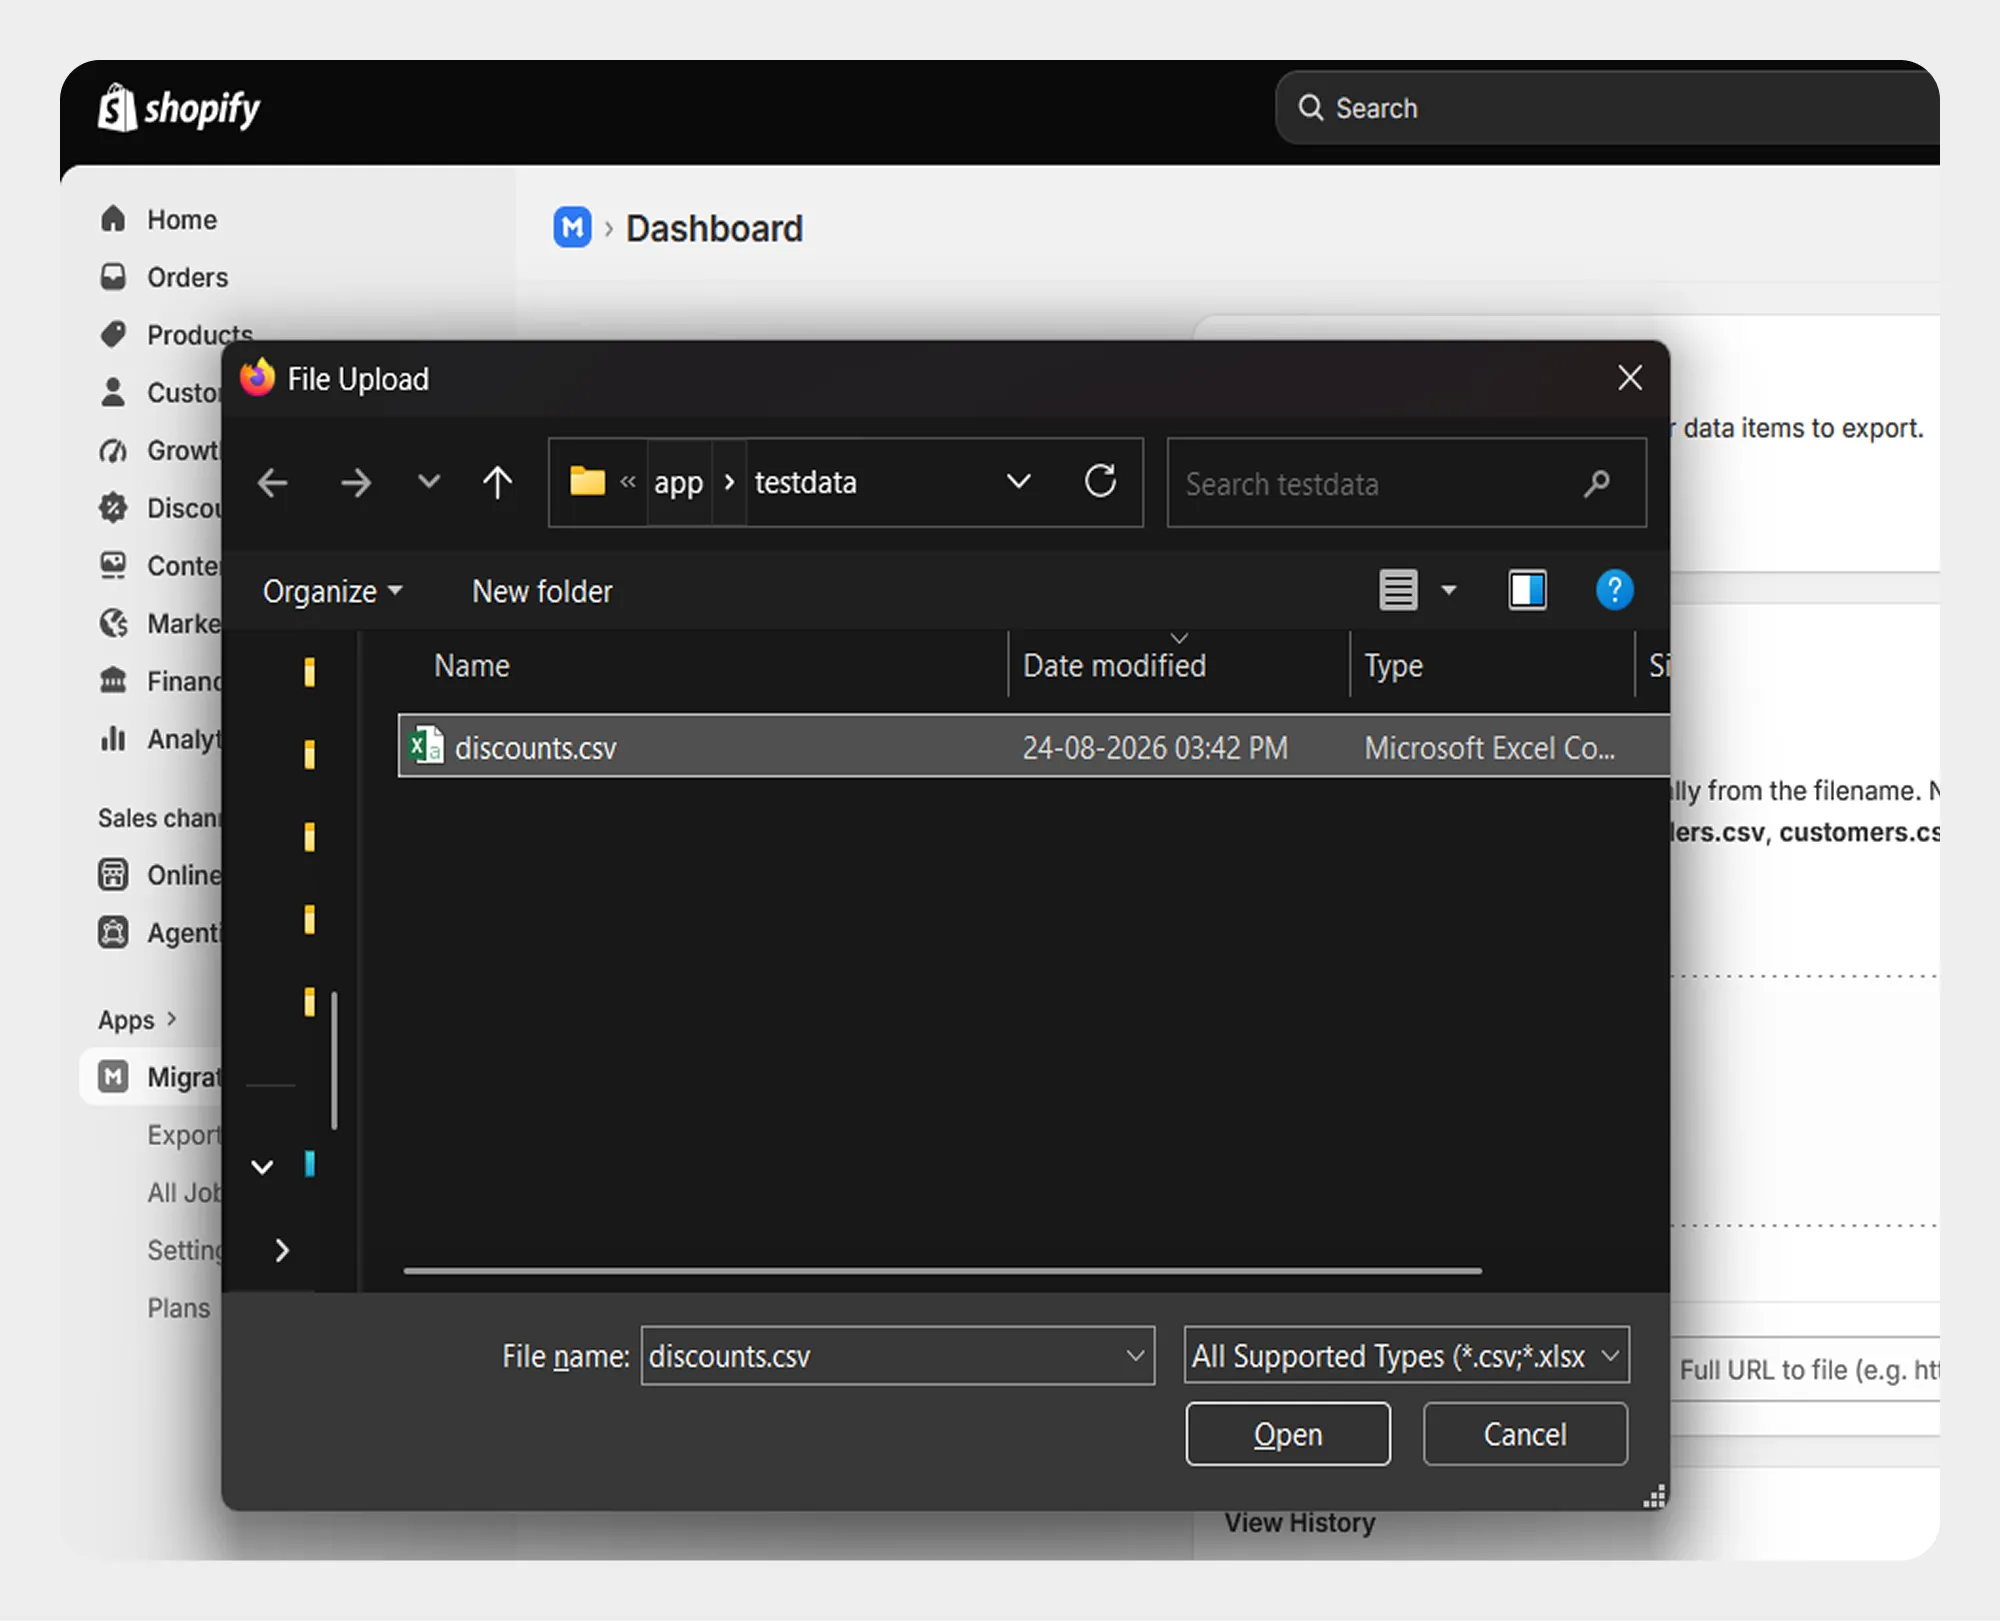
Step 2: Upload or Provide the Discount File
Migrato provides two ways to provide the discount file.
Option 1: Upload a File
You can upload or drag and drop your prepared discount file.
Migrato supports:
-
 CSV
-
XLSX
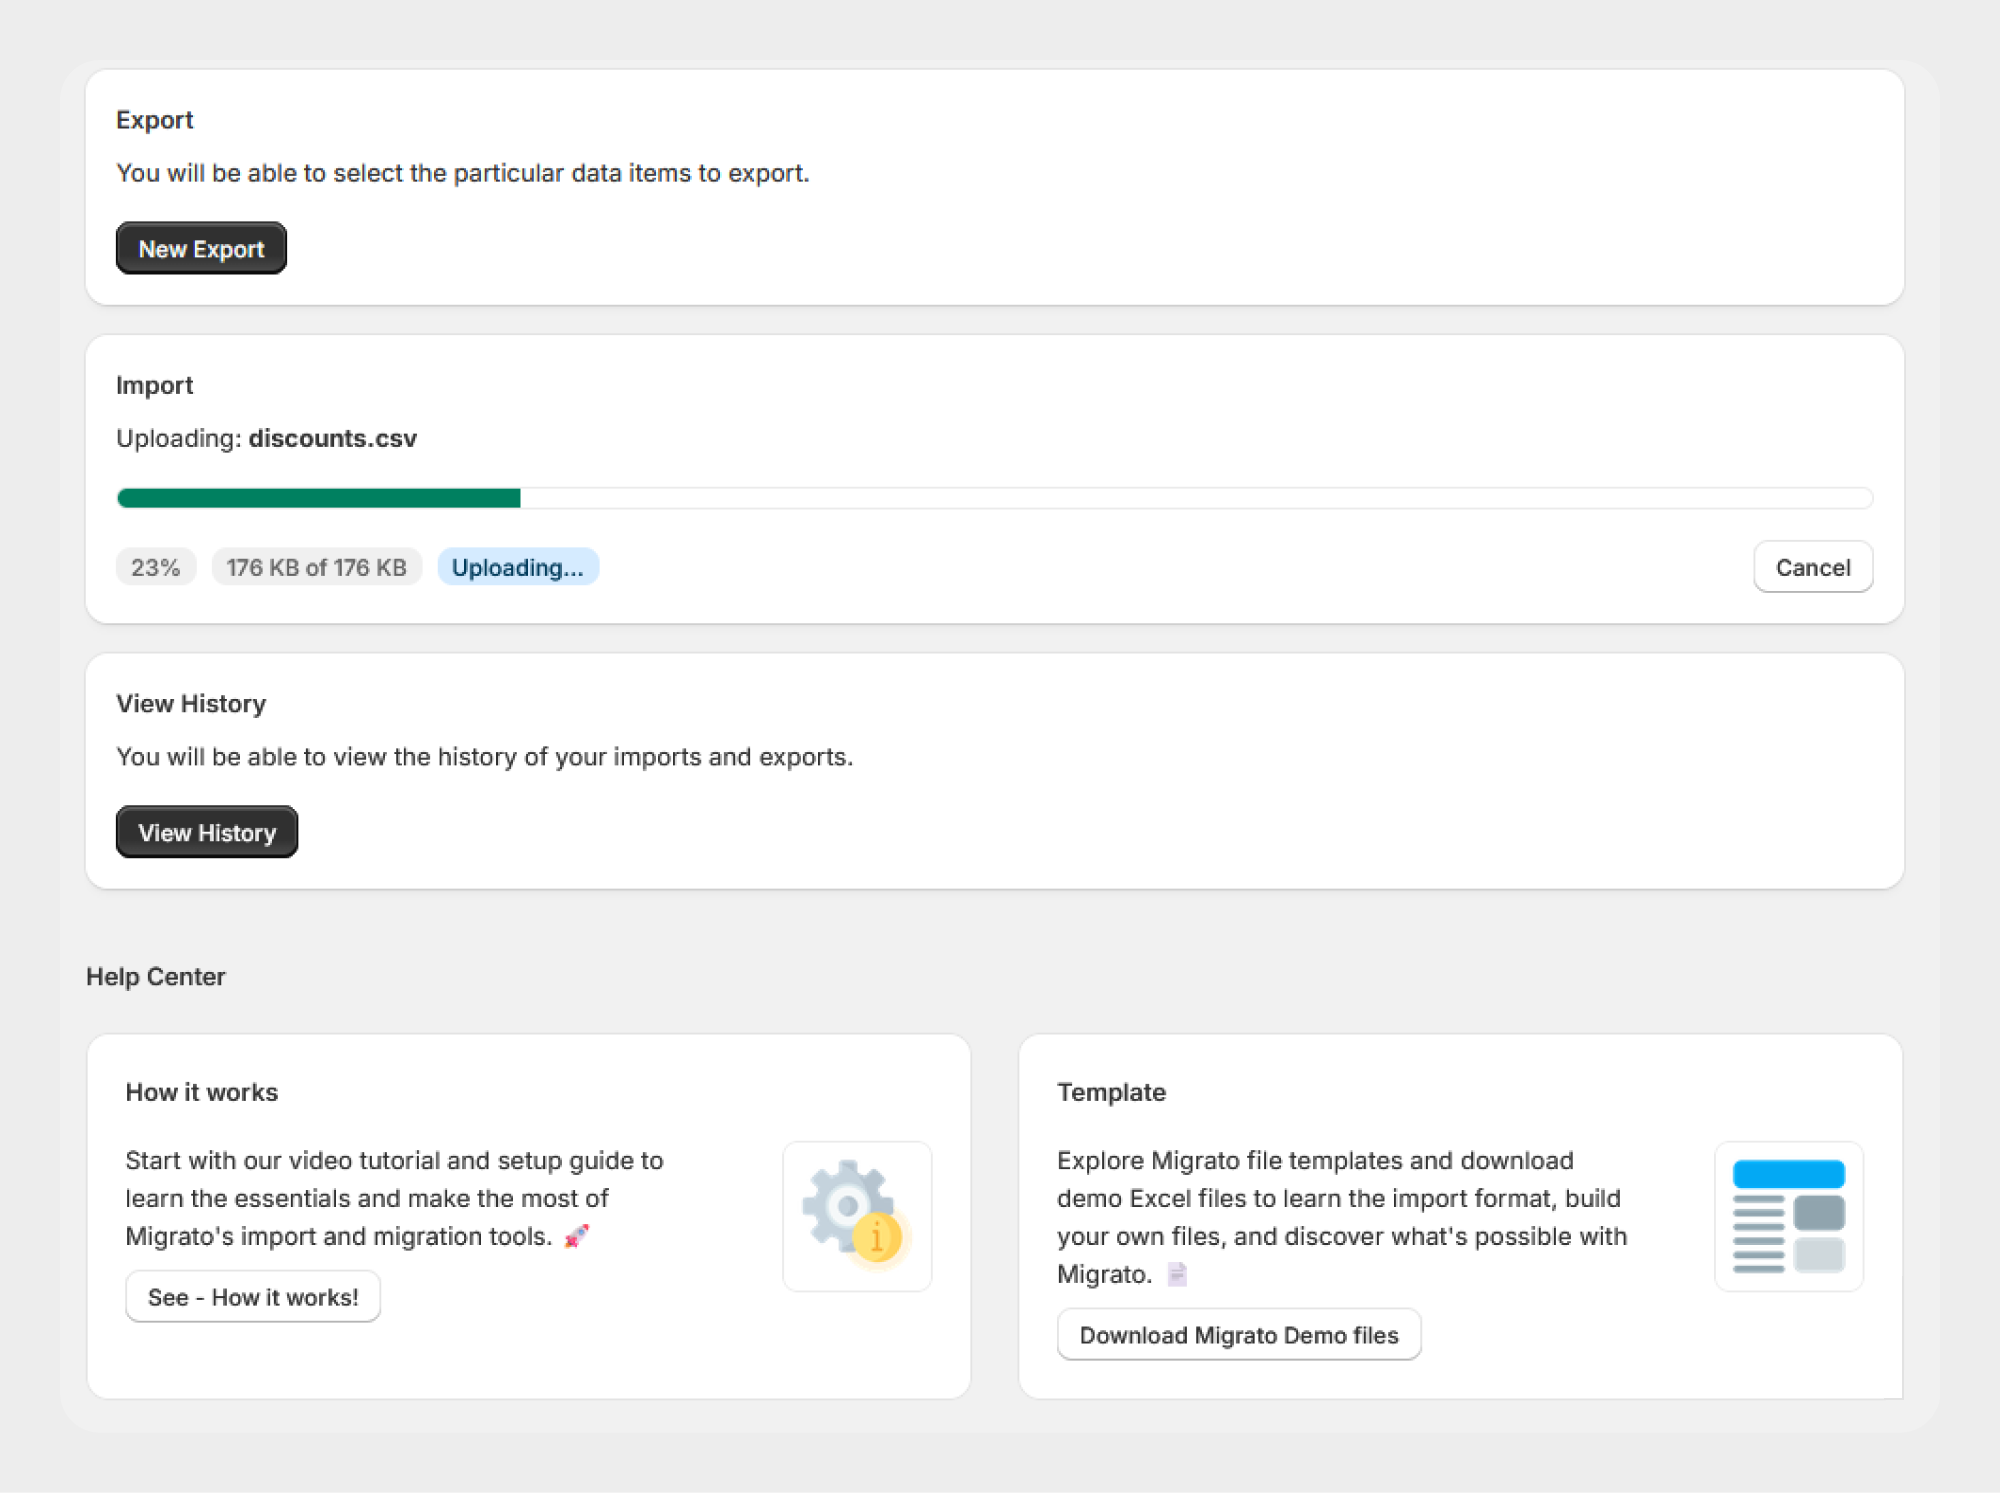
Option 2: Import from a Public URL
You can also provide the full publicly accessible URL of the discount file instead of uploading it manually.
For example:
https://example.com/discounts.csv
Enter the URL and select Upload from URL.
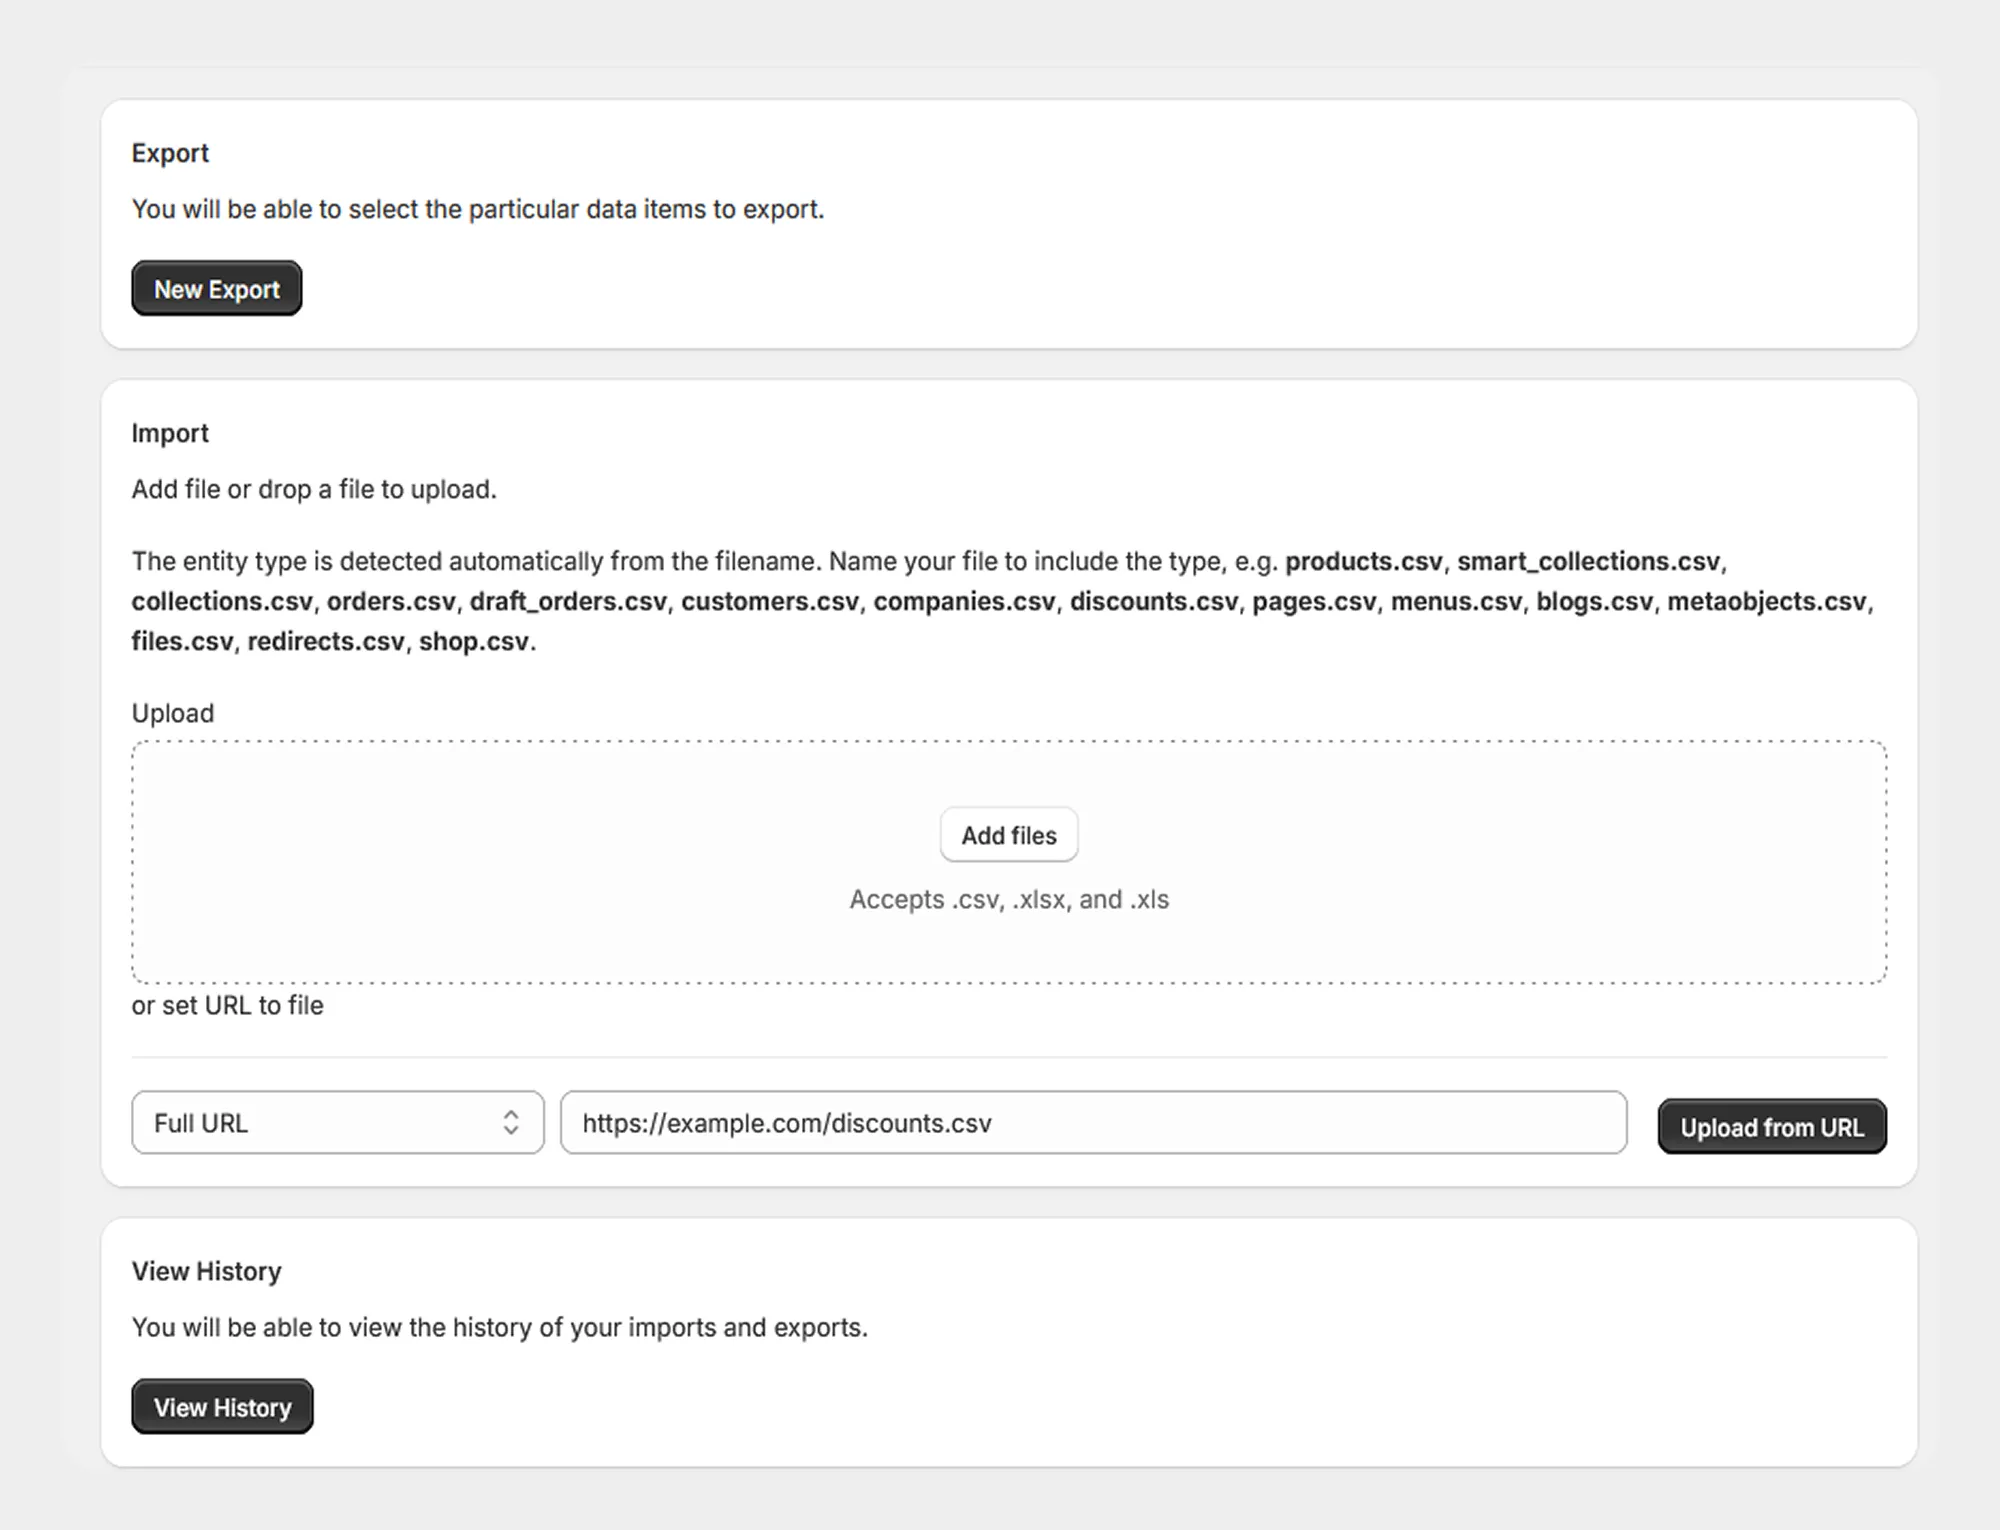
The file URL must be accessible to Migrato. If the file requires authentication, a login, or restricted permissions, Migrato may not be able to retrieve it.
Step 3: Review the Import Details
After the file is uploaded or retrieved from the provided URL, Migrato creates the import job and displays the available import information.
The import details may include:
-
Import ID
-
Import state
-
File format
-
Operation
-
Uploaded file
-
Import information
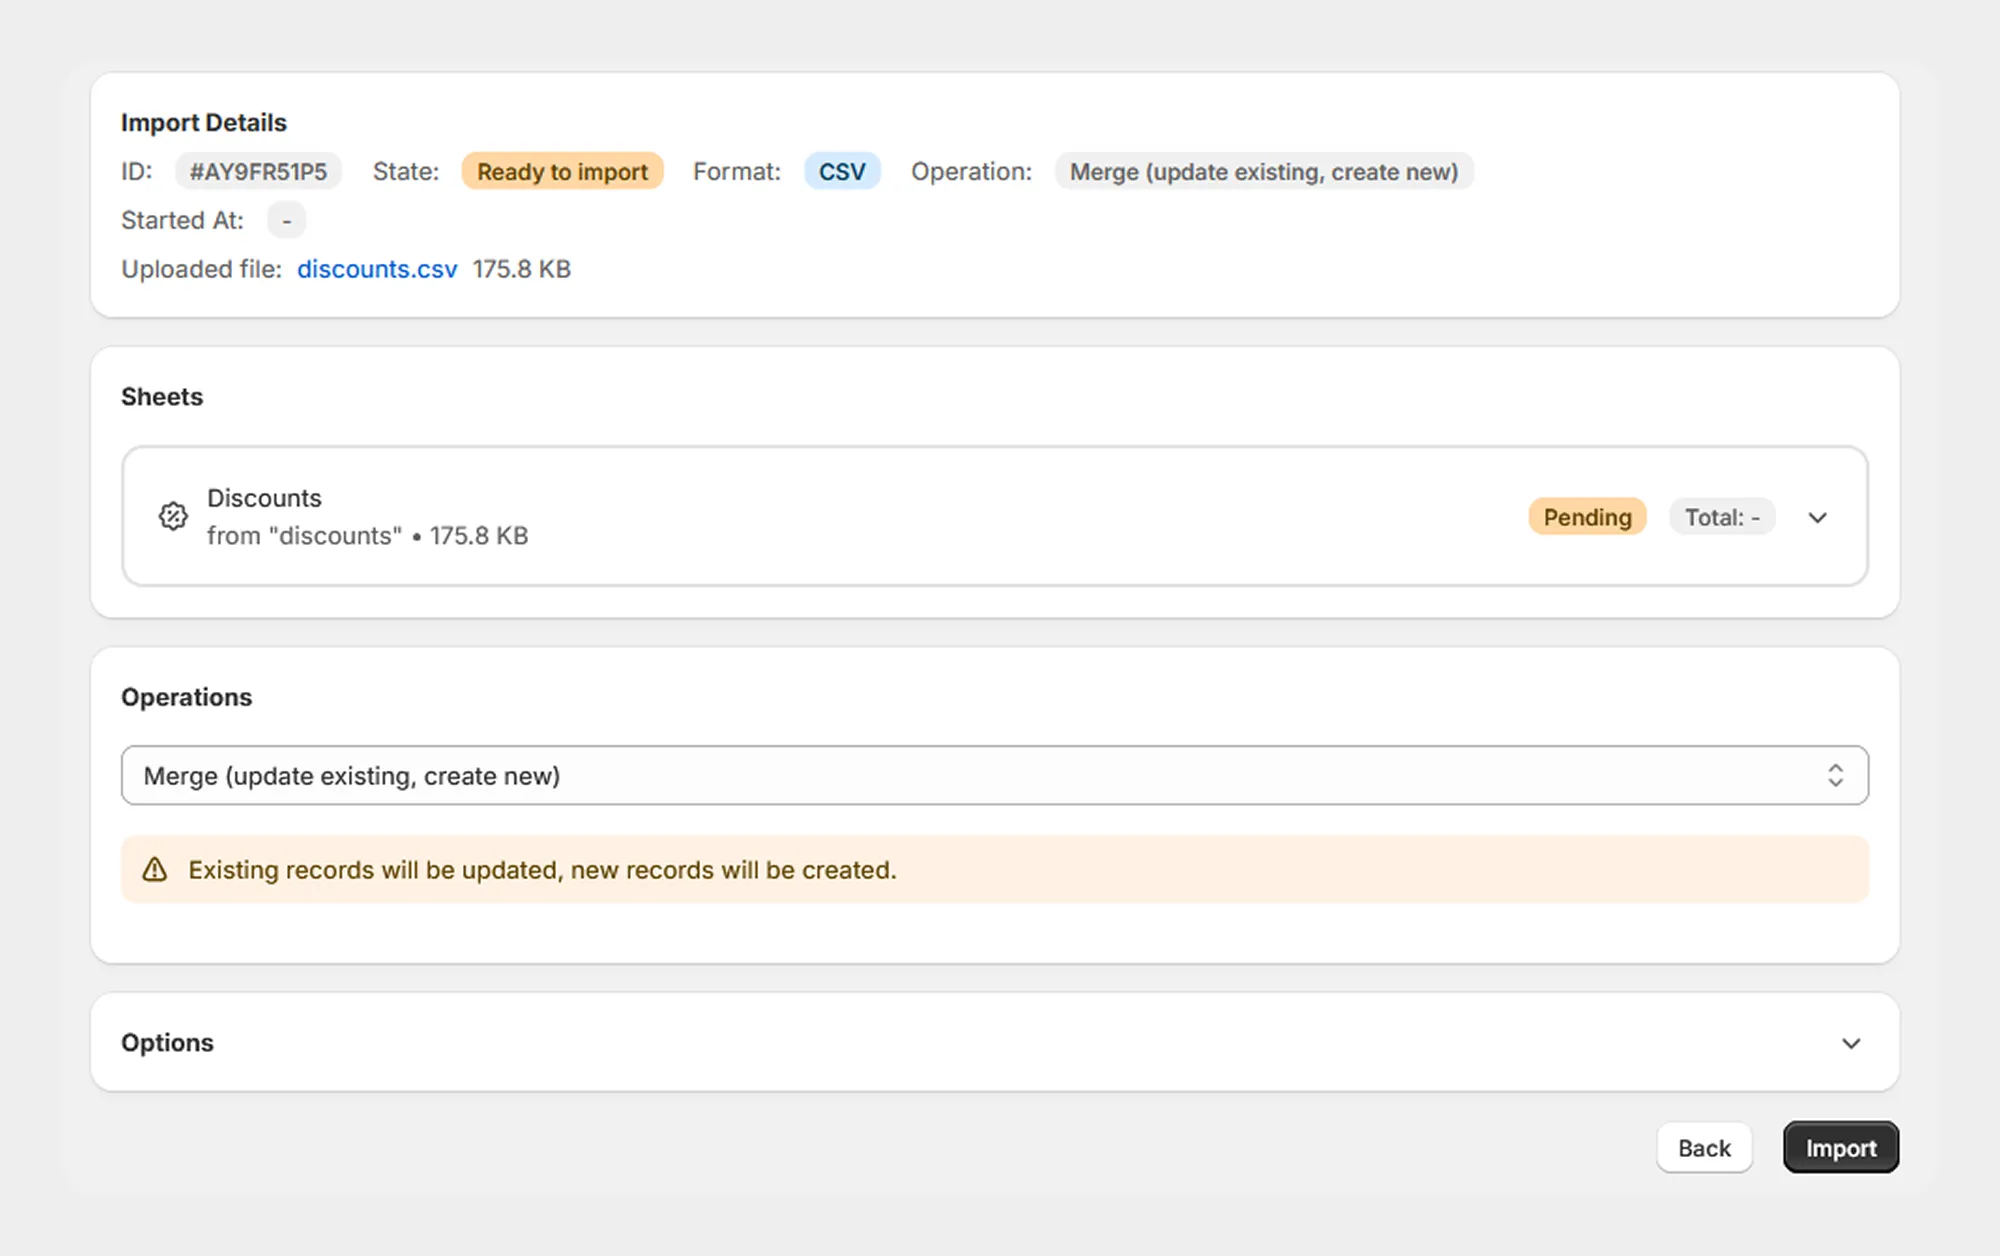
Review the displayed information before continuing.
Step 4: Review the Discount Sheet
Migrato identifies the discount data contained in the uploaded file and displays the available sheet information.
Review the detected sheet before selecting the import operation.
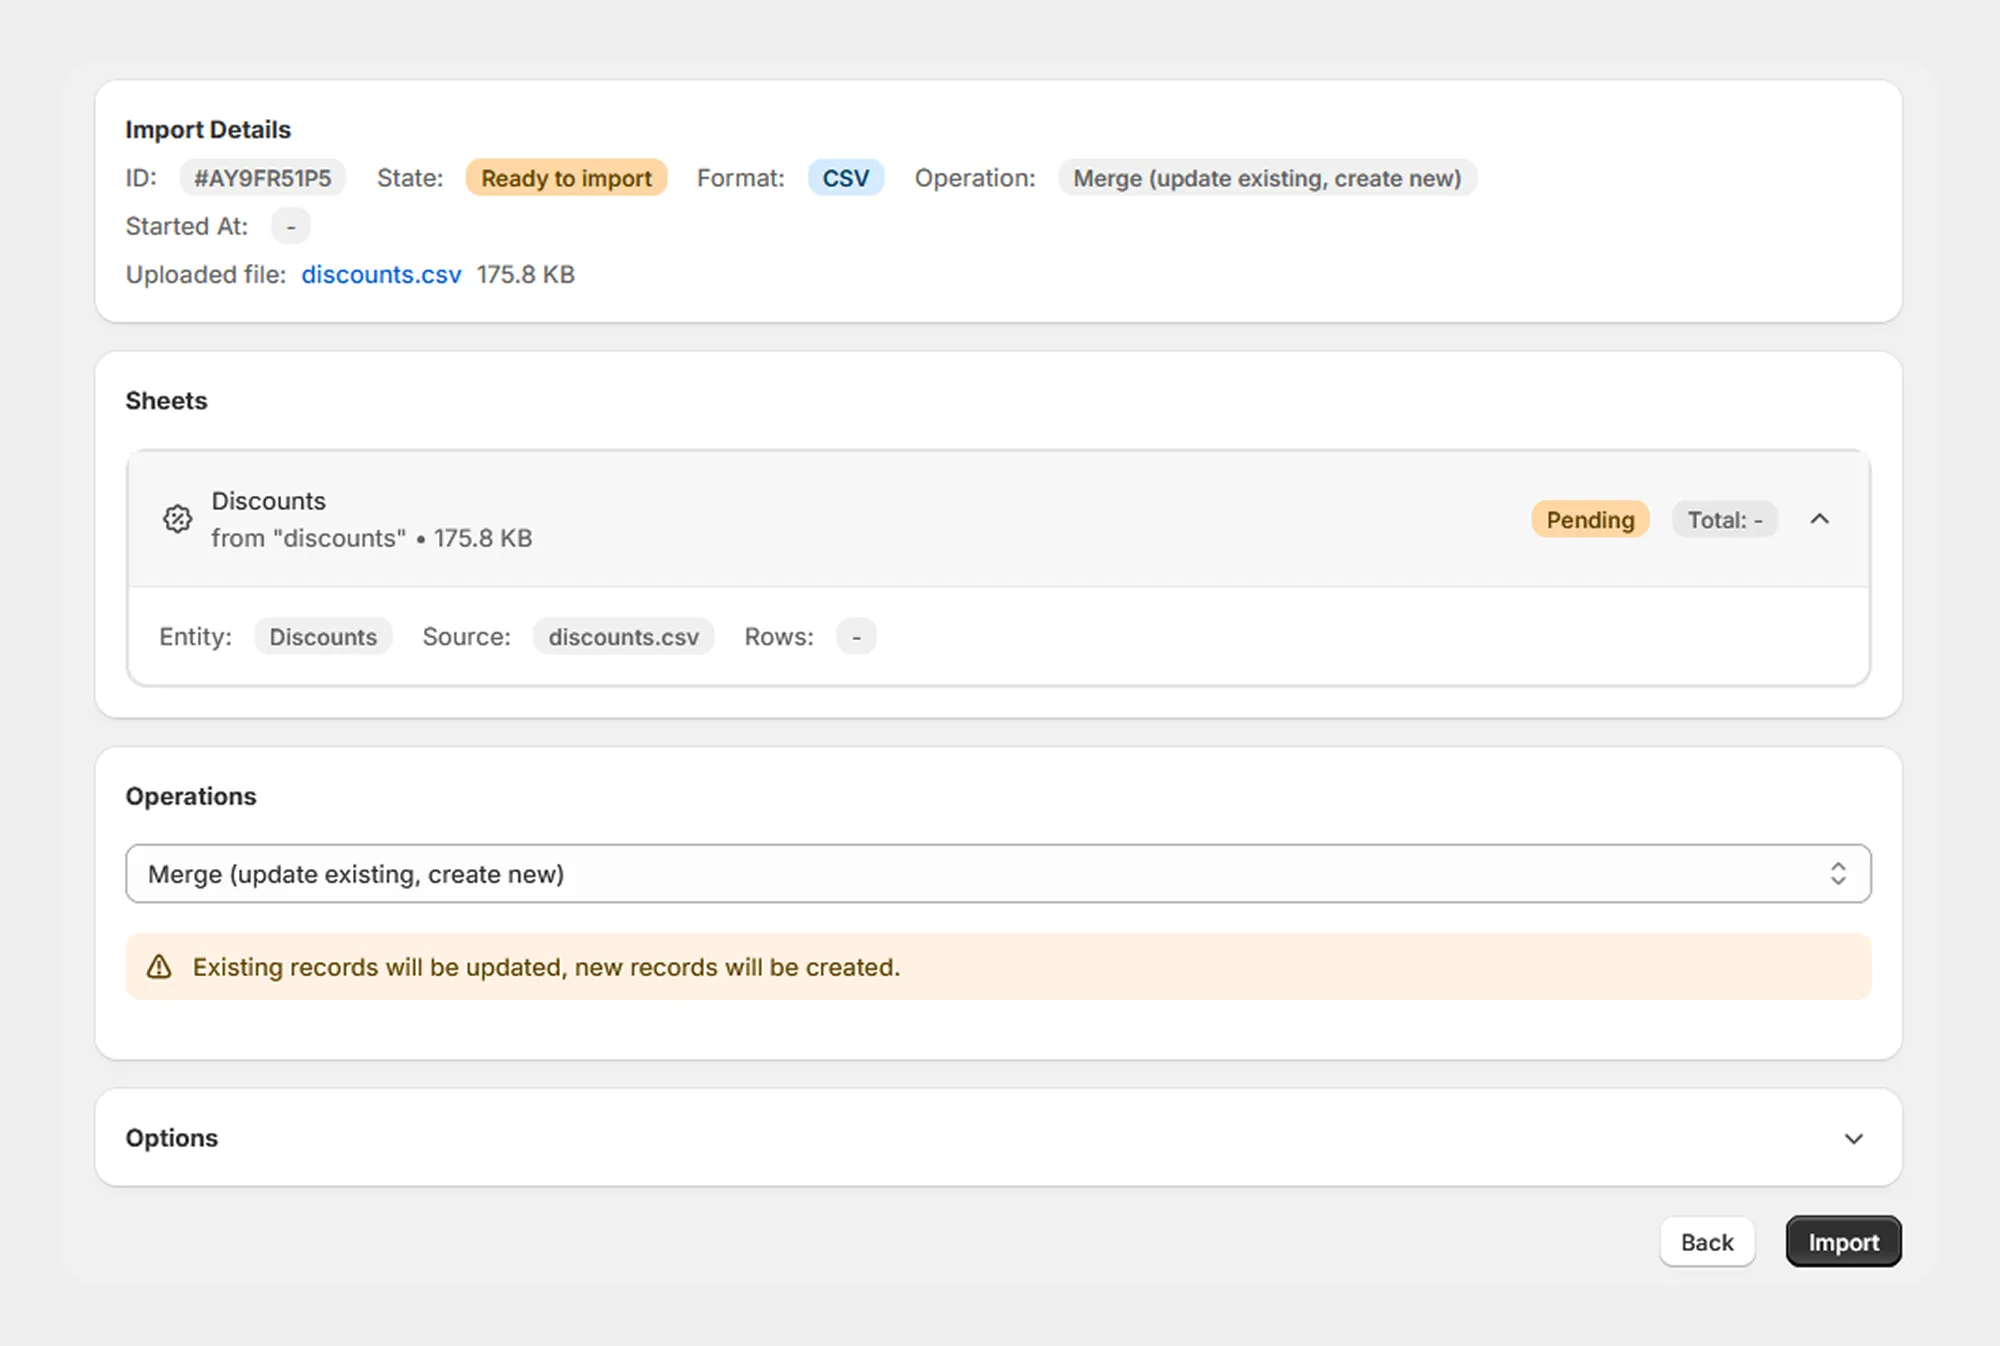
Make sure the expected discount columns are available and correctly structured.
Step 5: Select an Import Operation
Migrato allows you to select the operation that should be performed on the discount data.
Depending on the supported Migrato discount operations, the available options may include:
-
Merge – Update matching records and create new records.
-
Create only – Create new records and skip records that already exist.
-
Update only – Update existing records and skip records that cannot be matched.
-
Replace – Replace the existing matching record with the imported data.
-
Delete – Delete the matching record when it exists.
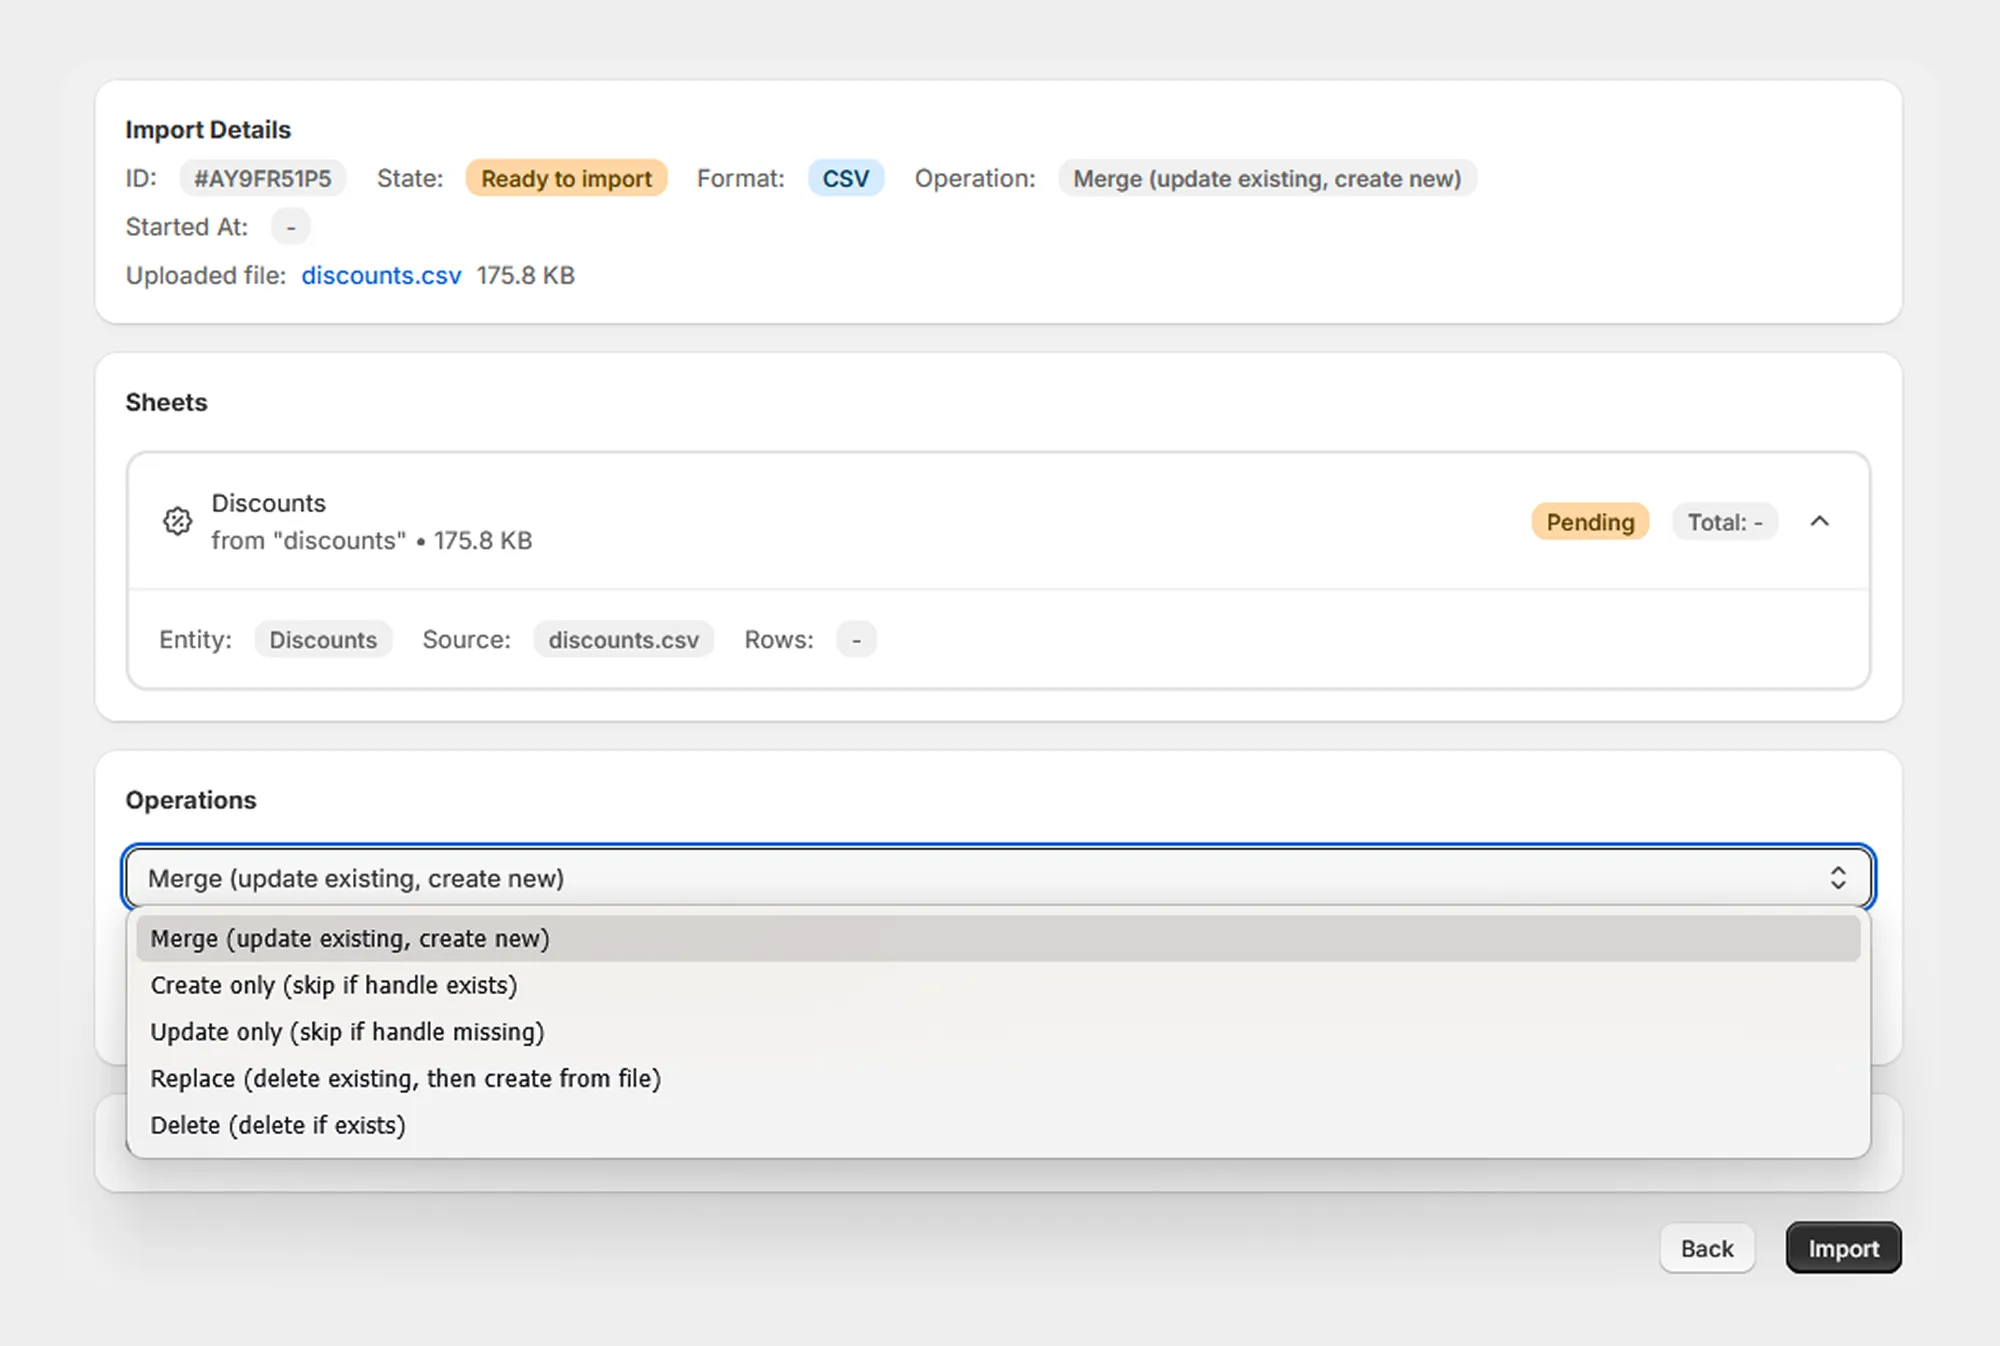
The selected operation determines how Migrato handles existing and new discount records.
Carefully review the selected operation before processing discount data, especially when using Replace or Delete.
Step 6: Configure Import Options
Open the Options section to configure any additional settings available for the discount import.
Depending on the current Migrato configuration, available options may include settings related to scheduling and result files.
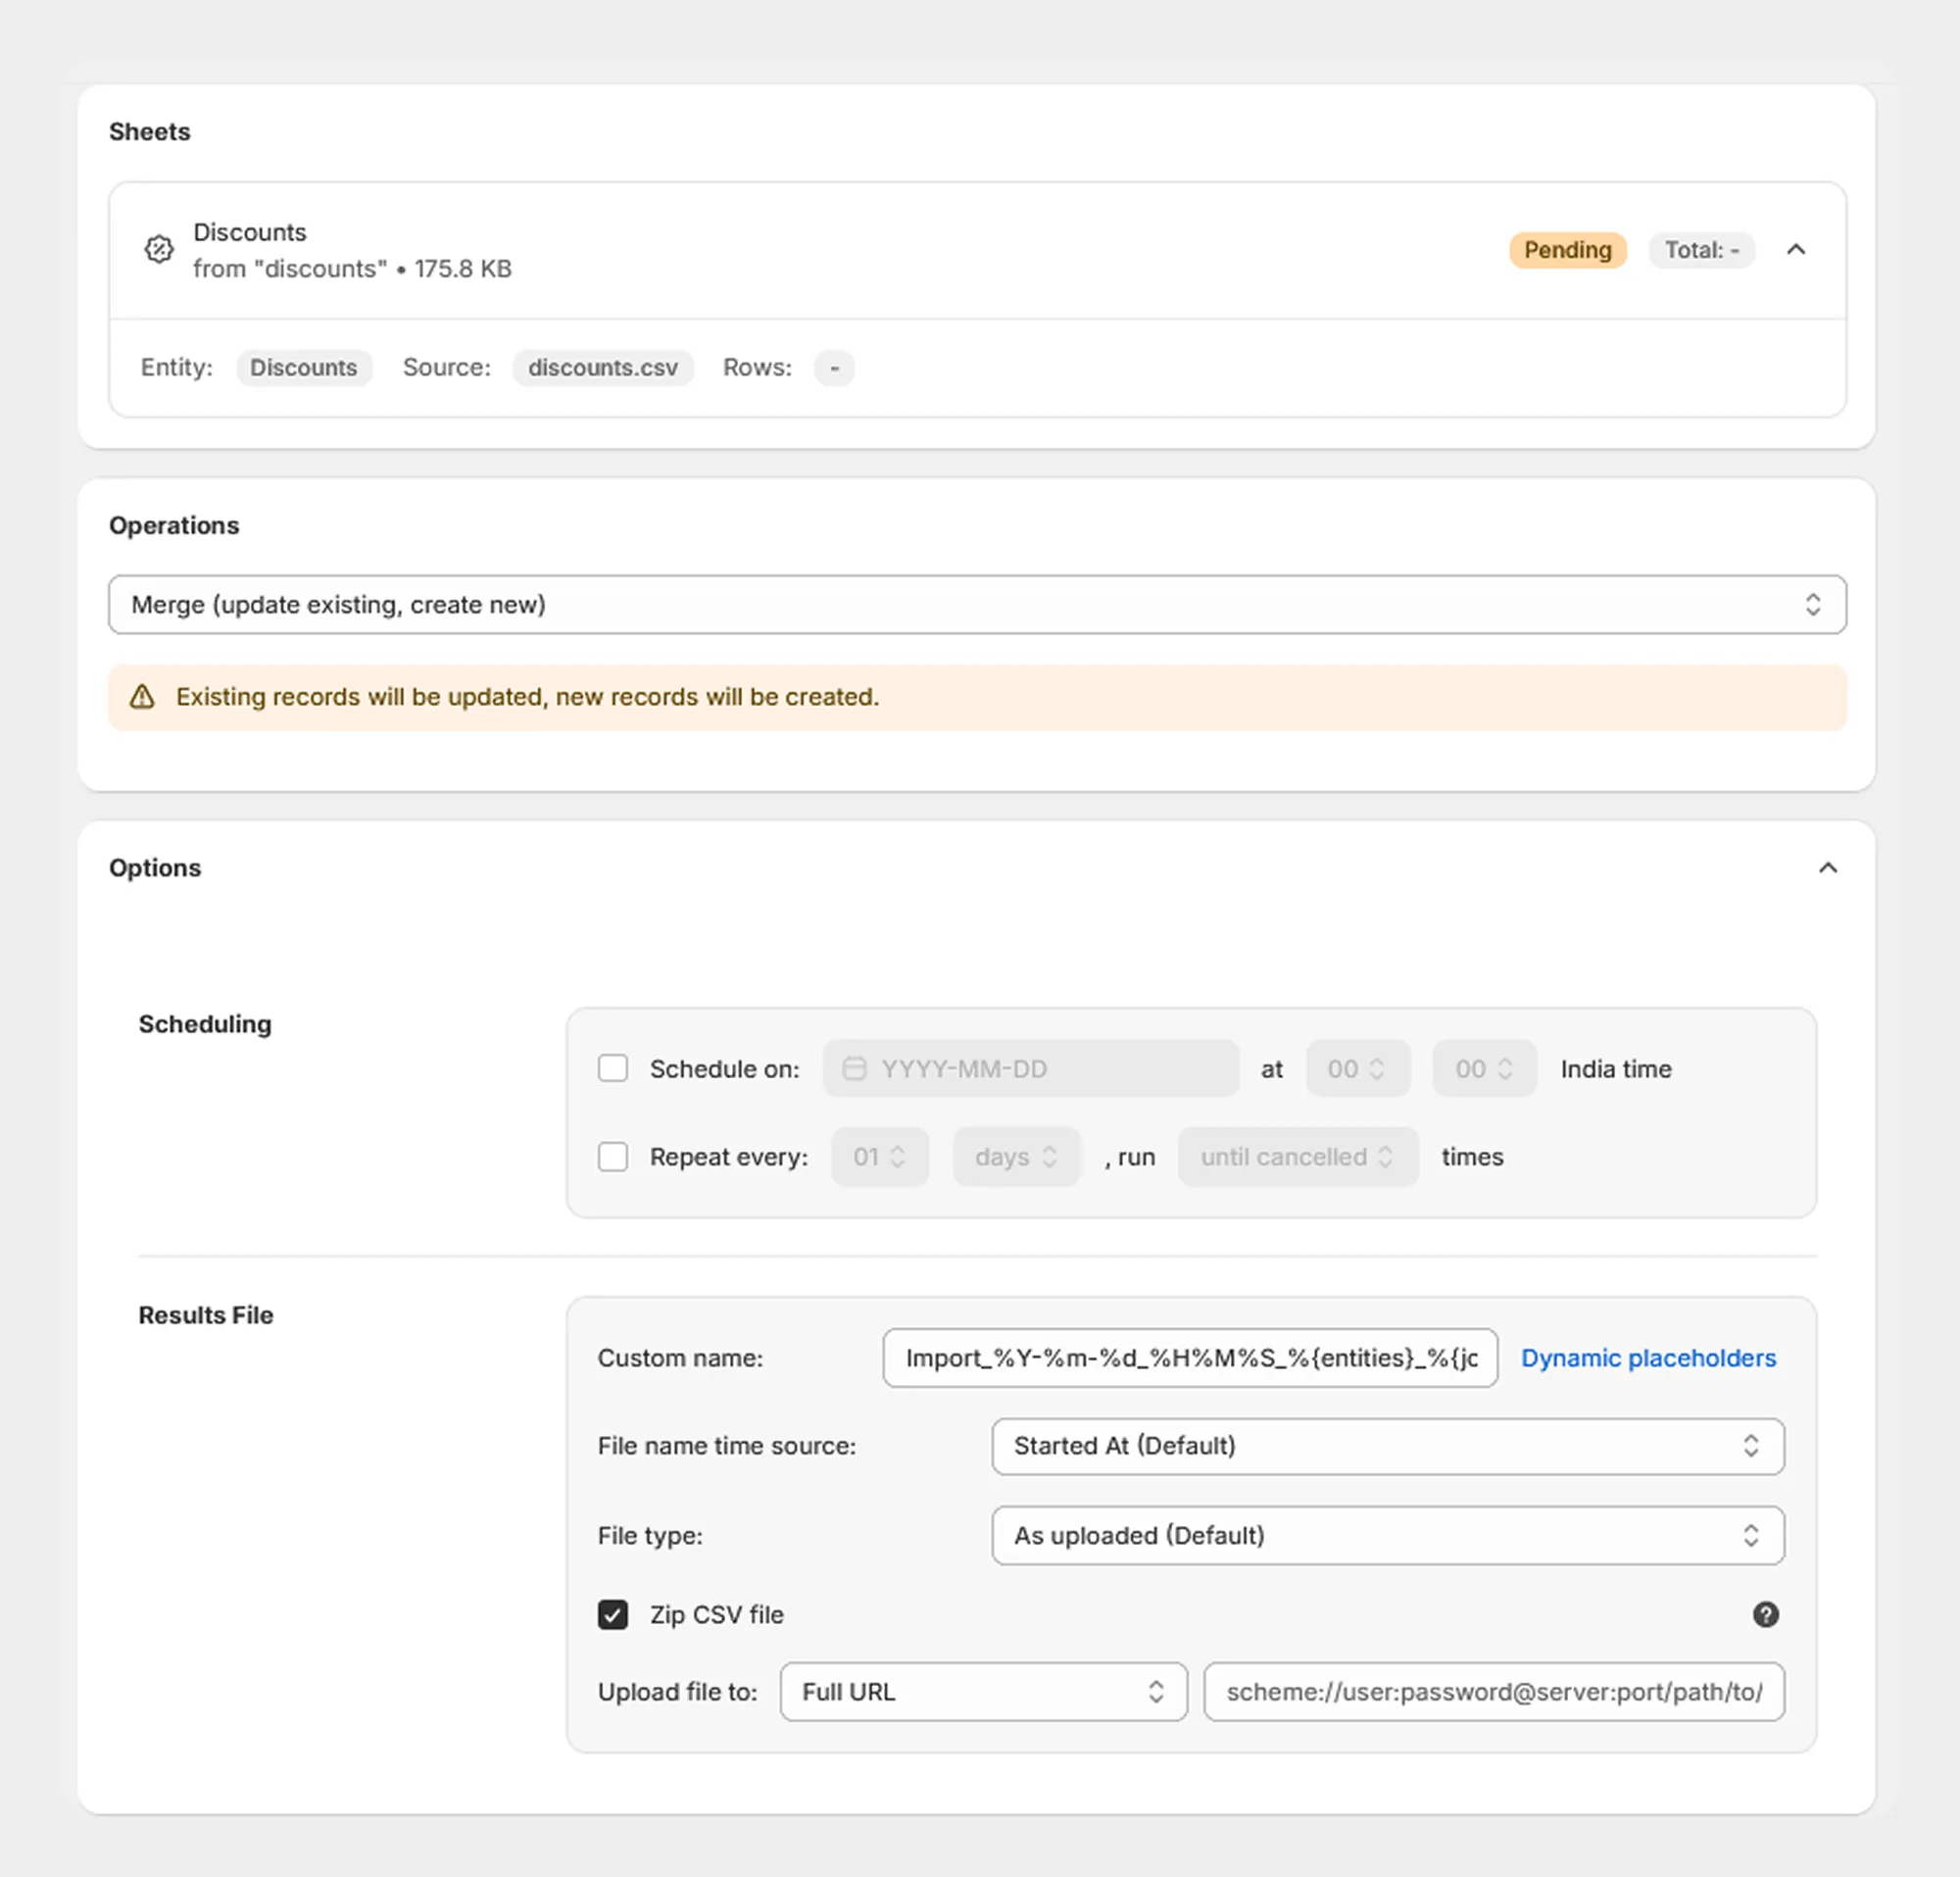
Step 7: Schedule the Discount Import
If scheduling is available for the import operation, you can configure the discount import to run automatically.
You can configure options such as:
-
Schedule date
-
Schedule time
-
Repeat interval
-
Number of repetitions or run until cancelled
This can be useful when discount data is maintained by an external system and needs to be imported regularly.
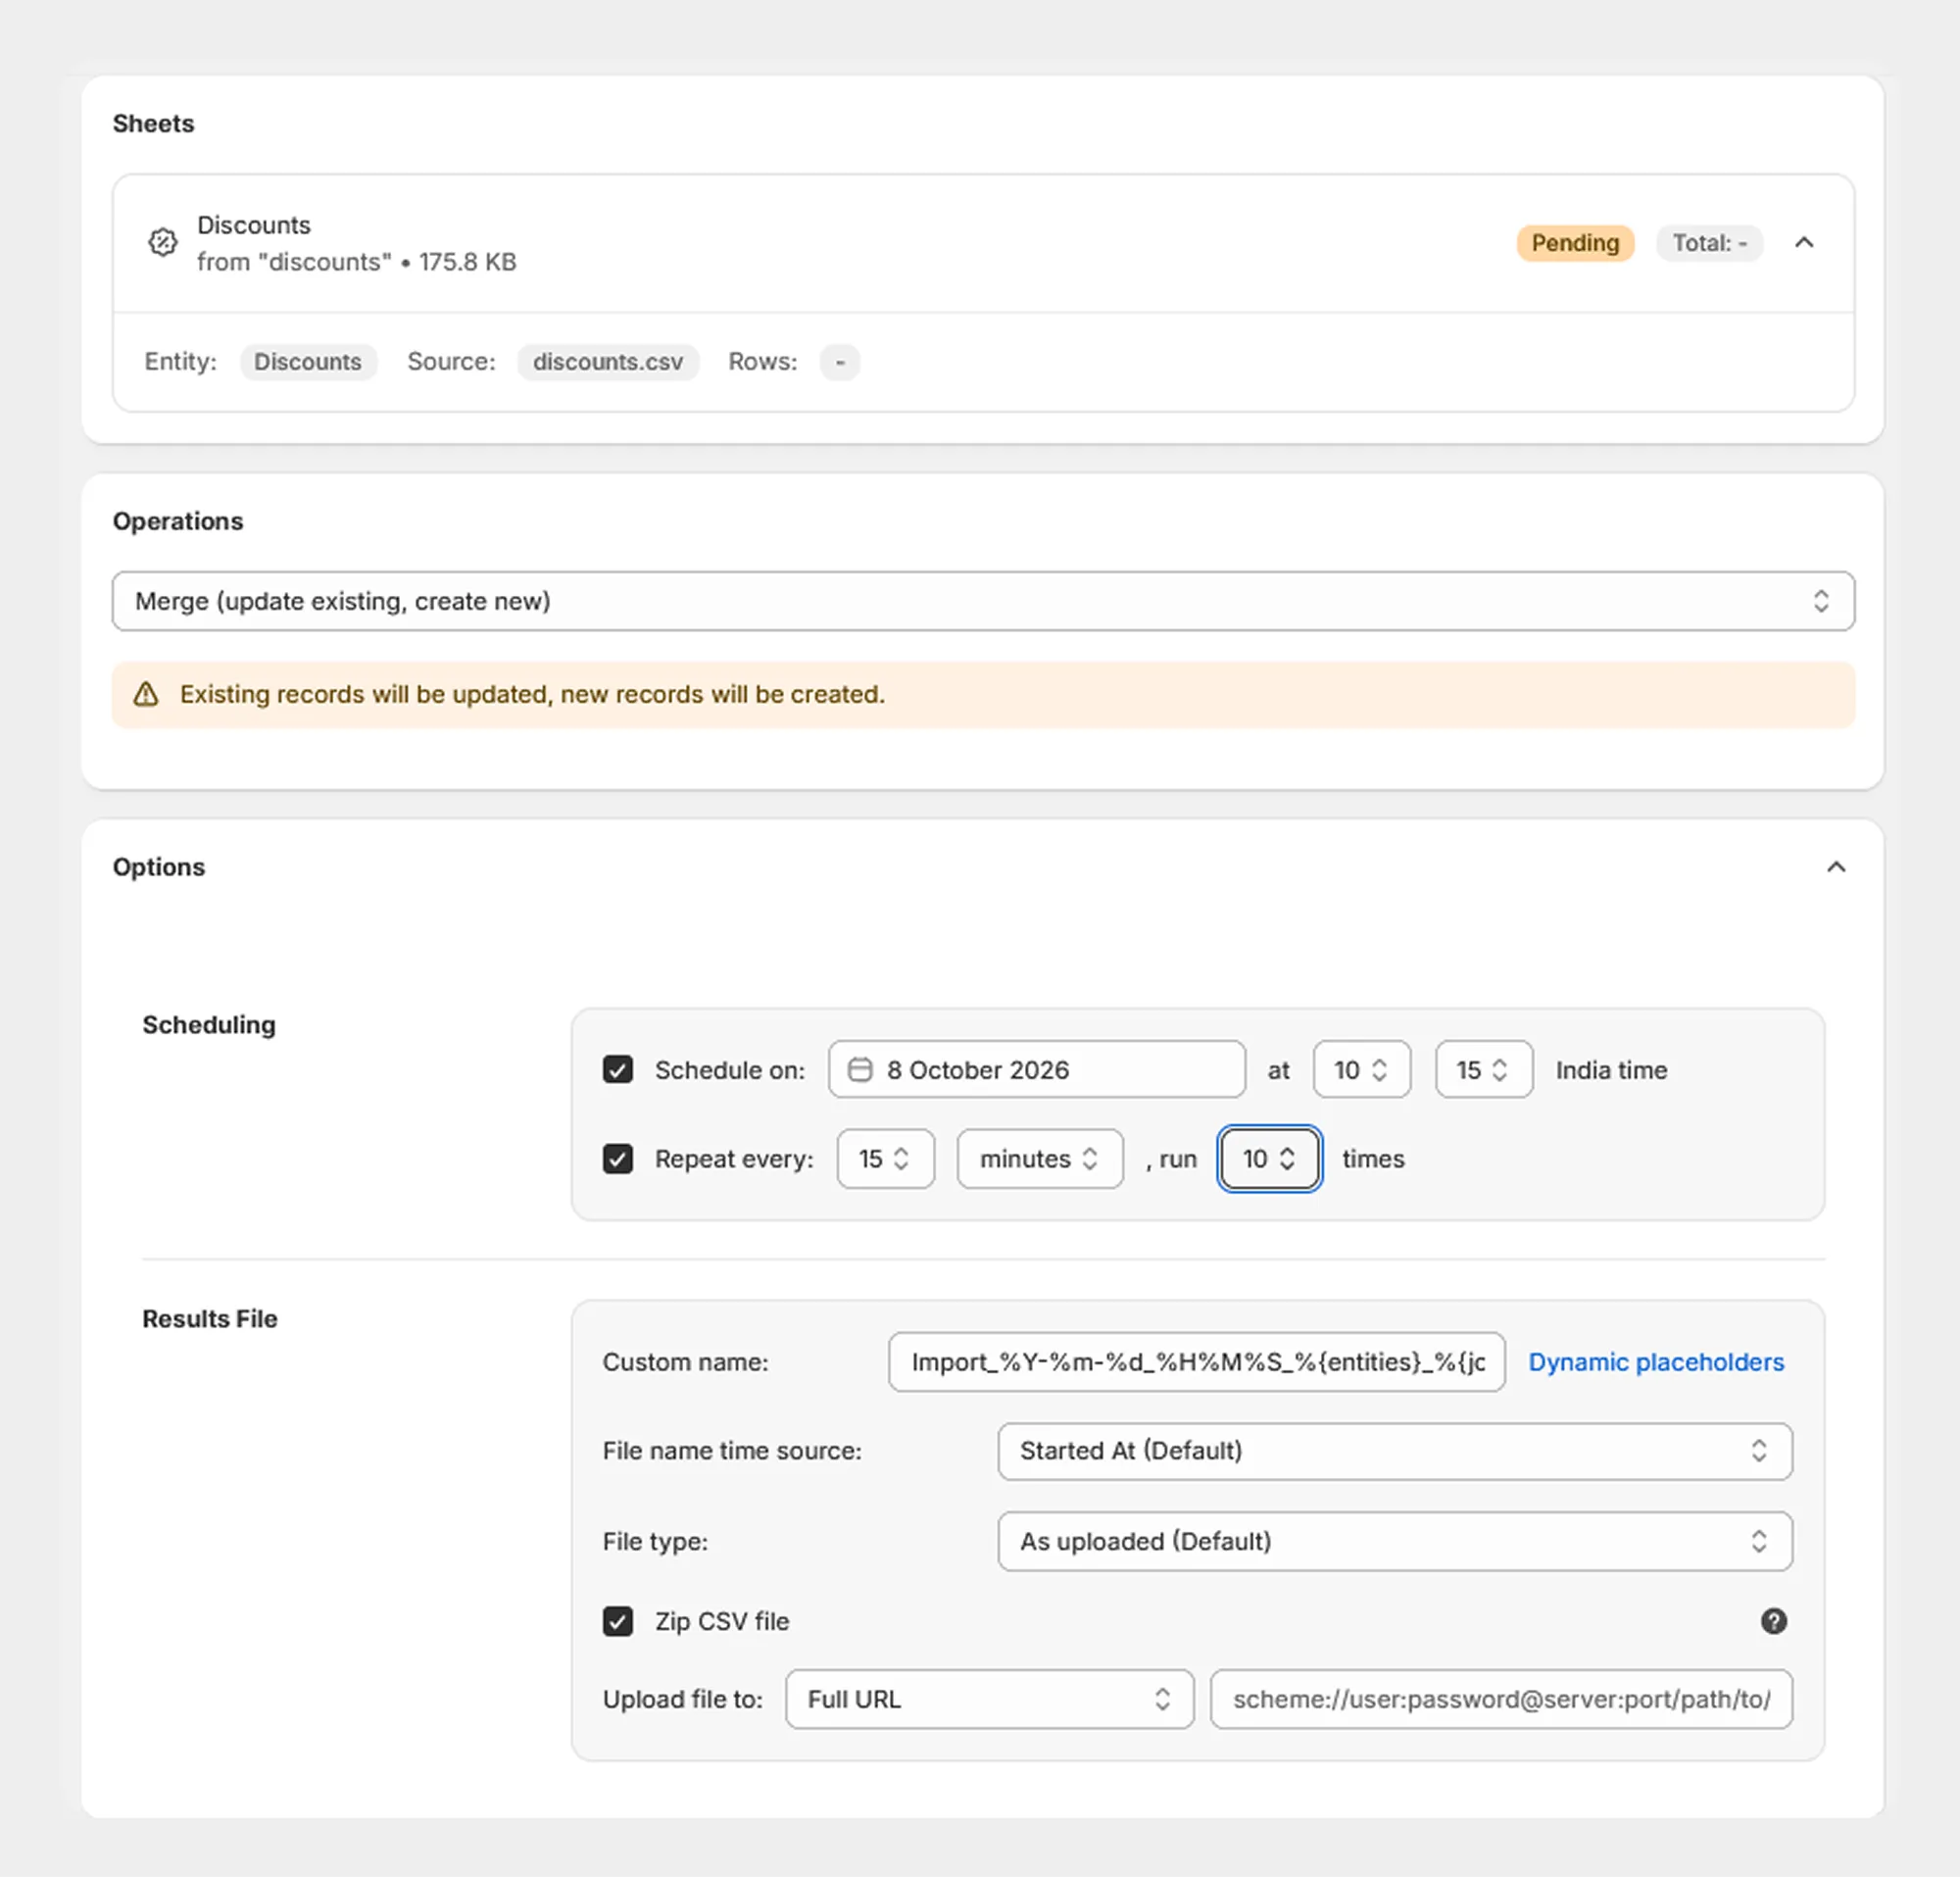
Step 8: Start the Discount Import
After reviewing the file and configuring the required settings:
- Review the import details.
- Confirm the selected operation.
- Review the available options.
- Click Import.
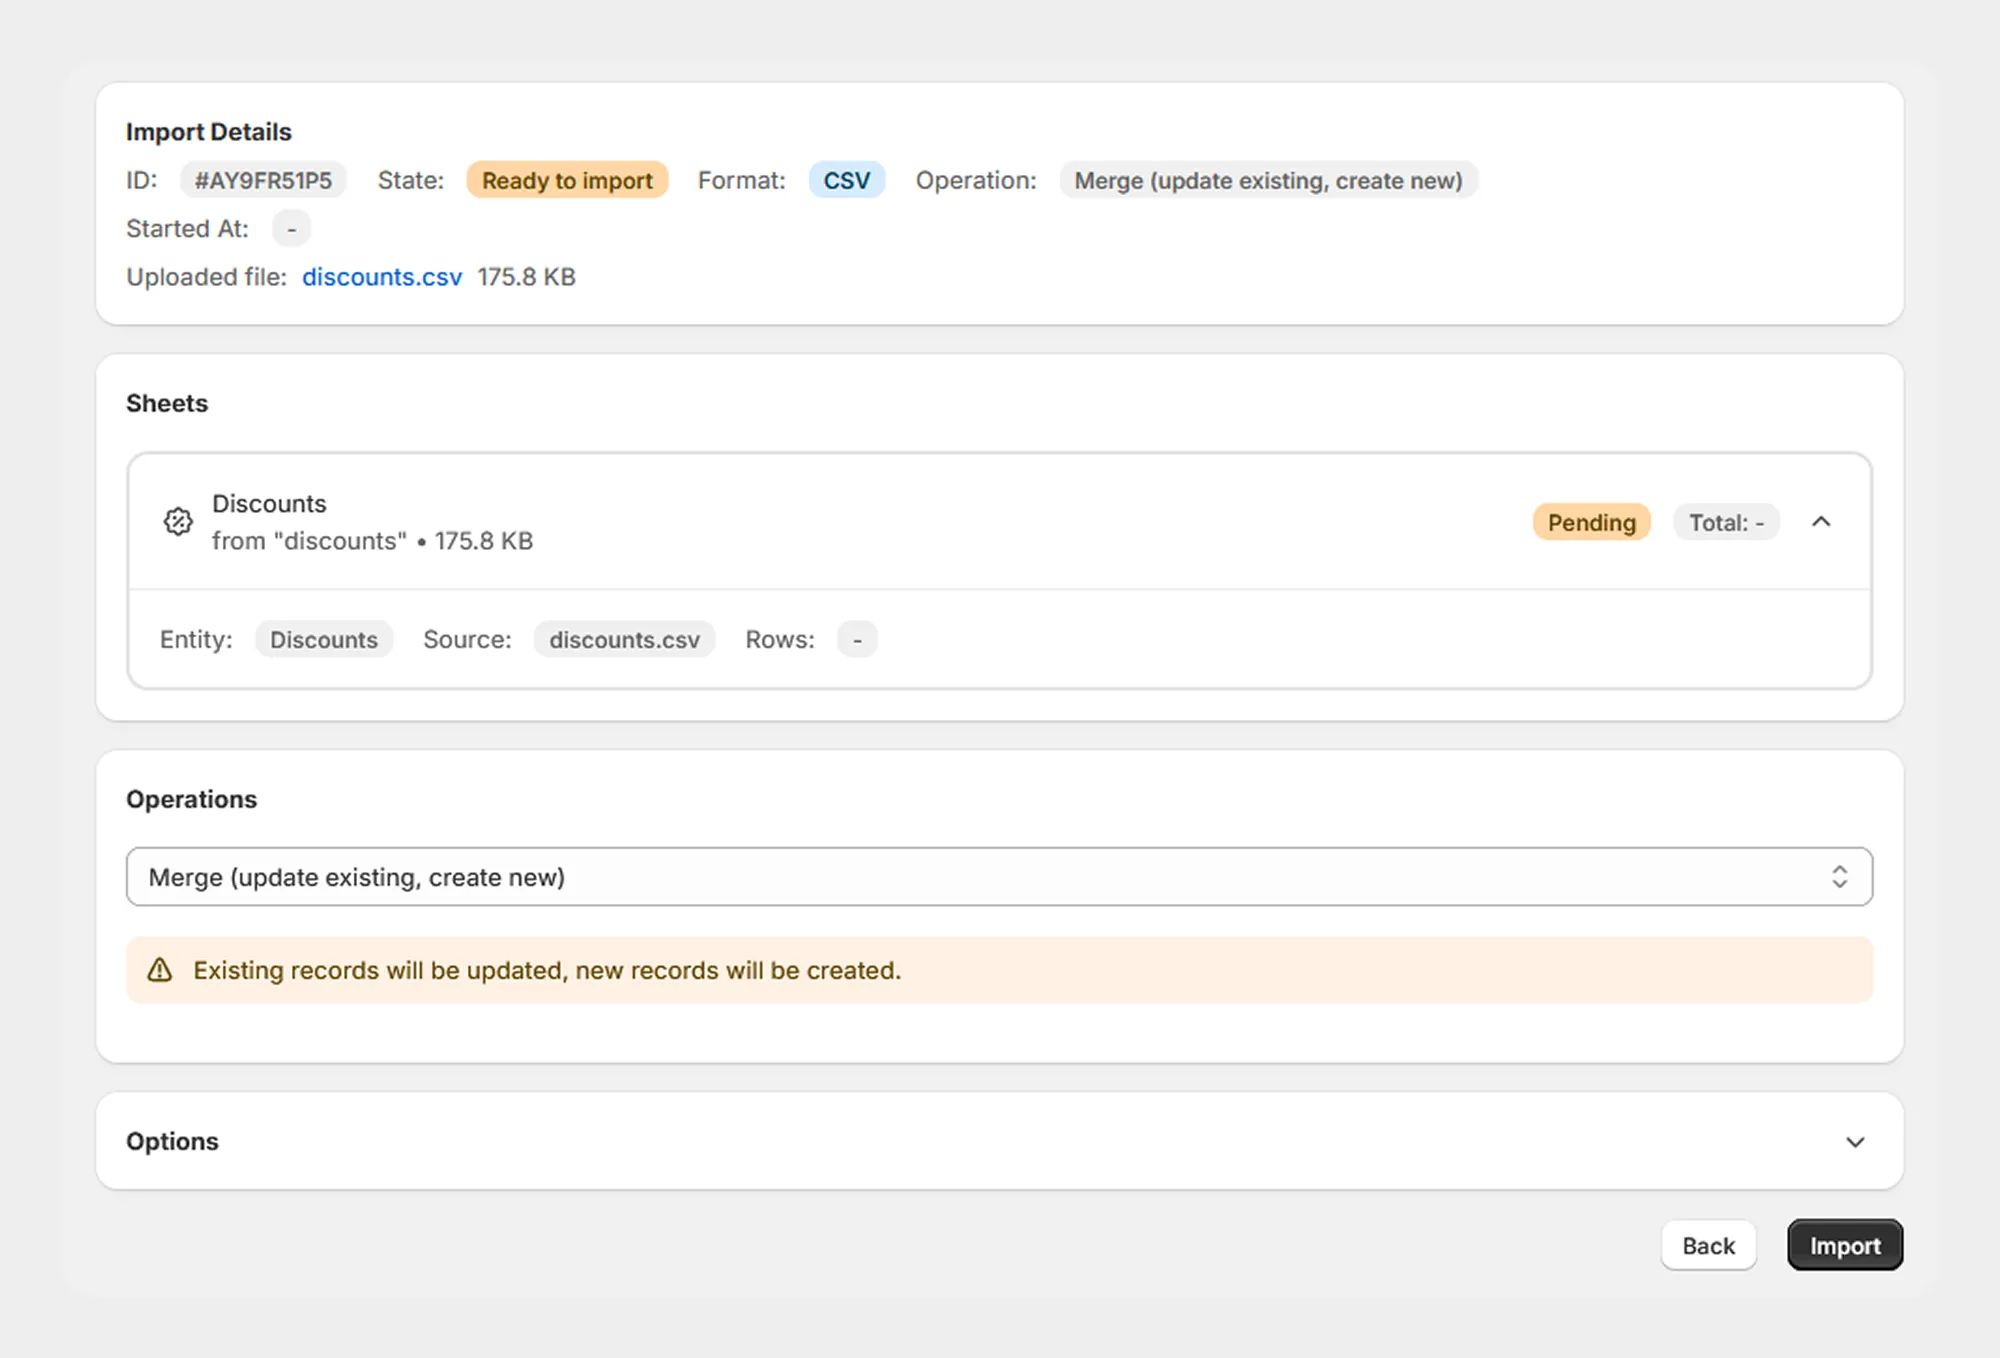
Migrato will begin processing the discount import.
Step 9: Monitor the Import
Migrato processes the discount import as a job and displays the current processing status.
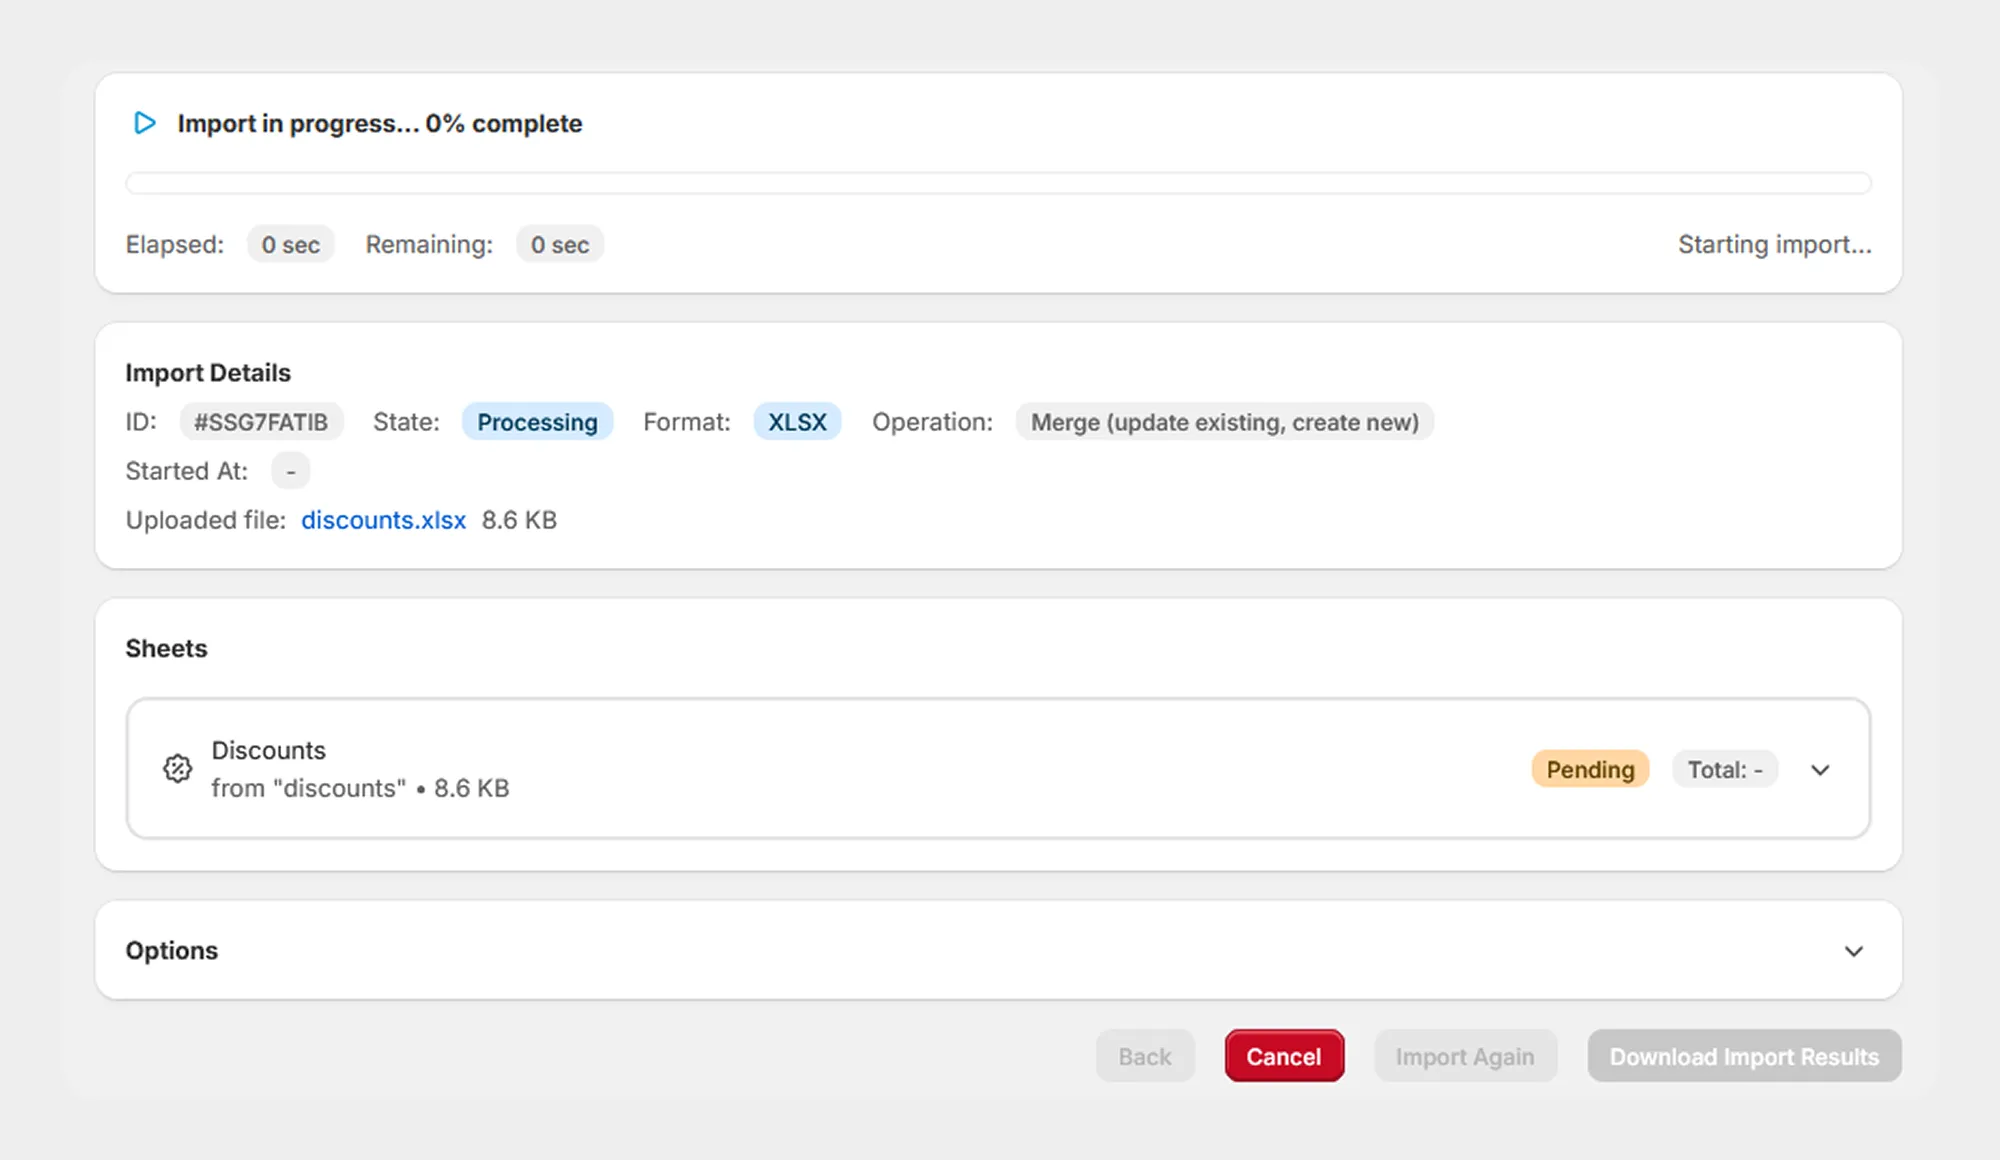
You can use the job information to monitor the progress of the import.
Step 10: Review Import Results
After the import has completed, review the results displayed by Migrato.
The results may include:
-
Import status
-
Total records
-
Successfully processed records
-
Failed records
-
Skipped records
-
Processing duration
-
Error information
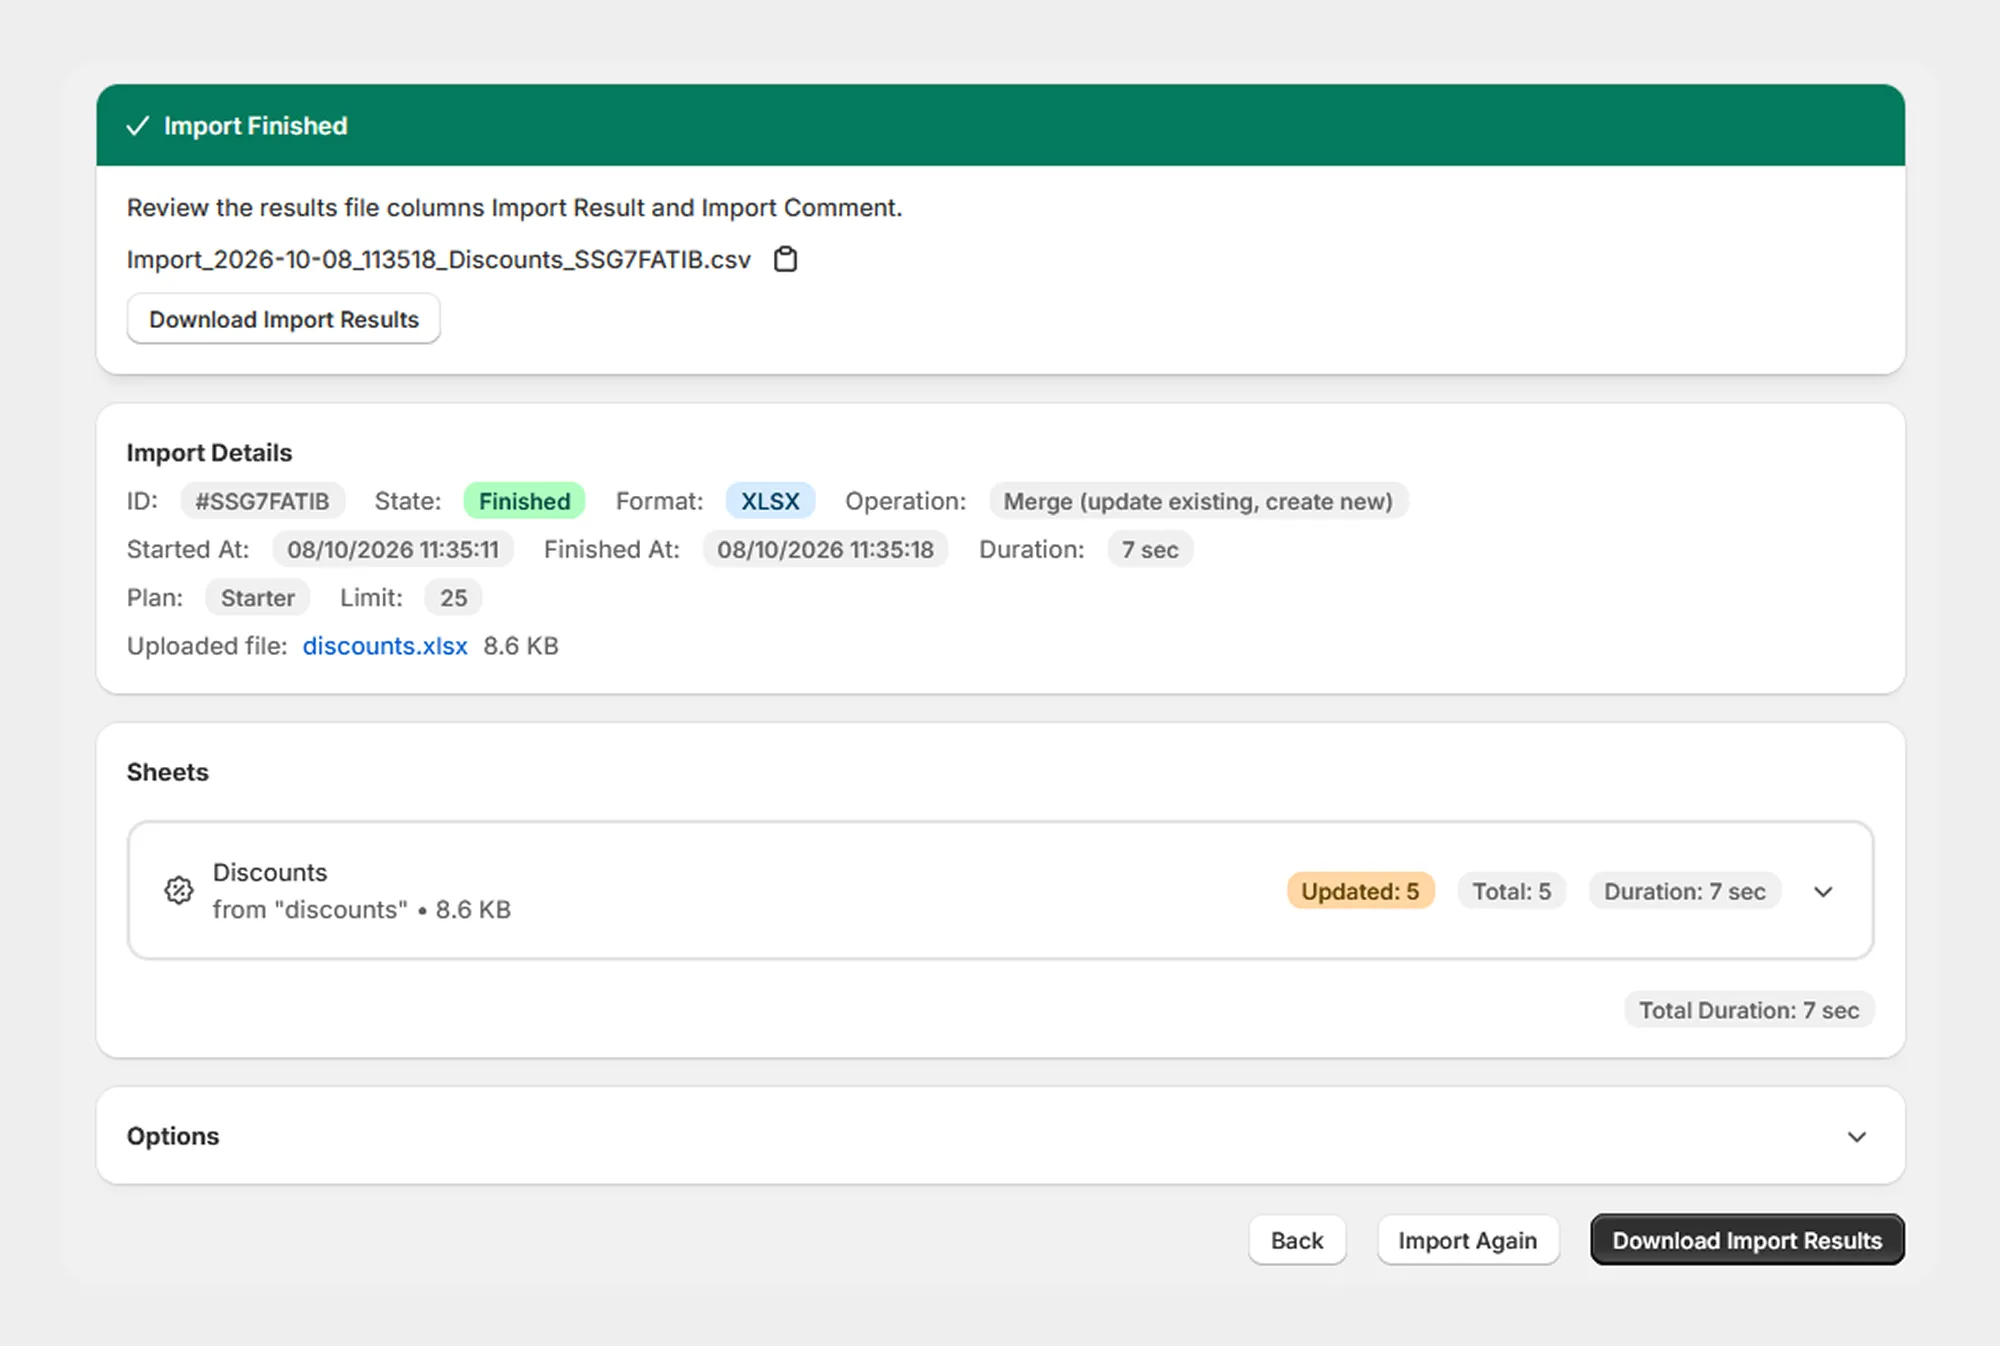
If any records fail, review the reported errors, correct the source data, and run the import again as required.
Export Discounts
Migrato allows you to export Shopify discount data into a downloadable CSV or XLSX file.
Discount exports can be useful for:
-
Discount reporting
-
Campaign management
-
Data analysis
-
Backup
-
Store migration
-
Bulk data processing
-
External system integration
-
Record keeping
Step 1: Open Discount Export
From your Shopify Admin:
- Go to Apps → Migrato.
- Open the Export section.
- Select Discounts.
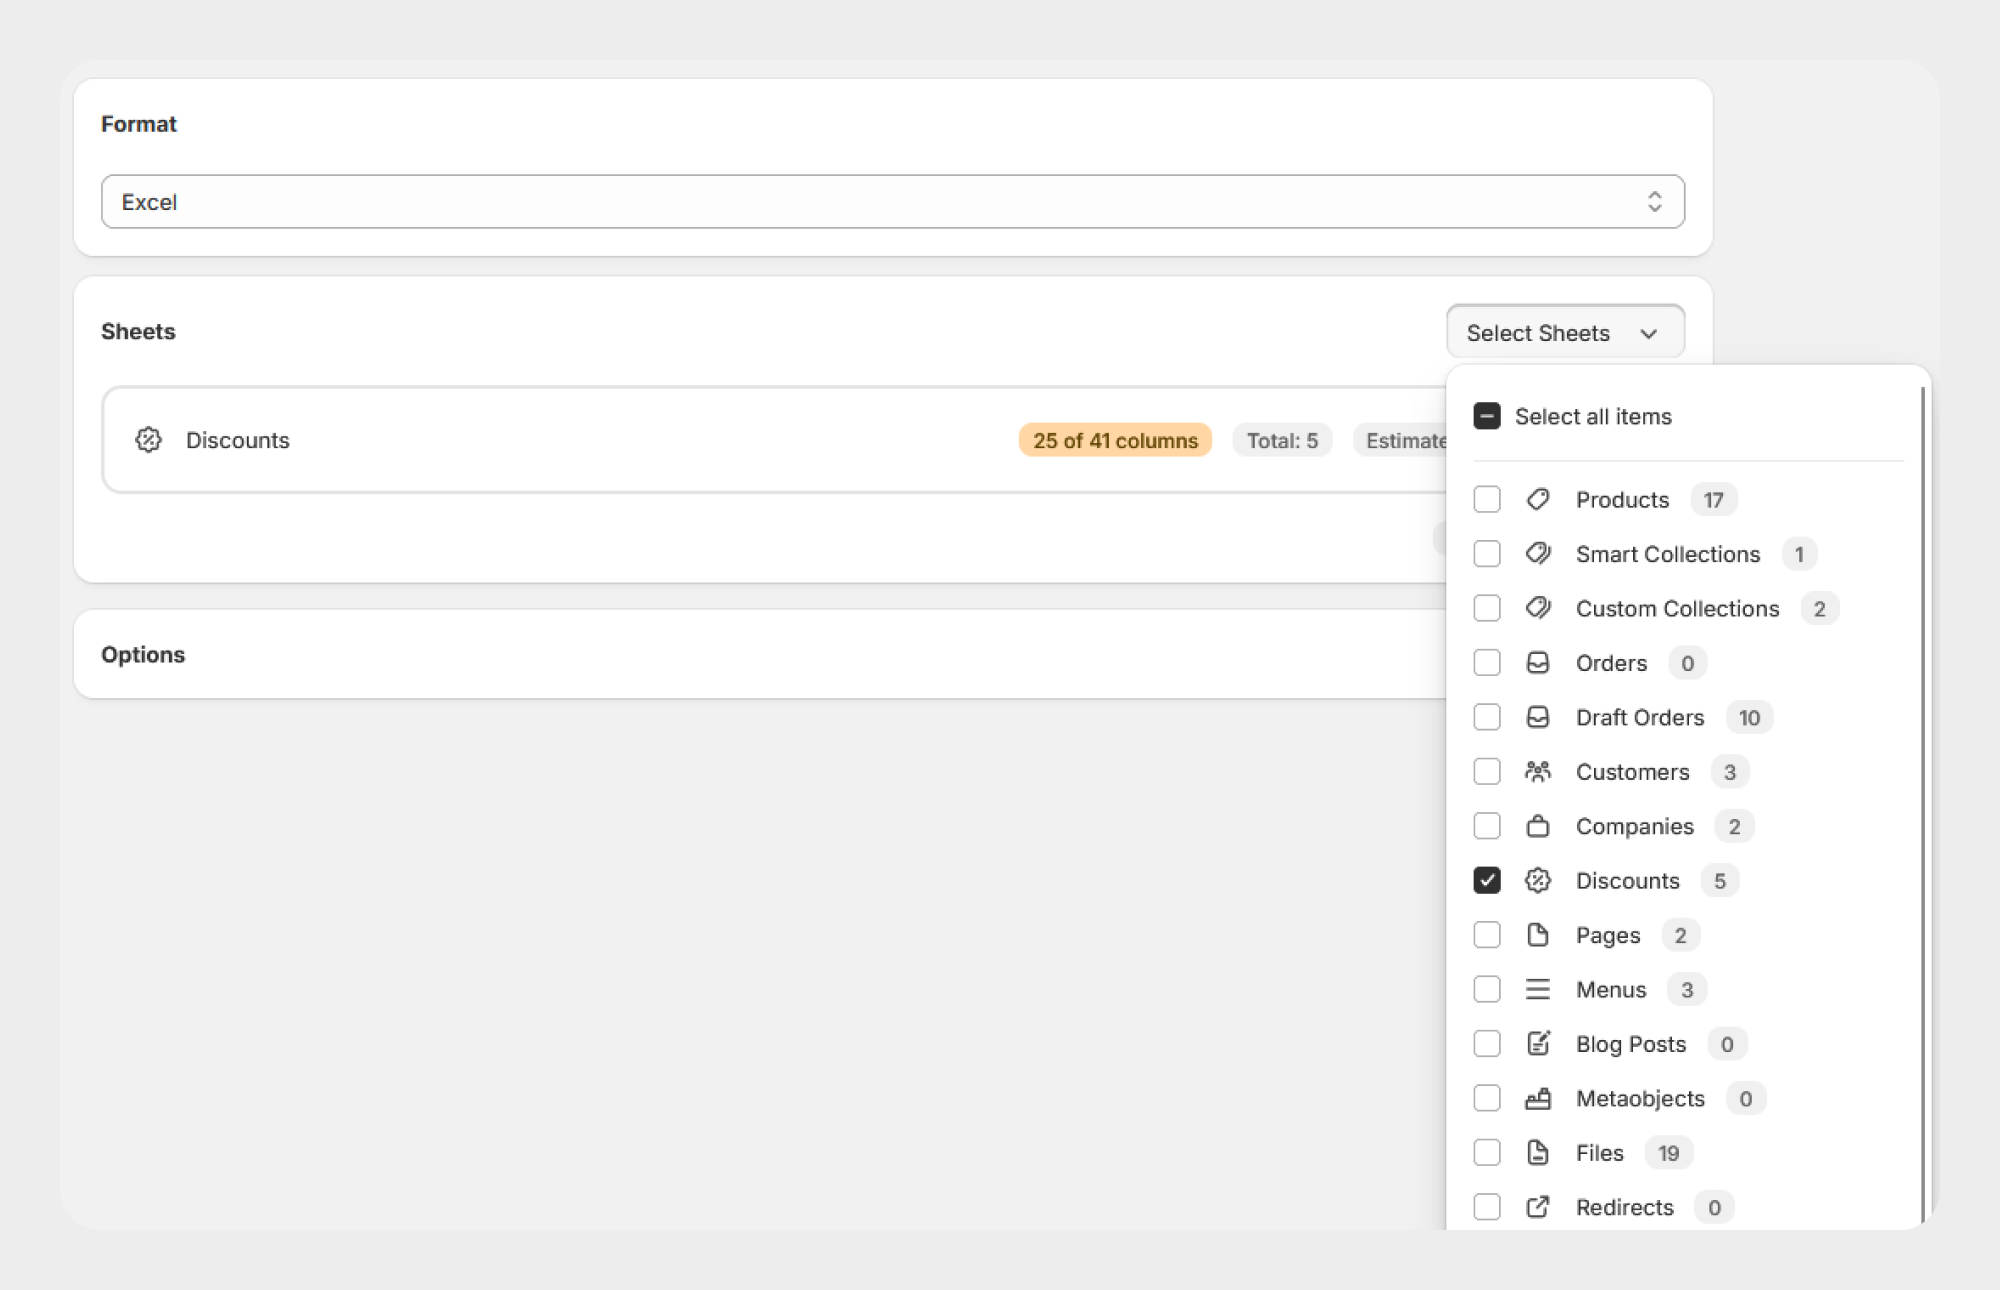
Step 2: Select Discount Fields
Select the discount fields you want to include in the export.
Migrato organizes the available discount fields into logical groups to make it easier to select the required information.
The available groups include:
-
Basic Columns
-
Type-Specific
-
Eligibility
-
Purchase Type
-
Combinations
-
Shareable Links
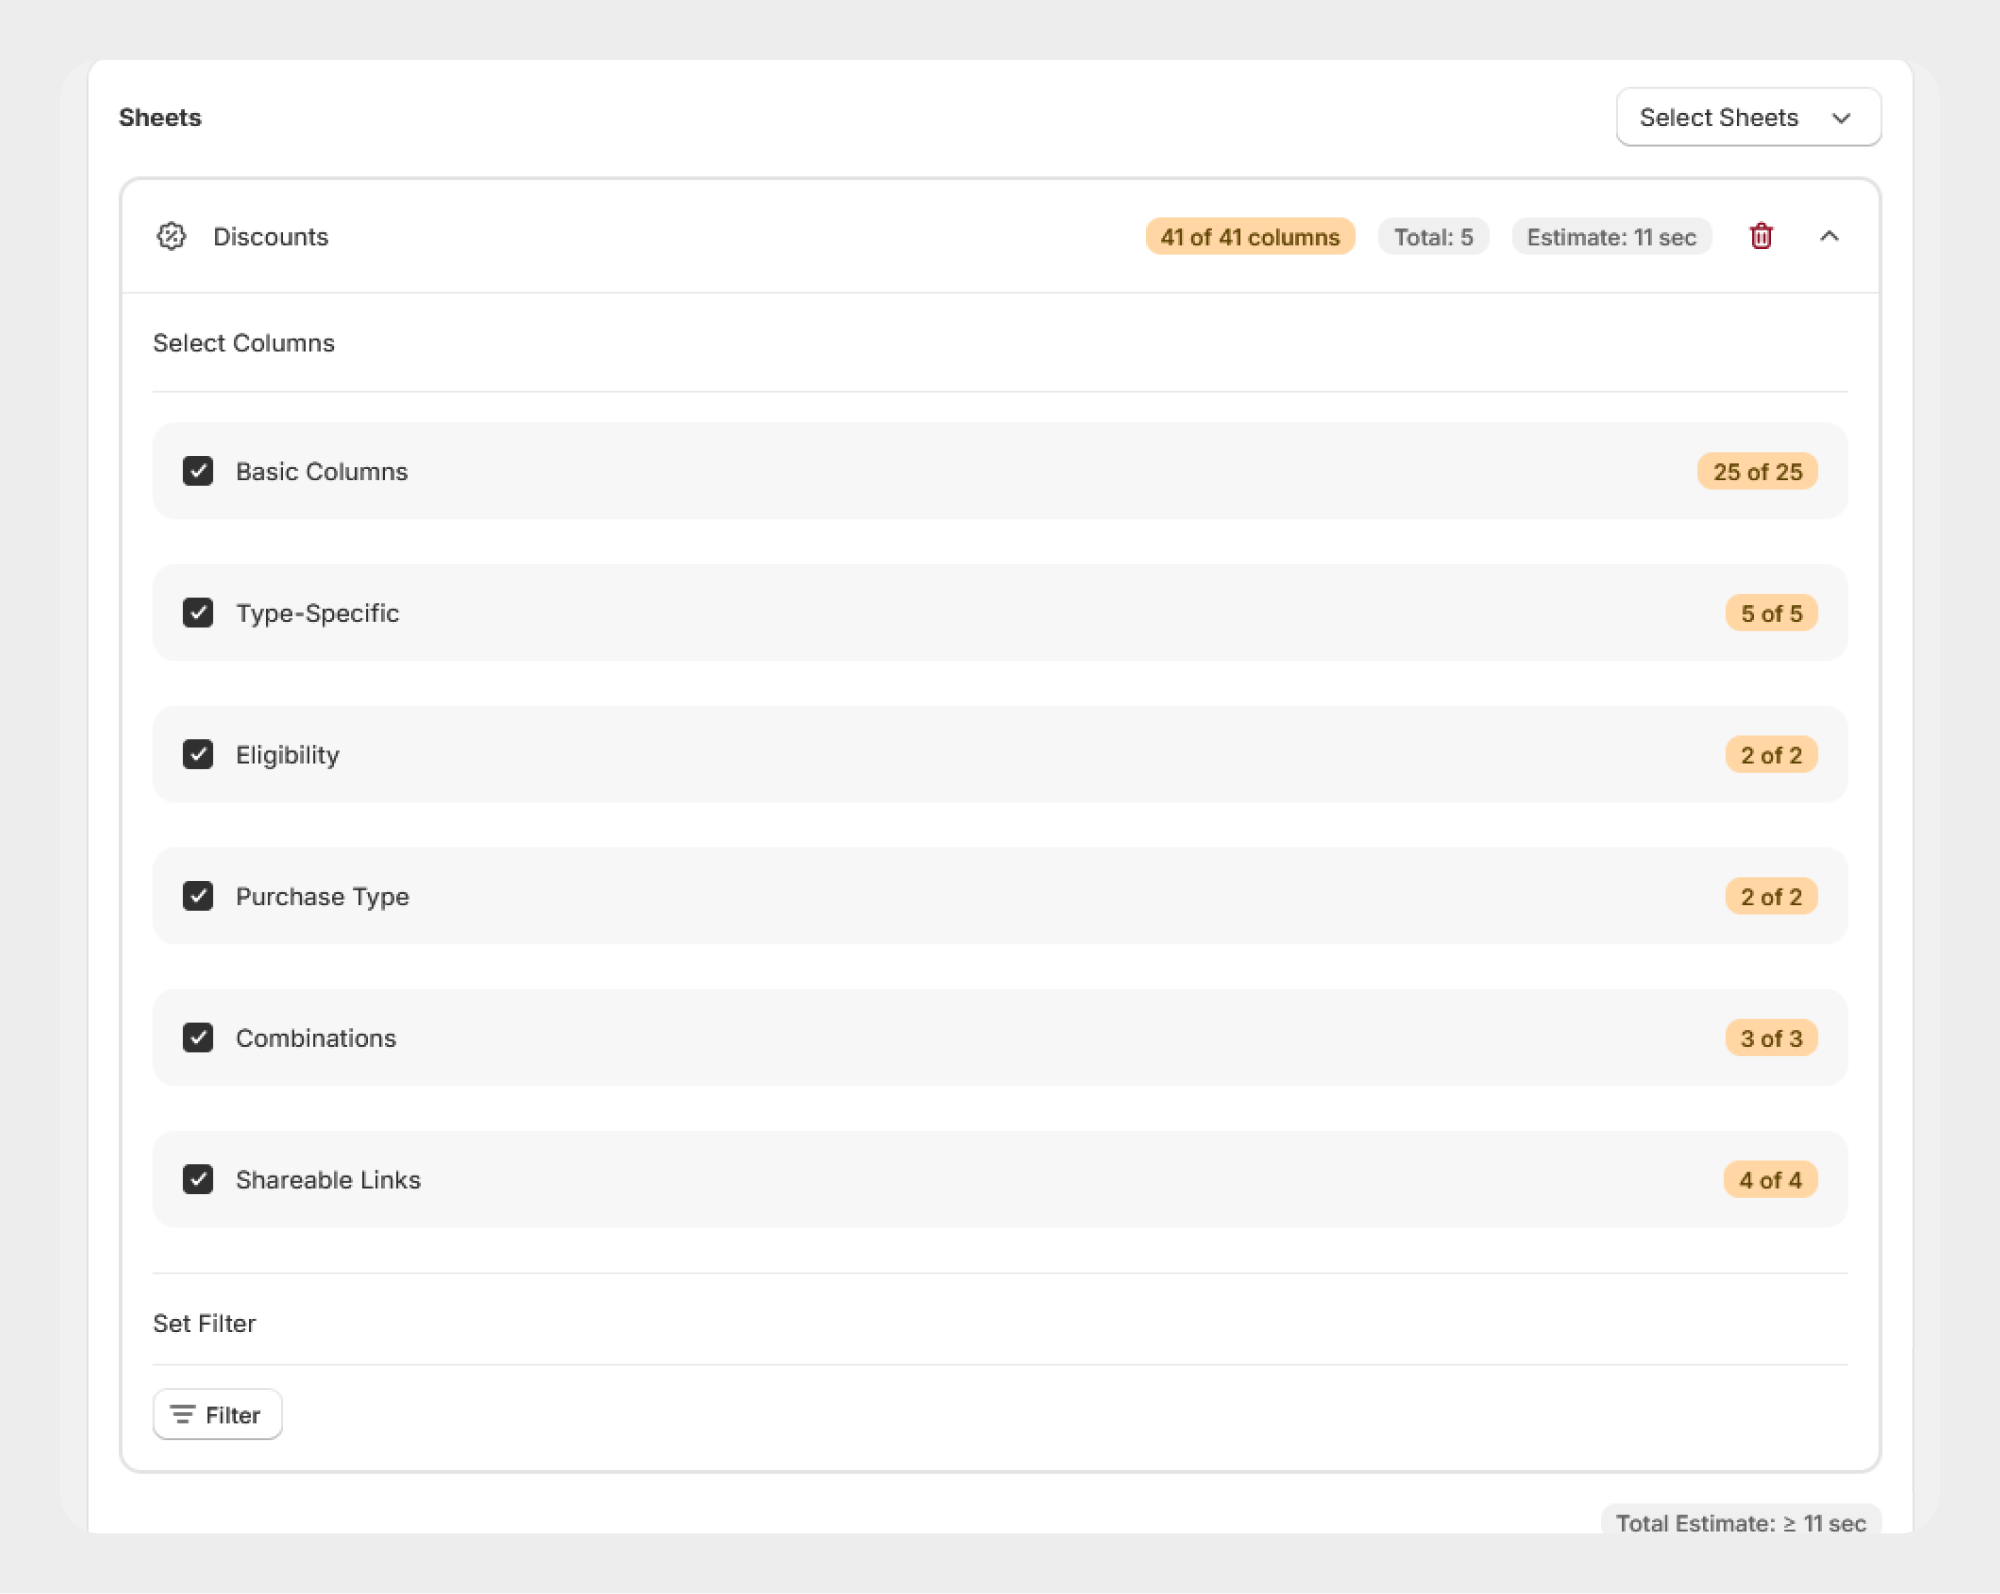
You can select the fields required for your reporting, migration, or data-management requirements.
Step 3: Apply Discount Filters
If you only need specific discounts, use the Filters section to narrow the export.
Migrato currently provides filters for:
-
ID
-
Title
-
Tags
-
Status
-
Method
-
Starts At
-
Ends At
-
Updated At
-
Created At
-
Total Used Count
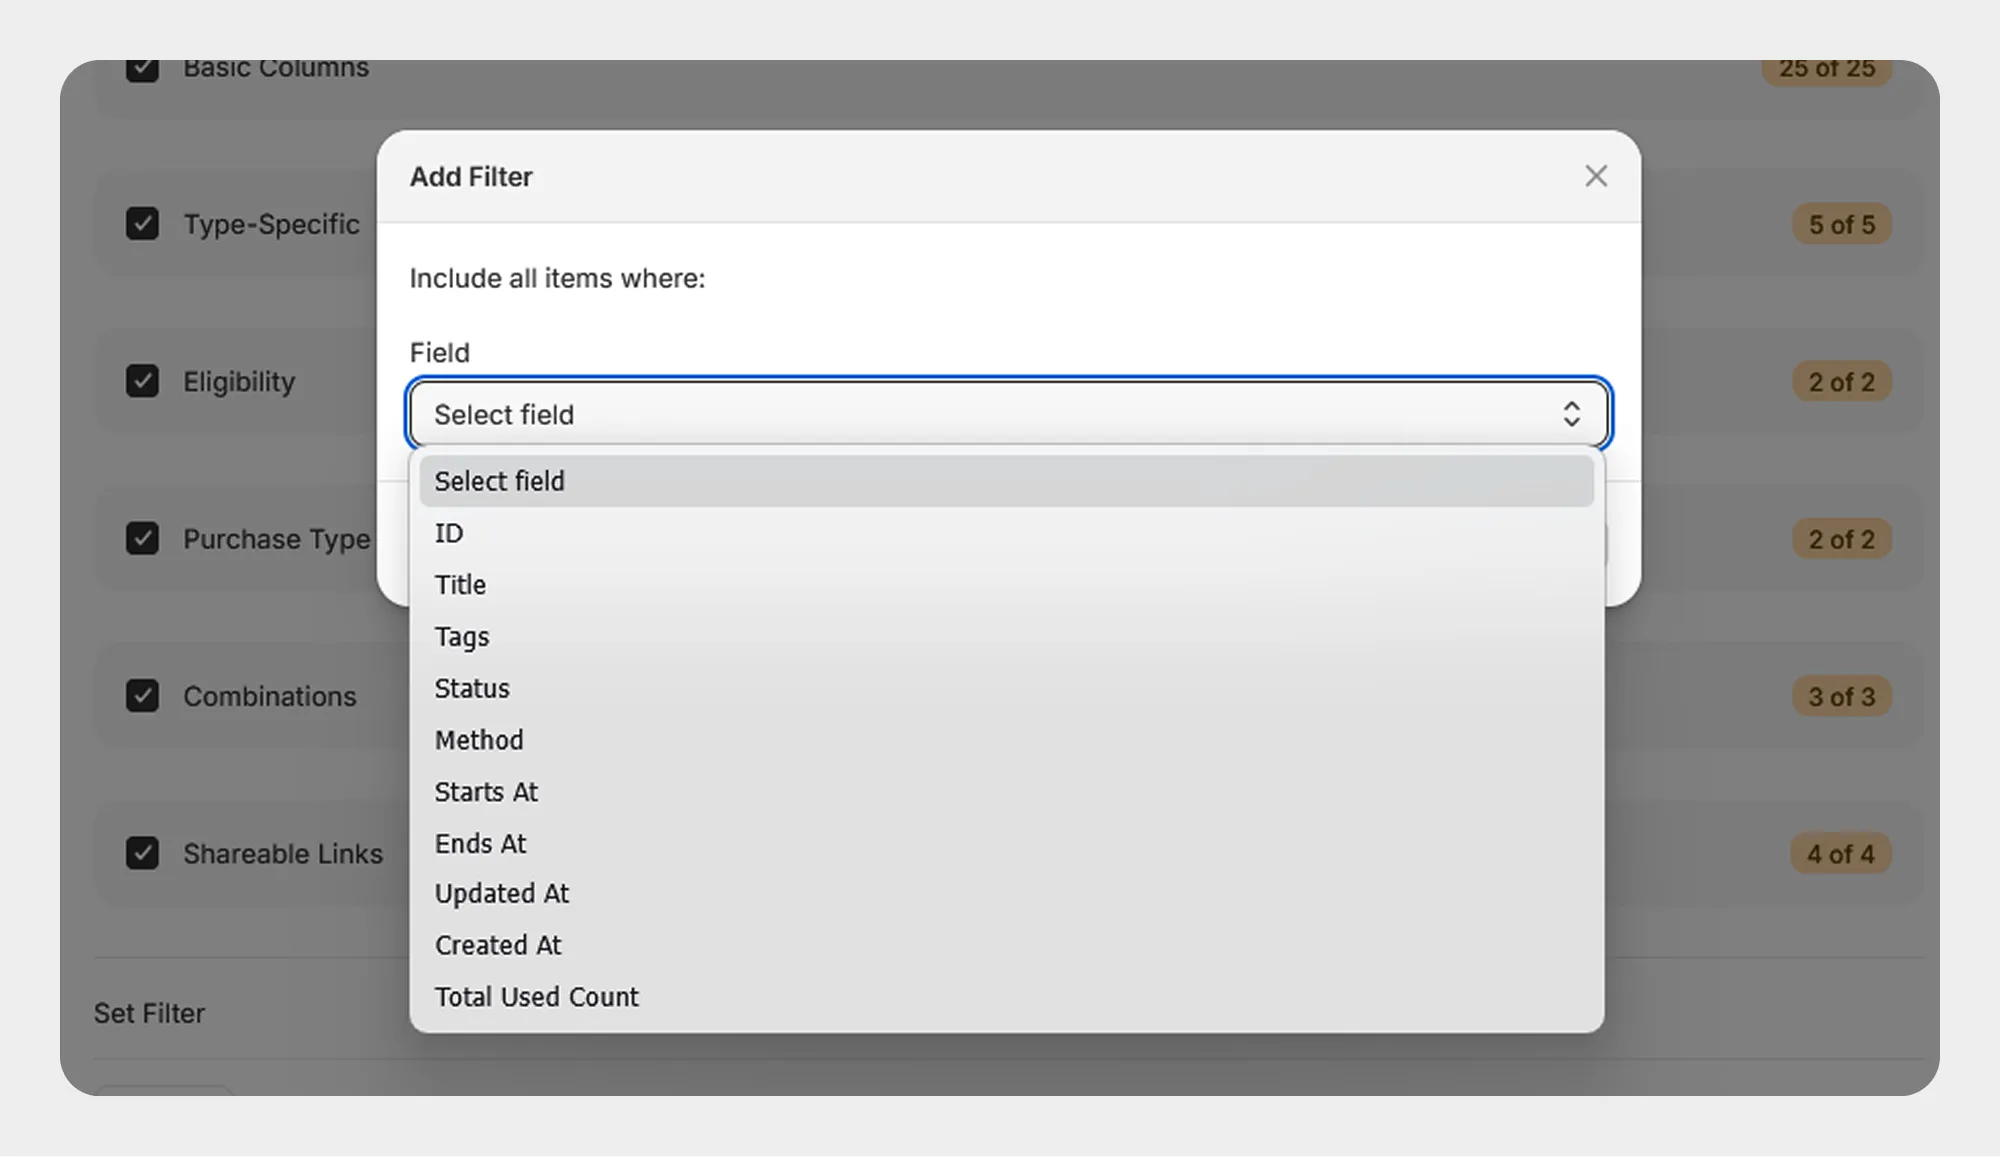
For complete information about the available filters and conditions, see 7.3 Filter Discounts.
Step 4: Start the Export
After selecting the required discount fields and filters:
- Review the selected fields.
- Review the applied filters.
- Confirm the export settings.
- Start the export.
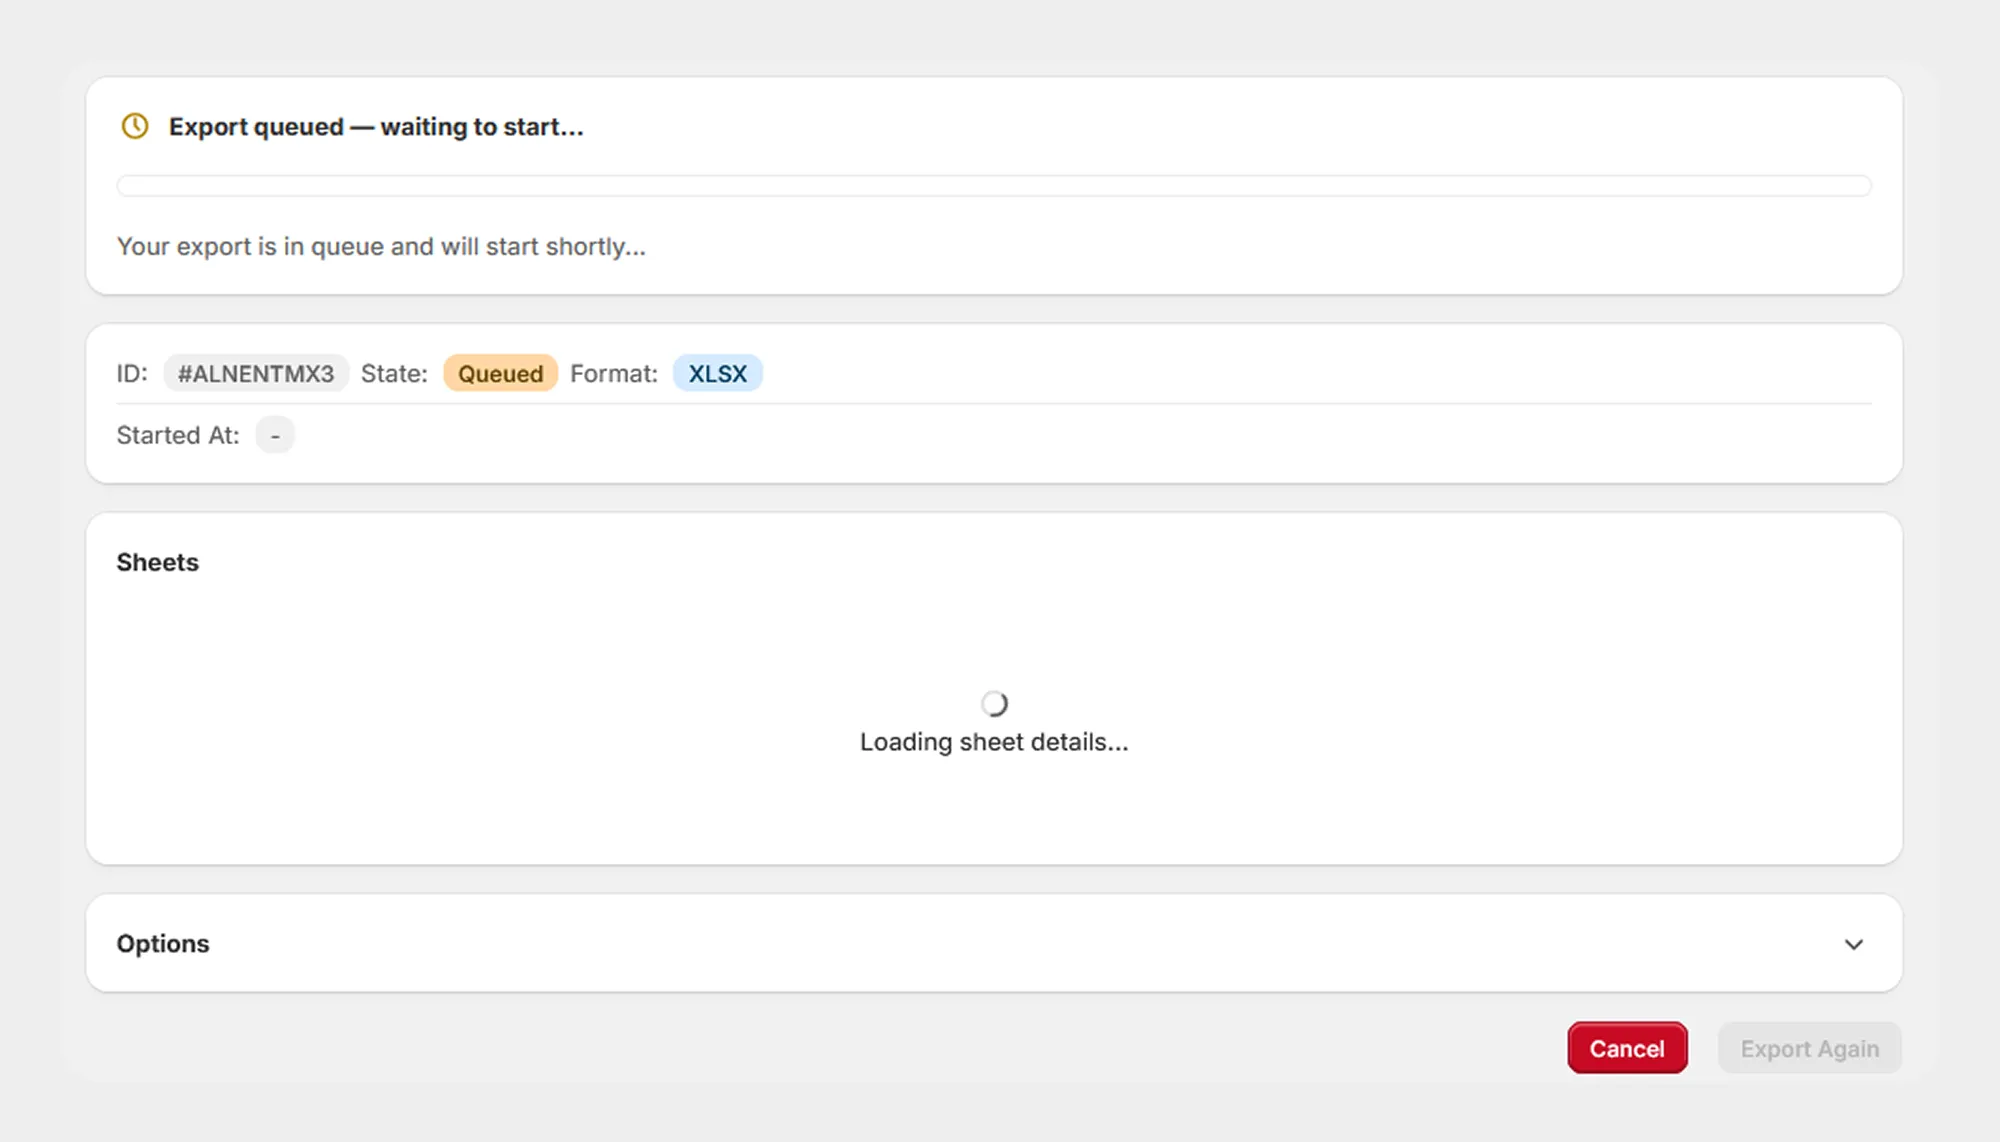
Migrato processes the selected discount data and creates the export file.
Step 5: Review the Export Result
After the export is completed, Migrato displays the export result.
The result can include information such as:
-
Export status
-
Exported file name
-
File format
-
Number of records exported
-
Processing duration
-
Selected fields
-
Applied filters
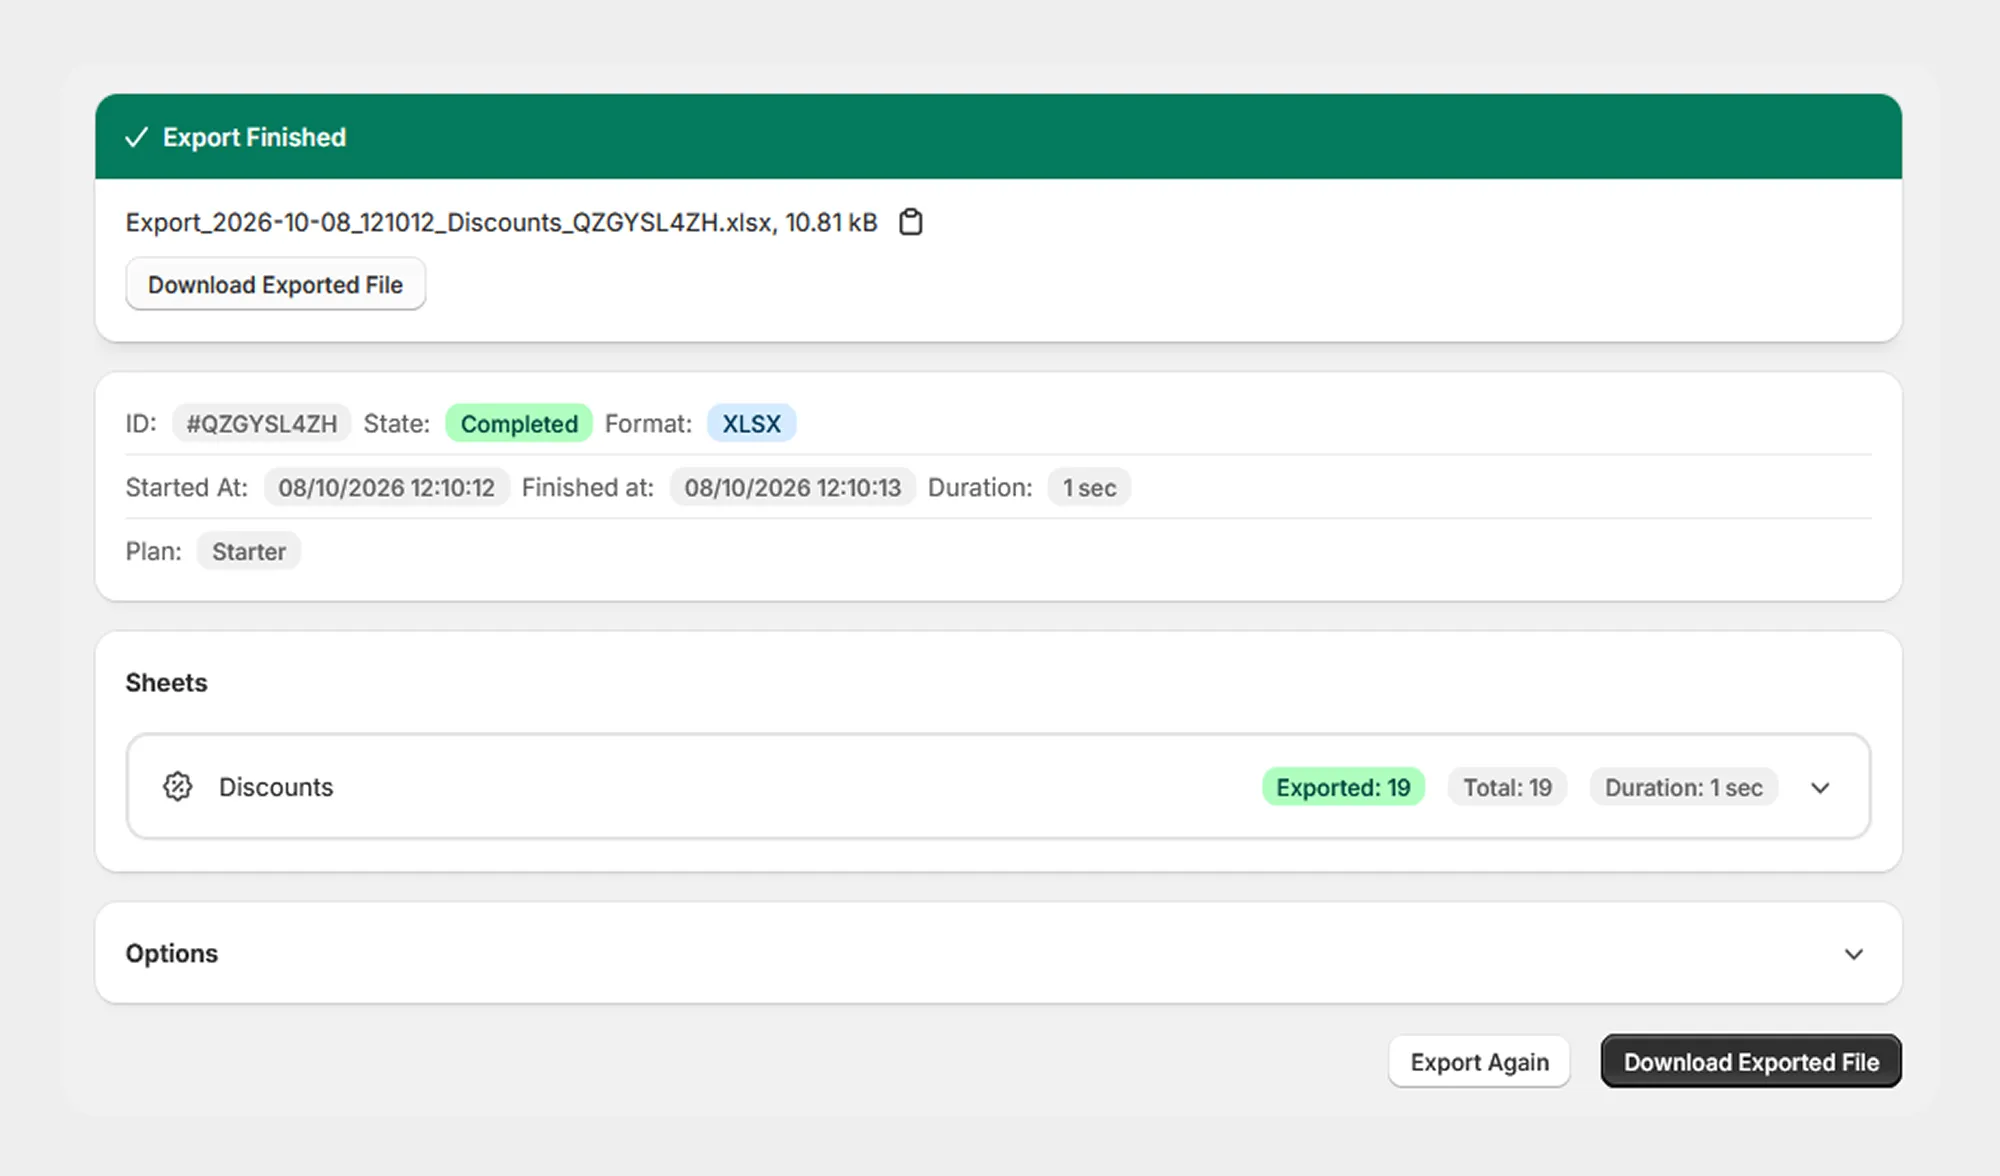
You can download the generated CSV/XLSX file from the completed export screen.
Supported Discount Data
Migrato's Discount template contains 40 supported columns organized into six logical groups.
| Group | Number of Columns |
|---|---|
| Basic Columns | 24 |
| Type-Specific | 5 |
| Eligibility | 2 |
| Purchase Type | 2 |
| Combinations | 3 |
| Shareable Links | 4 |
| Total | 40 |
 Free plan forever