 Our first app, Migrato, is live on the Shopify App Store

Migrate Shopify Content
Move pages, blogs, menus, redirects, metaobjects, files and collections between Shopify stores. 7 min read
 Updated 13 October 2026
 Applies to Migrato on all plans
Supported content
Migrato supports migration of supported Shopify content and store data using the available import/export functionality.
Content migration can be used when moving content between Shopify stores or when rebuilding a Shopify store while retaining existing content.
Depending on the current Migrato implementation, supported content can include entities such as:
-
 Pages
-
Blogs
-
Blog Posts
-
Menus
-
Redirects
-
Metaobjects
-
Files
-
Collections
-
Other supported Shopify content
Step 1: Identify the content to migrate
Before starting, identify which Shopify content needs to be transferred.
For example:
| Content | Migration use case |
|---|---|
| Pages | Move informational and static store pages. |
| Blogs | Transfer blog configuration and information. |
| Blog Posts | Move existing blog articles. |
| Menus | Transfer navigation menu data. |
| Redirects | Preserve URL redirect information. |
| Metaobjects | Transfer supported structured content. |
| Files | Migrate supported Shopify files. |
| Collections | Transfer supported collection information. |
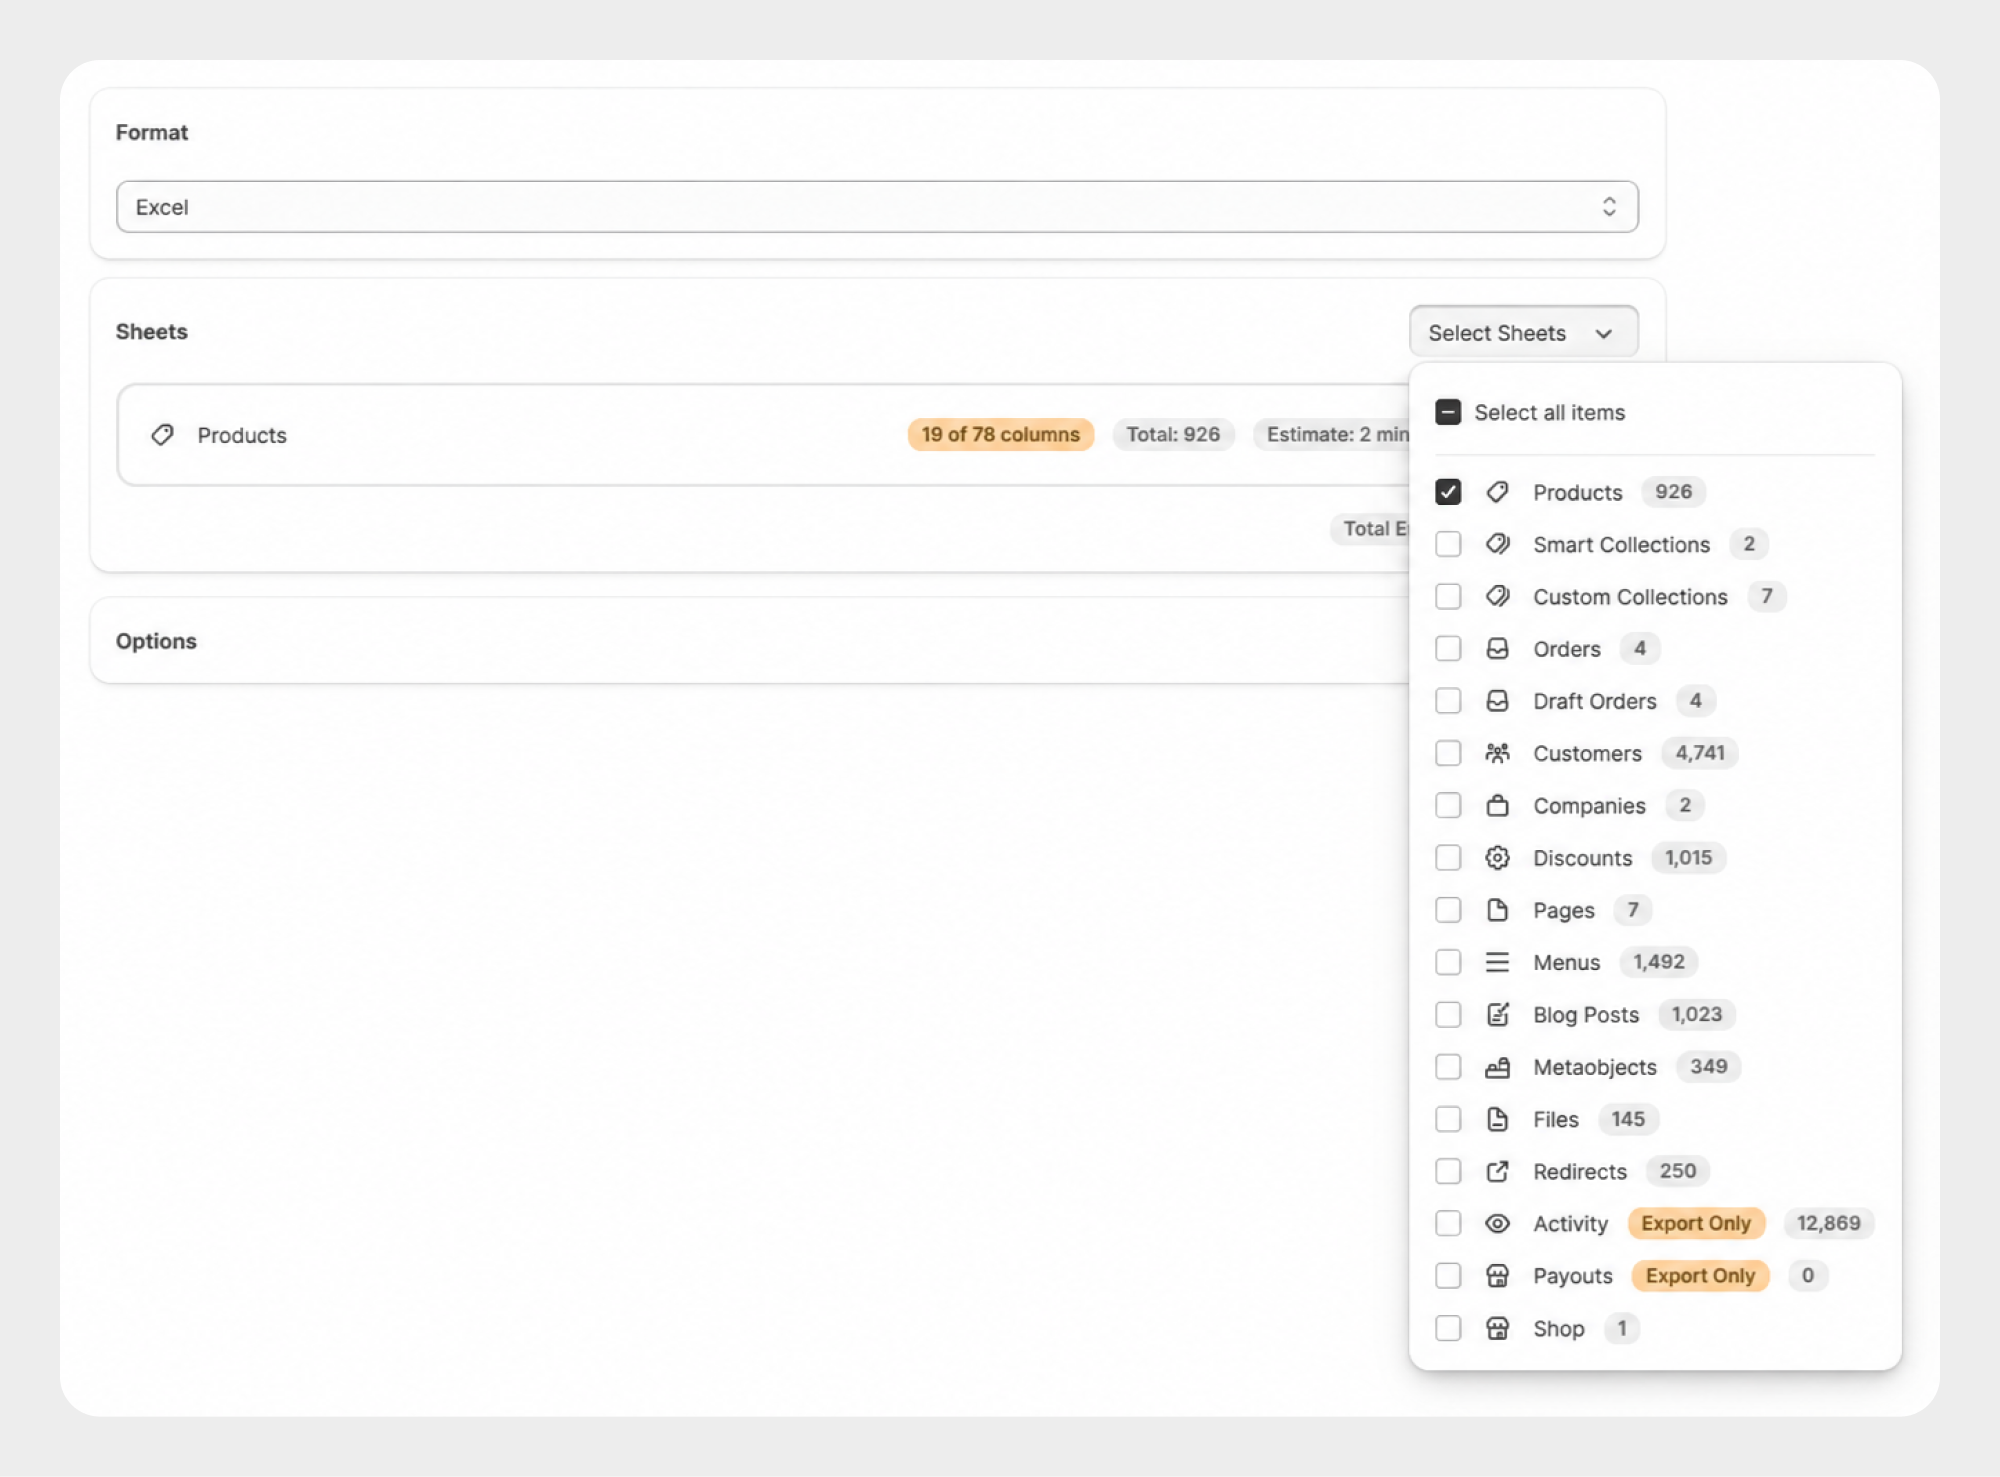
Step 2: Export the content
From the source Shopify store:
- Open Apps → Migrato.
- Open Export.
- Select the required content entity.
- Select the required fields.
- Add filters if required.
- Start the export.
- Download the generated file.
Step 3: Review the export file
Review the exported data before importing it into the destination store.
Check:
-
IDs
-
Handles
-
Titles
-
Content
-
URLs
-
Relationships
-
Metafields
-
Images or files
-
Other entity-specific fields
Some Shopify content can contain references to other Shopify resources. Review these relationships before importing into another store.
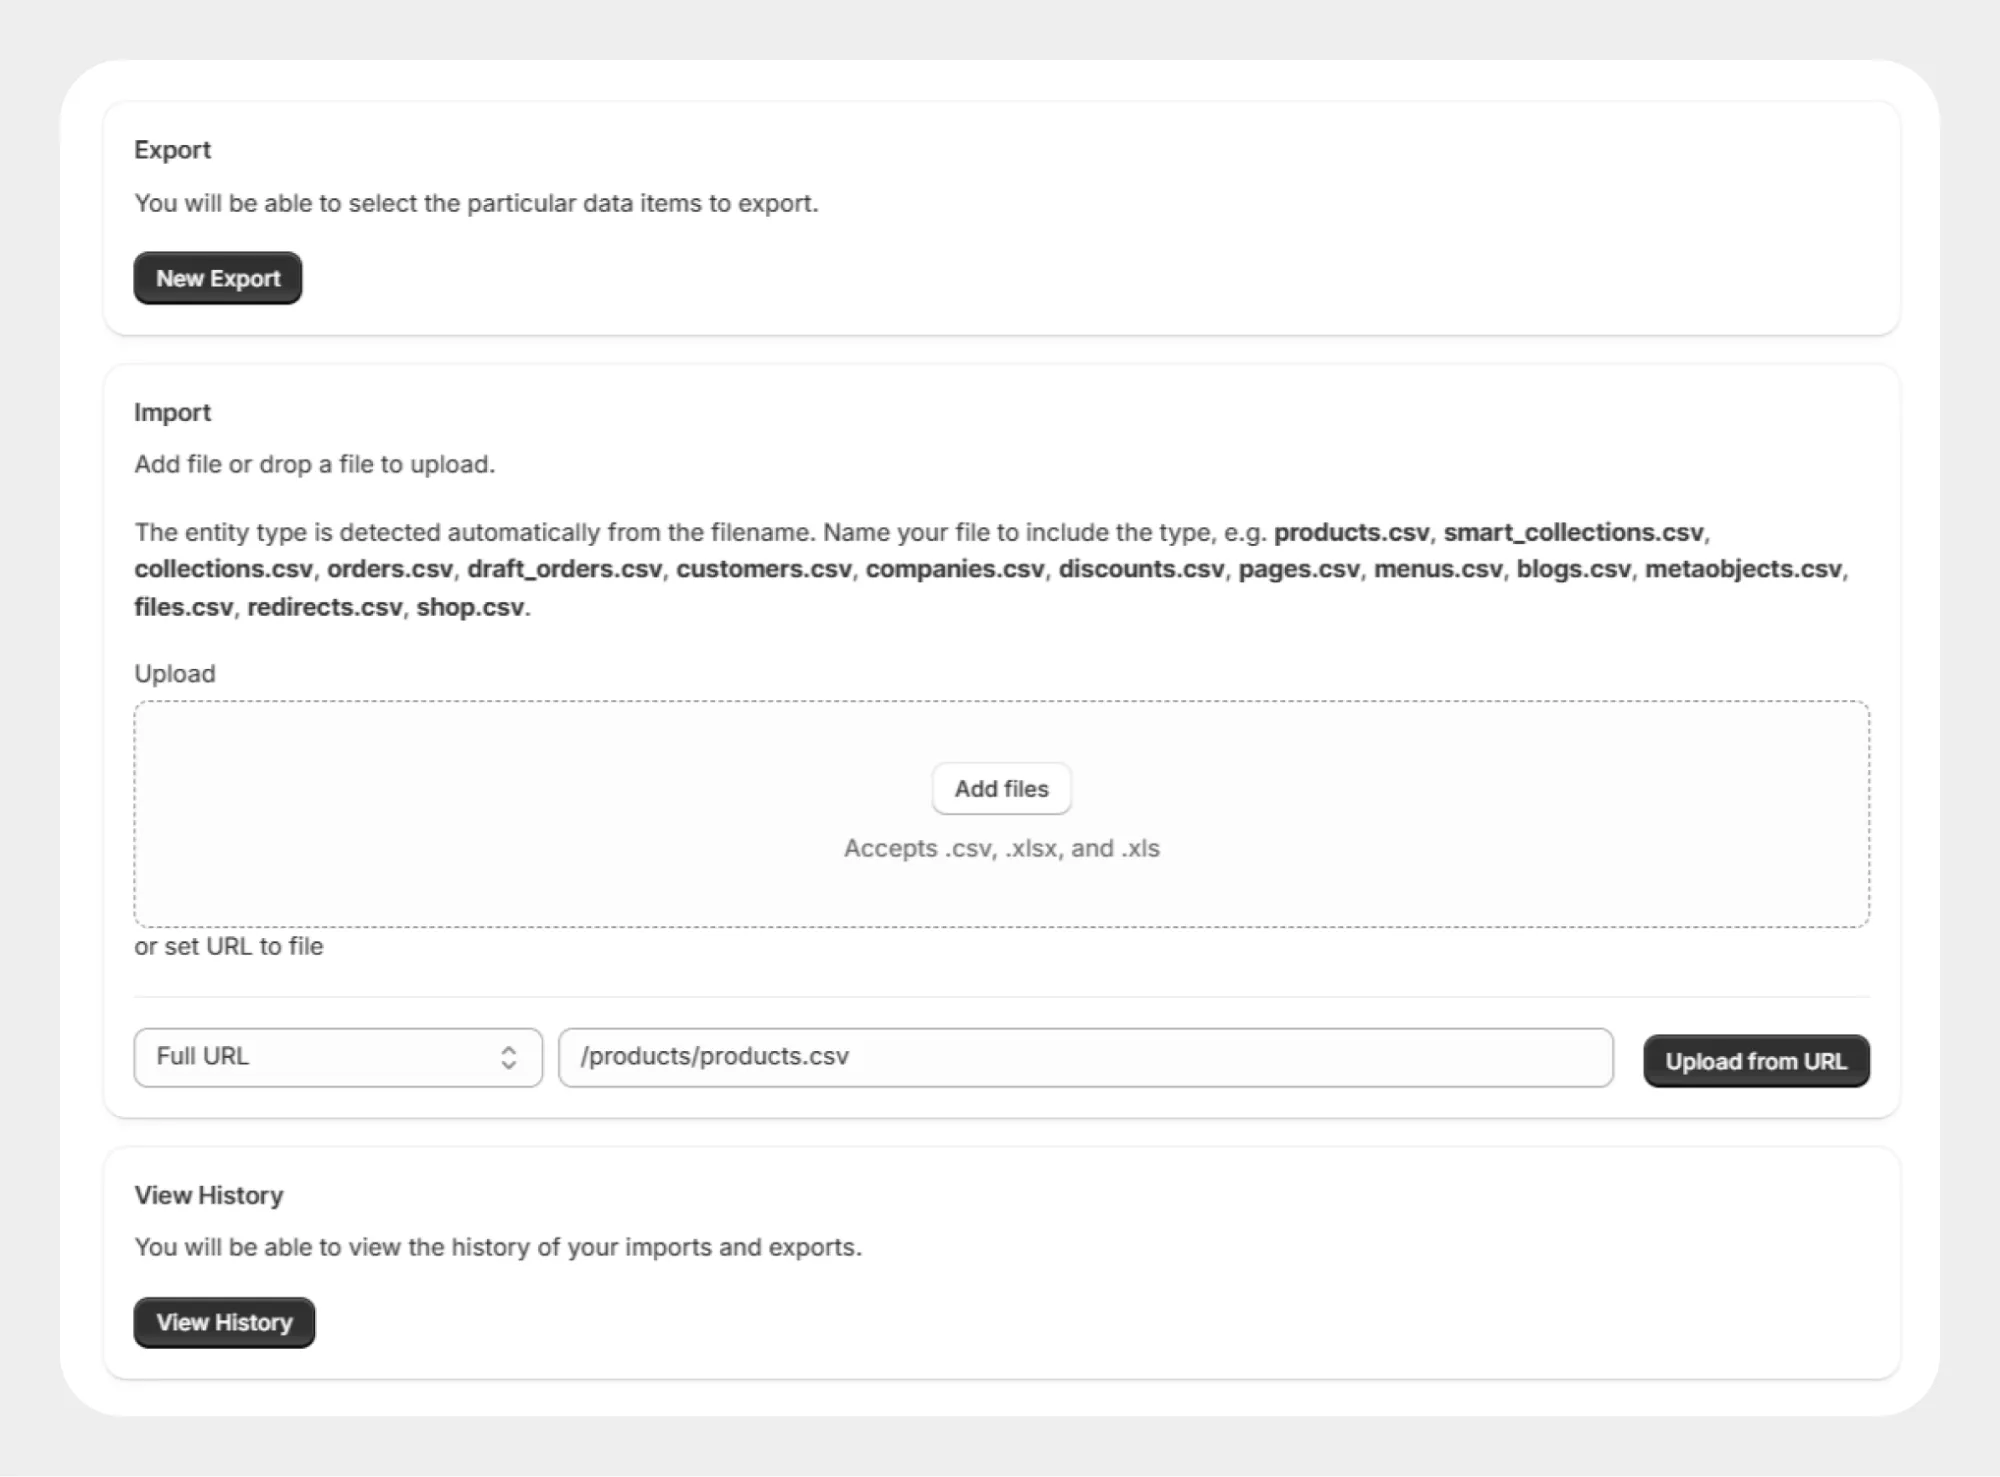
Step 4: Import the content into the target store
Open the destination Shopify store:
- Go to Apps → Migrato.
- Open Import.
- Select the relevant entity.
- Upload the exported file.
- Review the imported data.
- Select the required import operation.
Step 5: Process the migration
Review the import configuration and start the migration.
Migrato processes the selected content according to the imported file and selected operation.
Step 6: Verify the migrated content
After the migration is completed, verify the content in the target Shopify store. For example:
Verify:
- Page title
- Page handle
- Page content
- Published status
- Published date
- Template
- Metafields
Verify:
- Blog information
- Blog handle
- Post title
- Post content
- Author
- Tags
- Publication information
- Images
- Comments where supported
Verify:
- Menu title
- Menu handle
- Menu items
- Item positions
- Parent-child relationships
- Linked resources
- URLs
Verify:
- Redirect from
- Redirect to
Verify:
- Metaobject handle
- Status
- Display name
- Definition
- Field values
Verify:
- File name
- File URL
- File type
- Alt text
- Dimensions
- Status
- Other supported file information
Migration best practices
Follow these recommendations when performing a Shopify migration with Migrato:
- Create a backup of the source data before starting a large migration.
- Review the relevant template documentation before preparing migration files.
- Test with a small dataset before migrating the complete dataset.
- Migrate related data in a logical order where relationships between entities are important.
- Use filters when only a specific subset of records needs to be migrated.
- Review identifiers and handles before importing data into the destination store.
- Verify image and file URLs before migrating records that depend on external files.
- Review metafields and make sure the corresponding definitions are available in the destination store where required.
- Monitor the migration job from All Jobs.
- Review import results and errors after processing.
- Verify the migrated data directly in the destination Shopify store.
- Divide large migrations into smaller batches where practical.
Shopify data relationships and available fields can vary between entities. Always review the current Migrato template for the specific entity before starting a production migration.
Migration workflow summary
A typical Migrato migration can follow this workflow:
- Prepare source data
- Export or prepare the migration file
- Review template and data
- Select the target Shopify store
- Import data into Migrato
- Select the import operation
- Review import options
- Start the migration
- Monitor the job in All Jobs
- Review import results
- Verify data in Shopify
This workflow can be used for CSV/XLSX migrations, FTP/SFTP-based product migrations, Shopify-to-Shopify migrations, and supported Shopify content migrations.
 Free plan forever