 Our first app, Migrato, is live on the Shopify App Store

Import / Export Orders
Migrato allows you to import and export Shopify orders in bulk using CSV or Excel (XLSX) files.
You can use order import/export to transfer, manage, update, or migrate order data in bulk instead of processing orders individually through Shopify Admin.
Migrato also supports importing order data from a publicly accessible file URL, making it possible to work with files hosted on external systems.

Before importing or exporting orders: We recommend reviewing the Order Template Documentation and downloading the Order Demo CSV/XLSX file, if available, to understand the supported fields and expected data structure.
How to Import and Export Shopify Orders
Import Orders
Migrato allows you to bulk import Shopify order data using CSV or XLSX files.
You can upload a prepared order file directly to Migrato or provide a publicly accessible URL to the file.
Step 1: Open Order Import
From your Shopify Admin:
- Go to Apps → Migrato.
- Open the Import section.
- Add the order file you want to import.
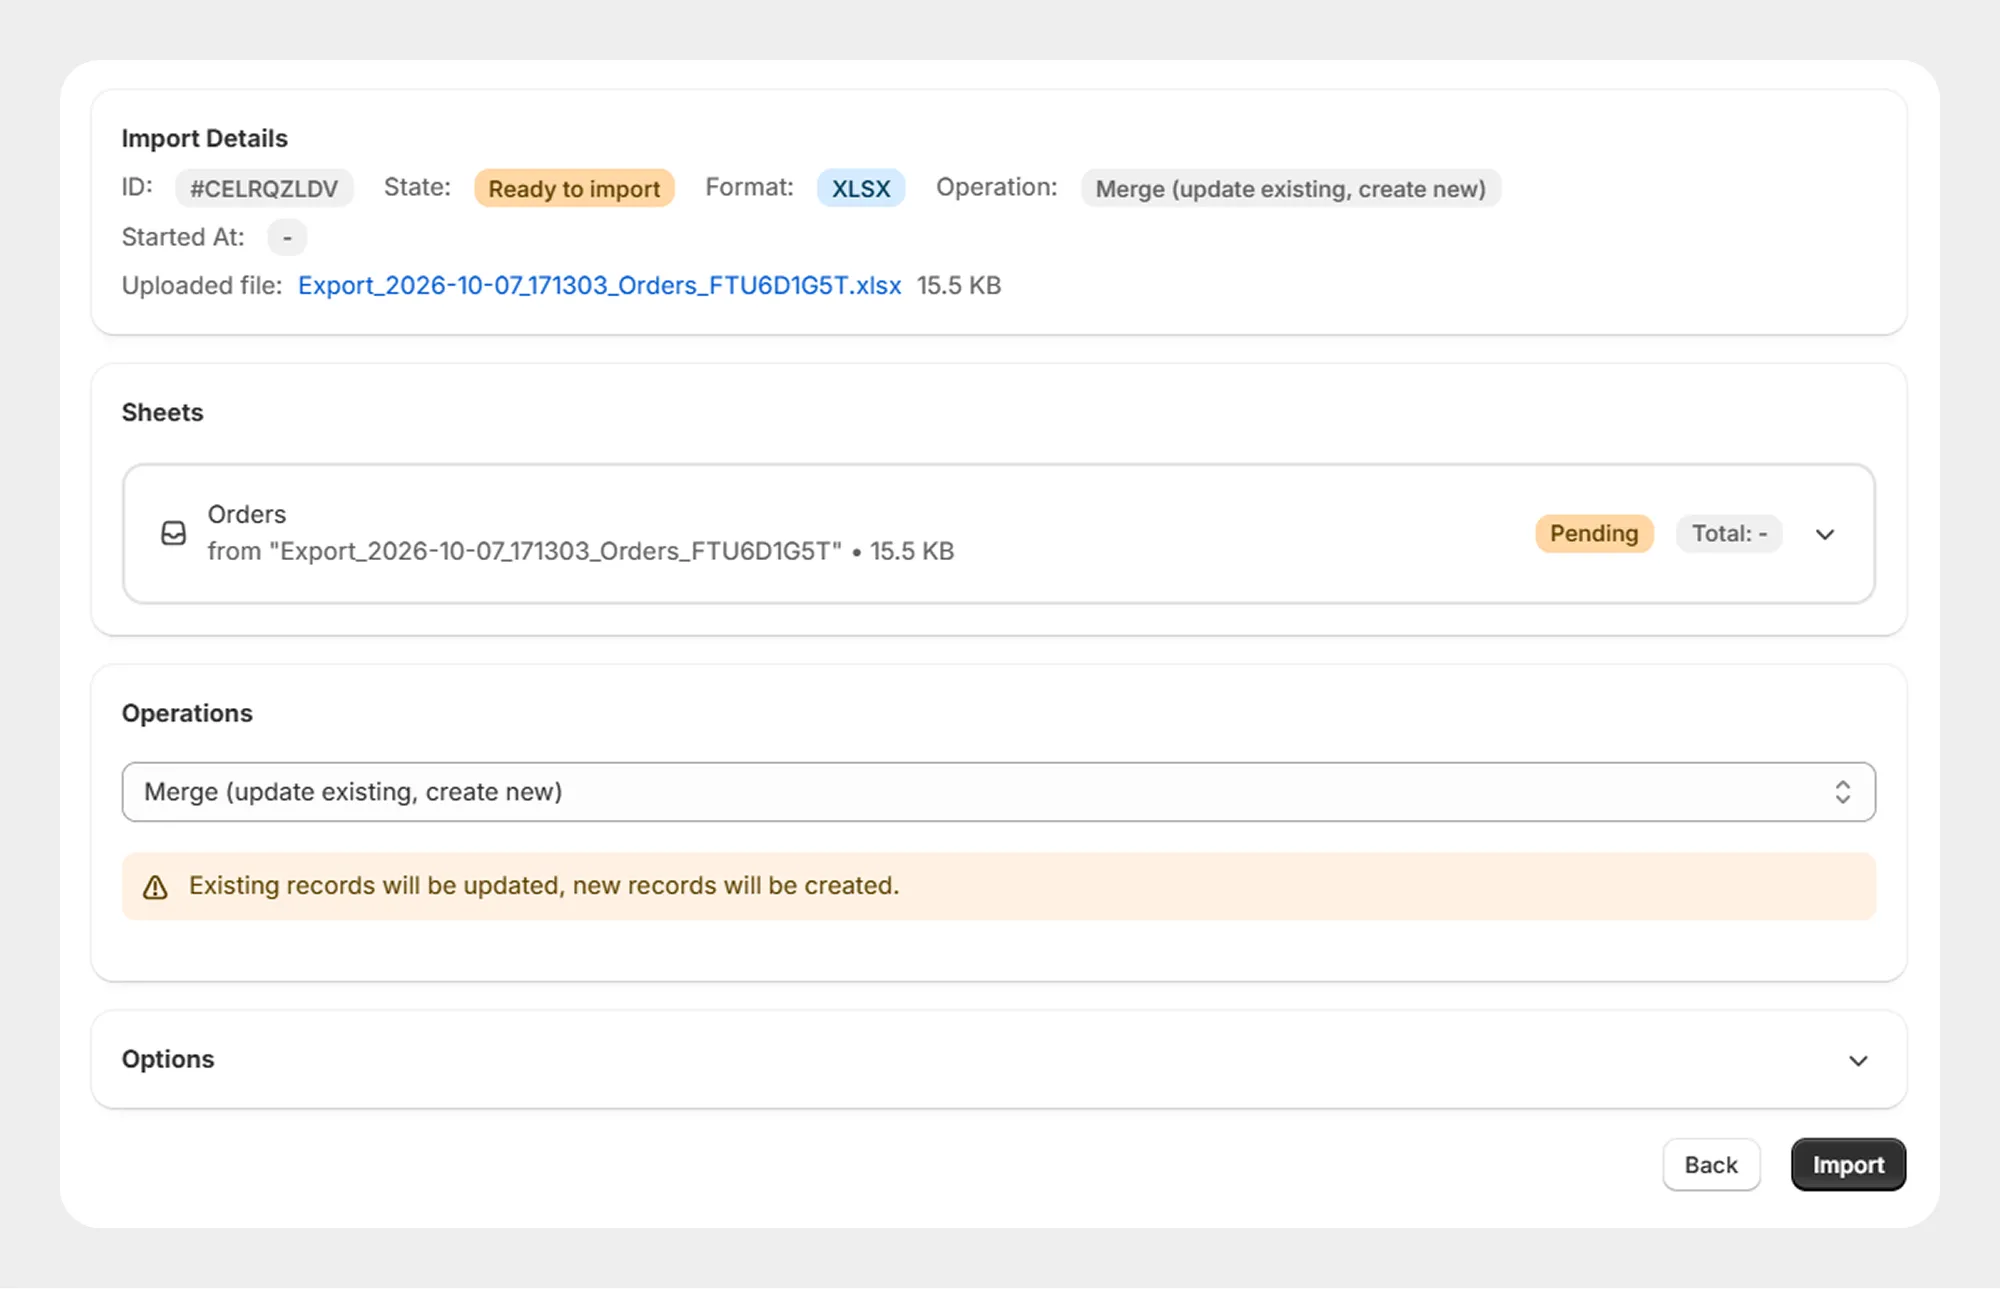
Step 2: Upload or Provide the Order File
Migrato provides two ways to provide the order file.
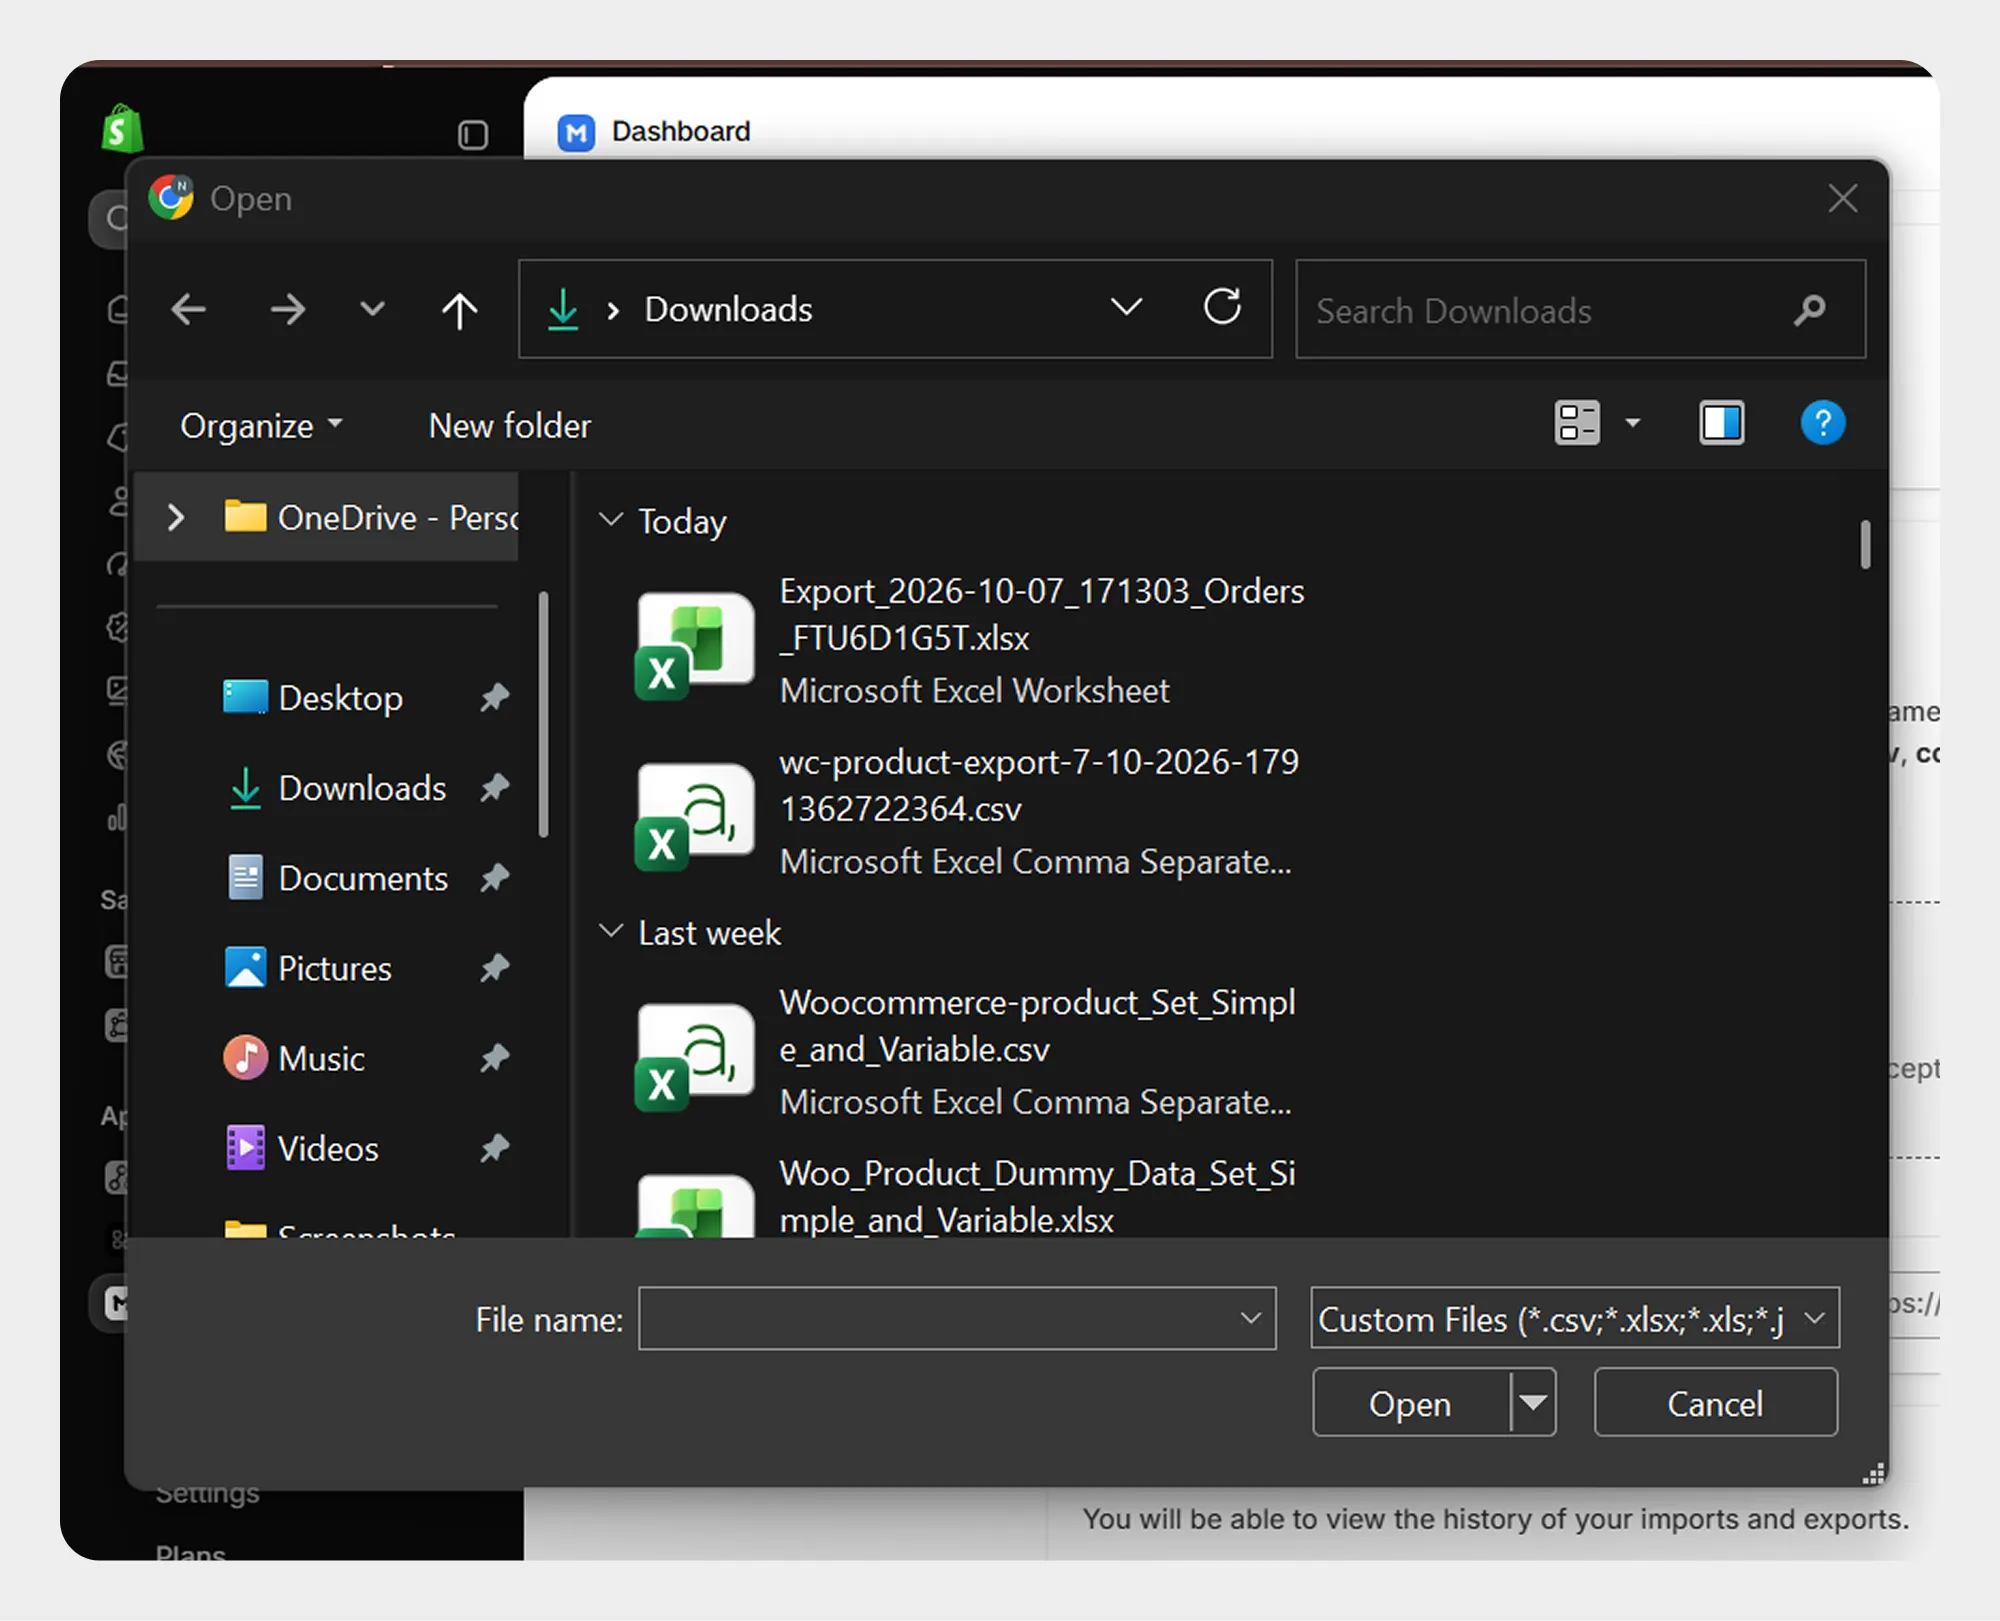
Option 1: Upload a File
You can upload or drag and drop your order file into the upload area.
Migrato supports:
-
 CSV
-
XLSX
Option 2: Import from a Public URL
Instead of uploading the file manually, you can provide the full publicly accessible URL of the order file.
For example:
https://example.com/orders.csv
Enter the URL and select Upload from URL.
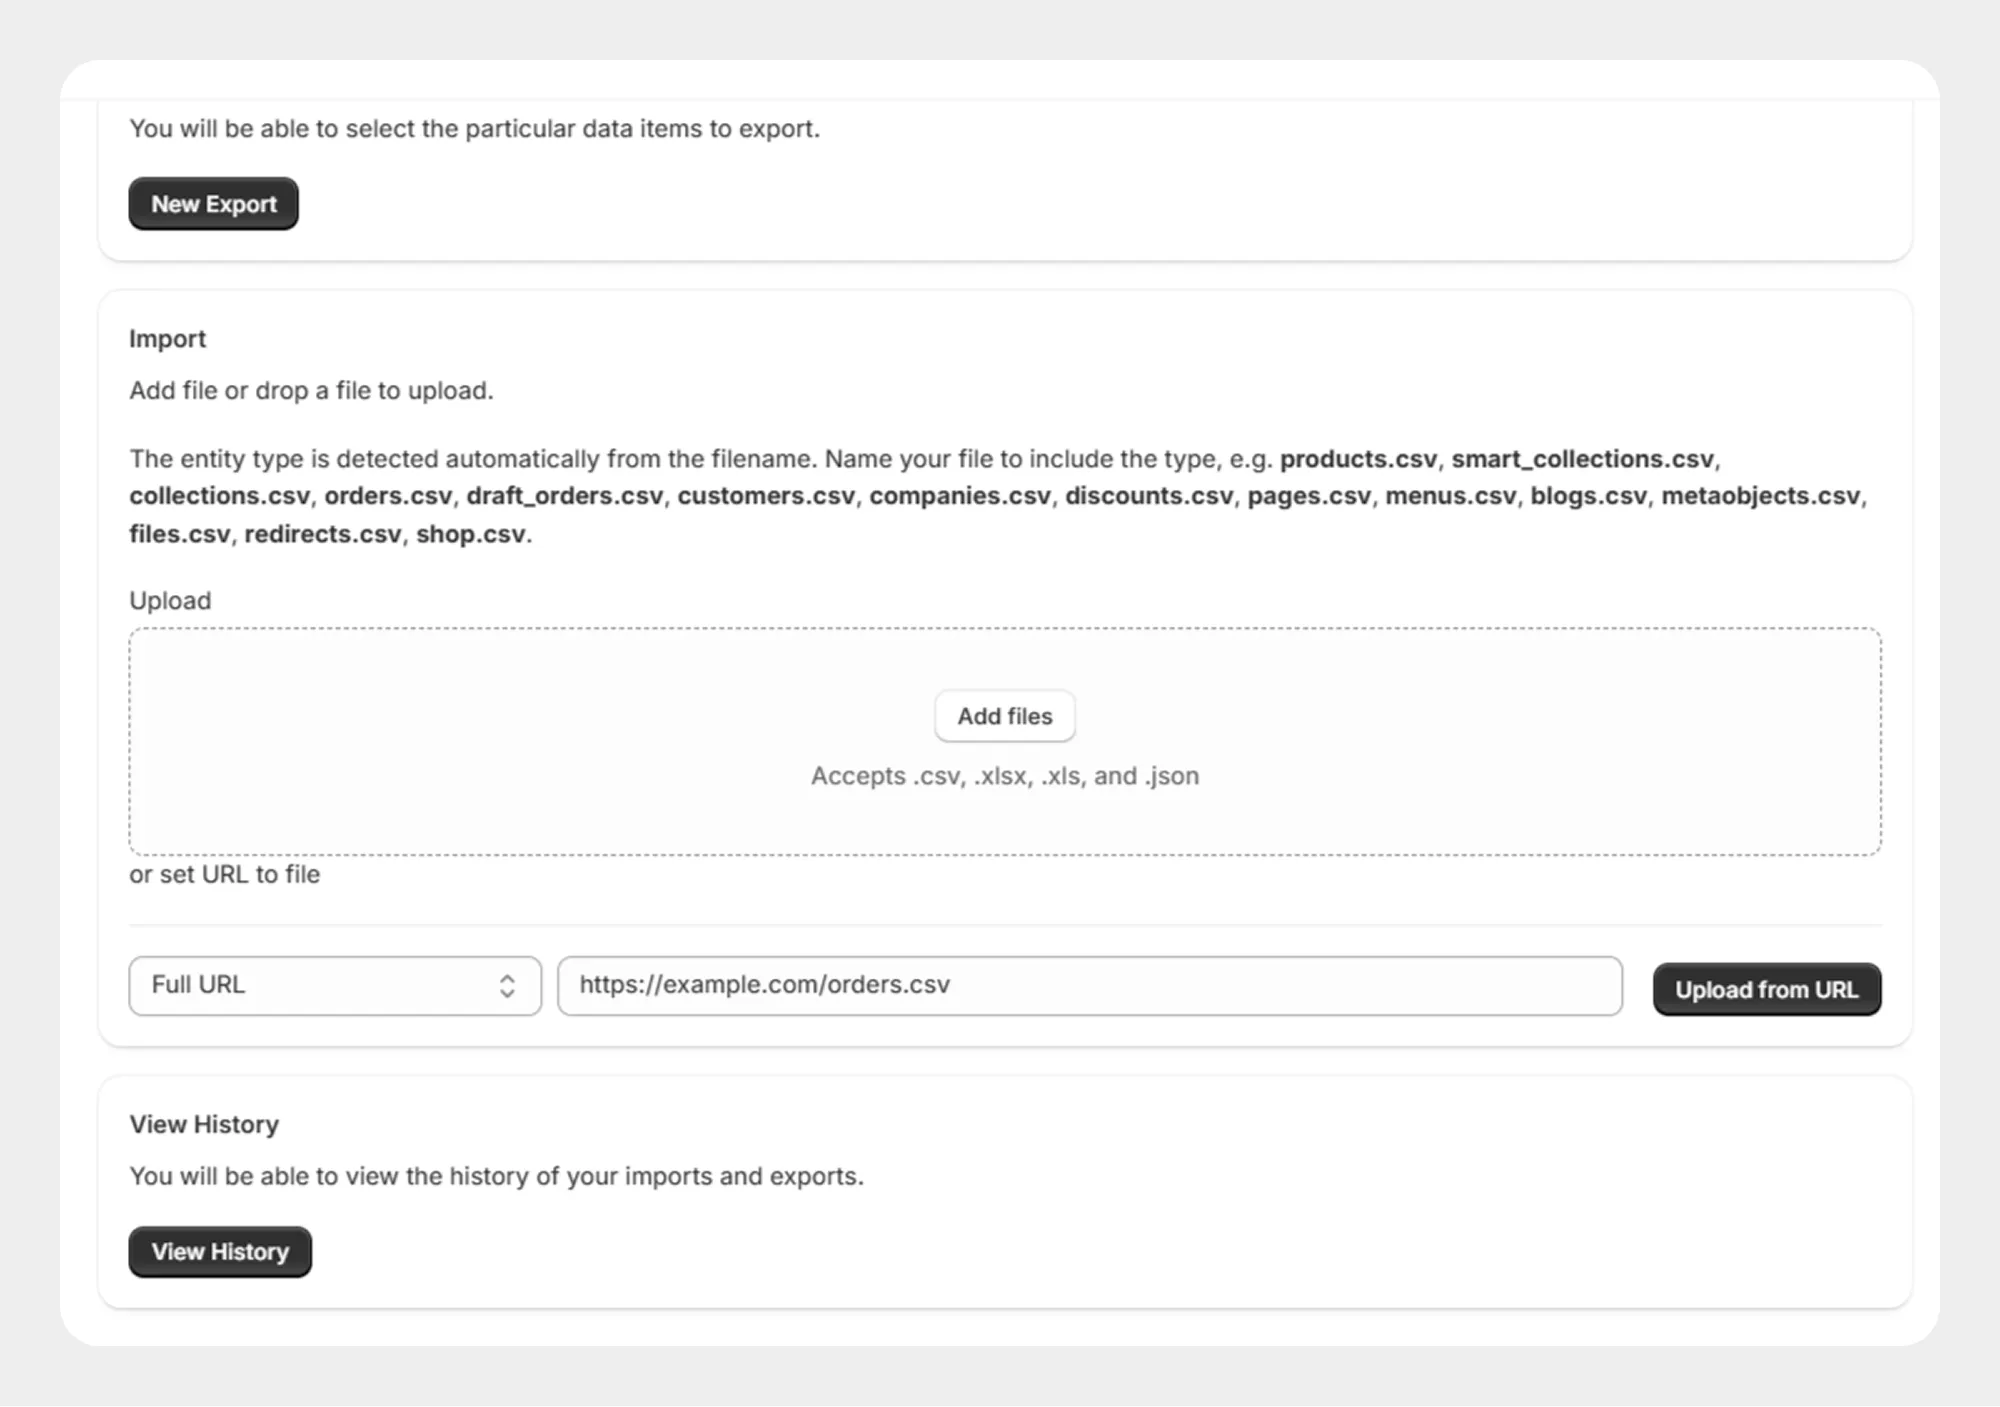
Note: The file URL must be accessible to Migrato. Make sure the file can be accessed without authentication or a login requirement.
Step 3: Review the Import Details
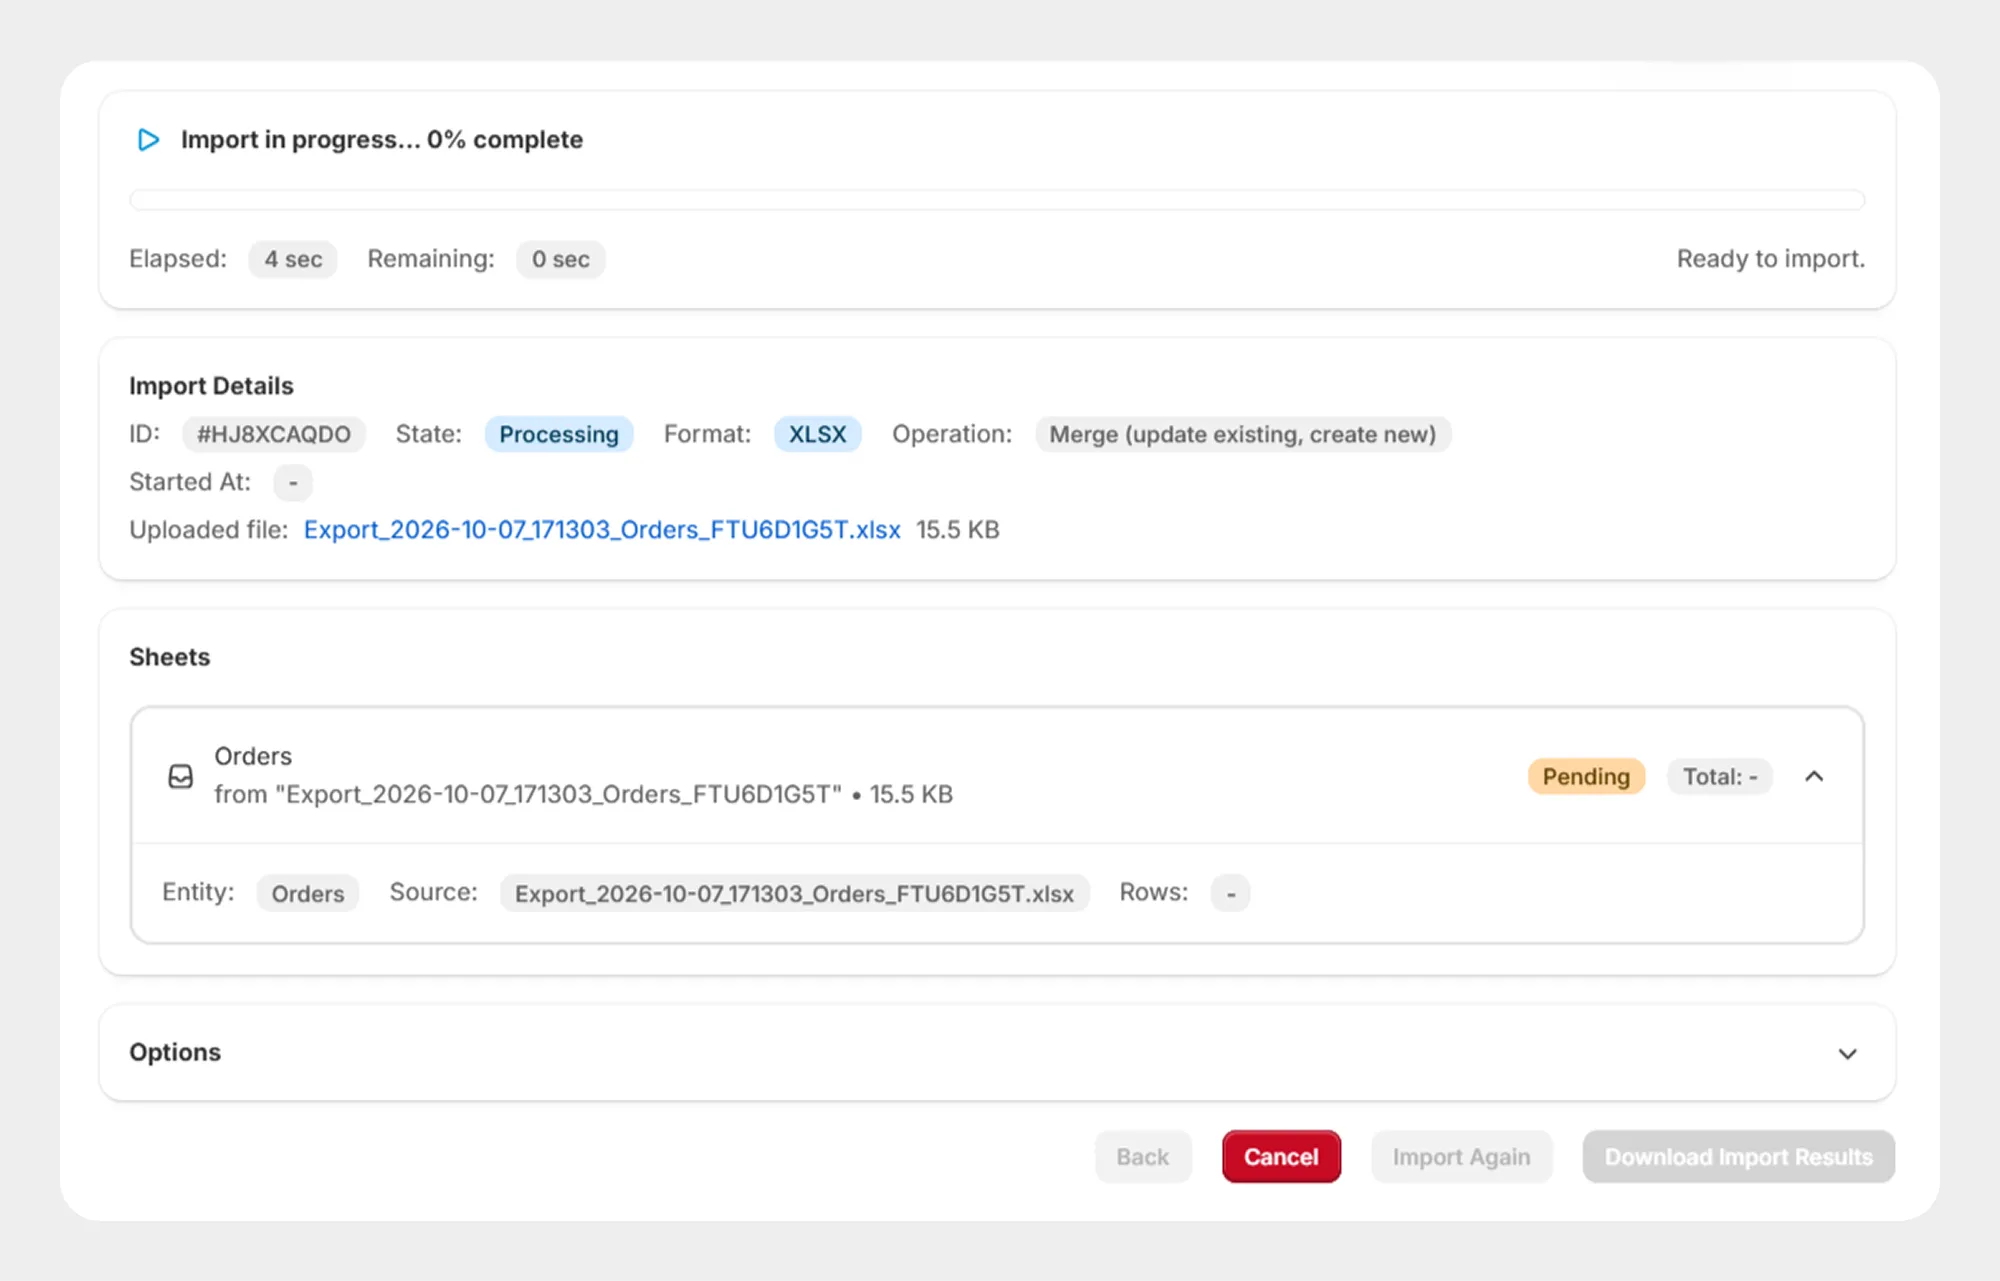
After the file is uploaded or retrieved from the provided URL, Migrato creates an import job and displays the import details.
The import details can include:
-
Import ID
-
Import state
-
File format
-
Operation
-
Uploaded file
-
Import start information
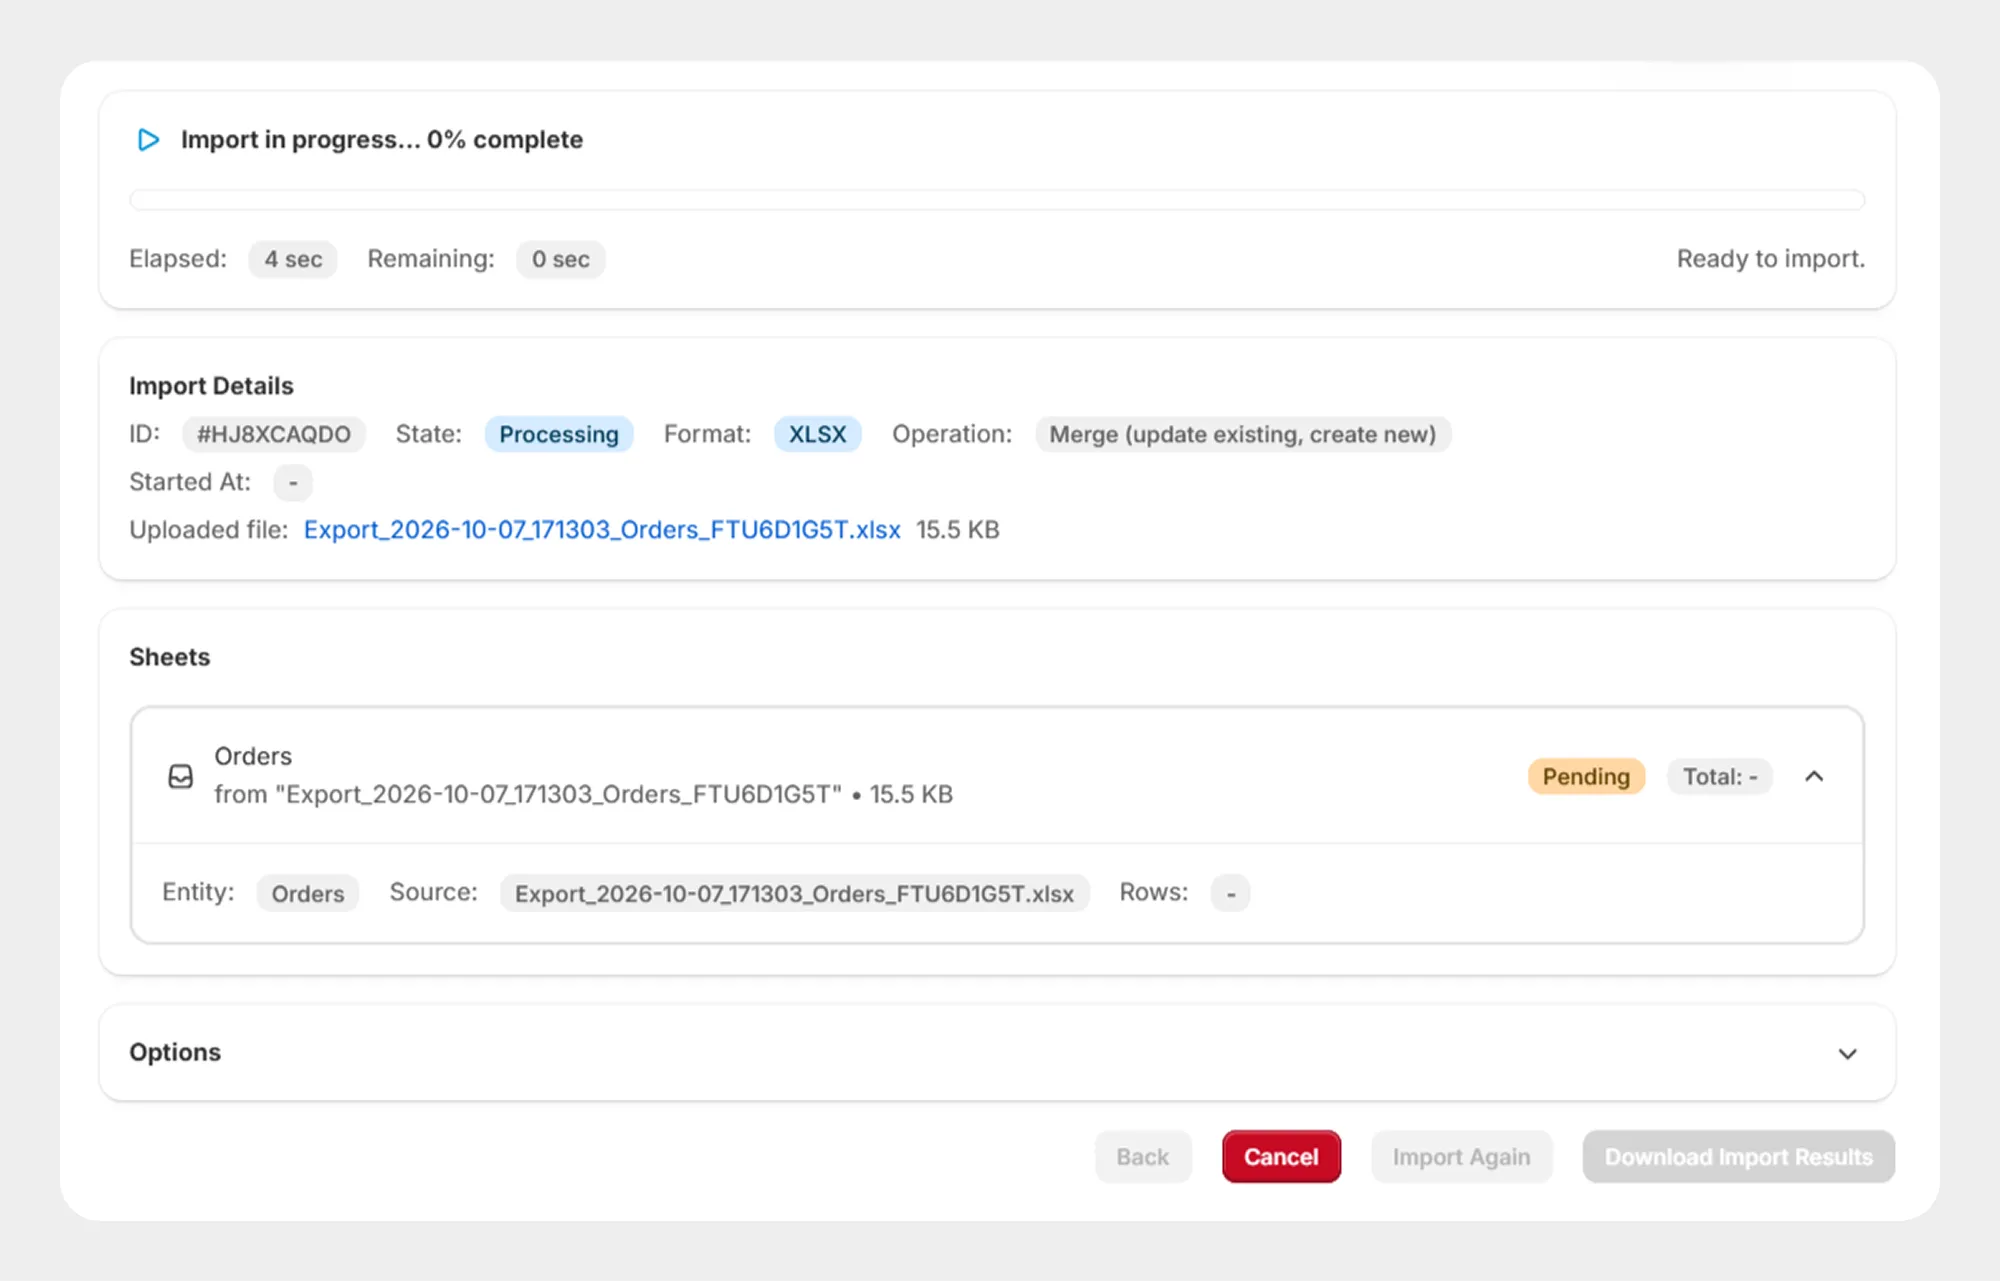
Review the displayed information before continuing with the import.
Step 4: Review the Order Sheet
Migrato identifies the order data contained in the uploaded file and displays it under the Sheets section.
Review the detected order sheet before selecting the import operation.
Step 5: Select an Import Operation
Migrato allows you to select the operation to perform on the order data.
Depending on the supported order operations, the available options include:
-
Merge – Update existing records and create new records.
-
Create only – Create new records and skip records that already exist.
-
Update only – Update existing records and skip records that cannot be matched.
-
Replace – Delete the existing record and create it again using the imported data.
-
Delete – Delete the matching record if it exists.
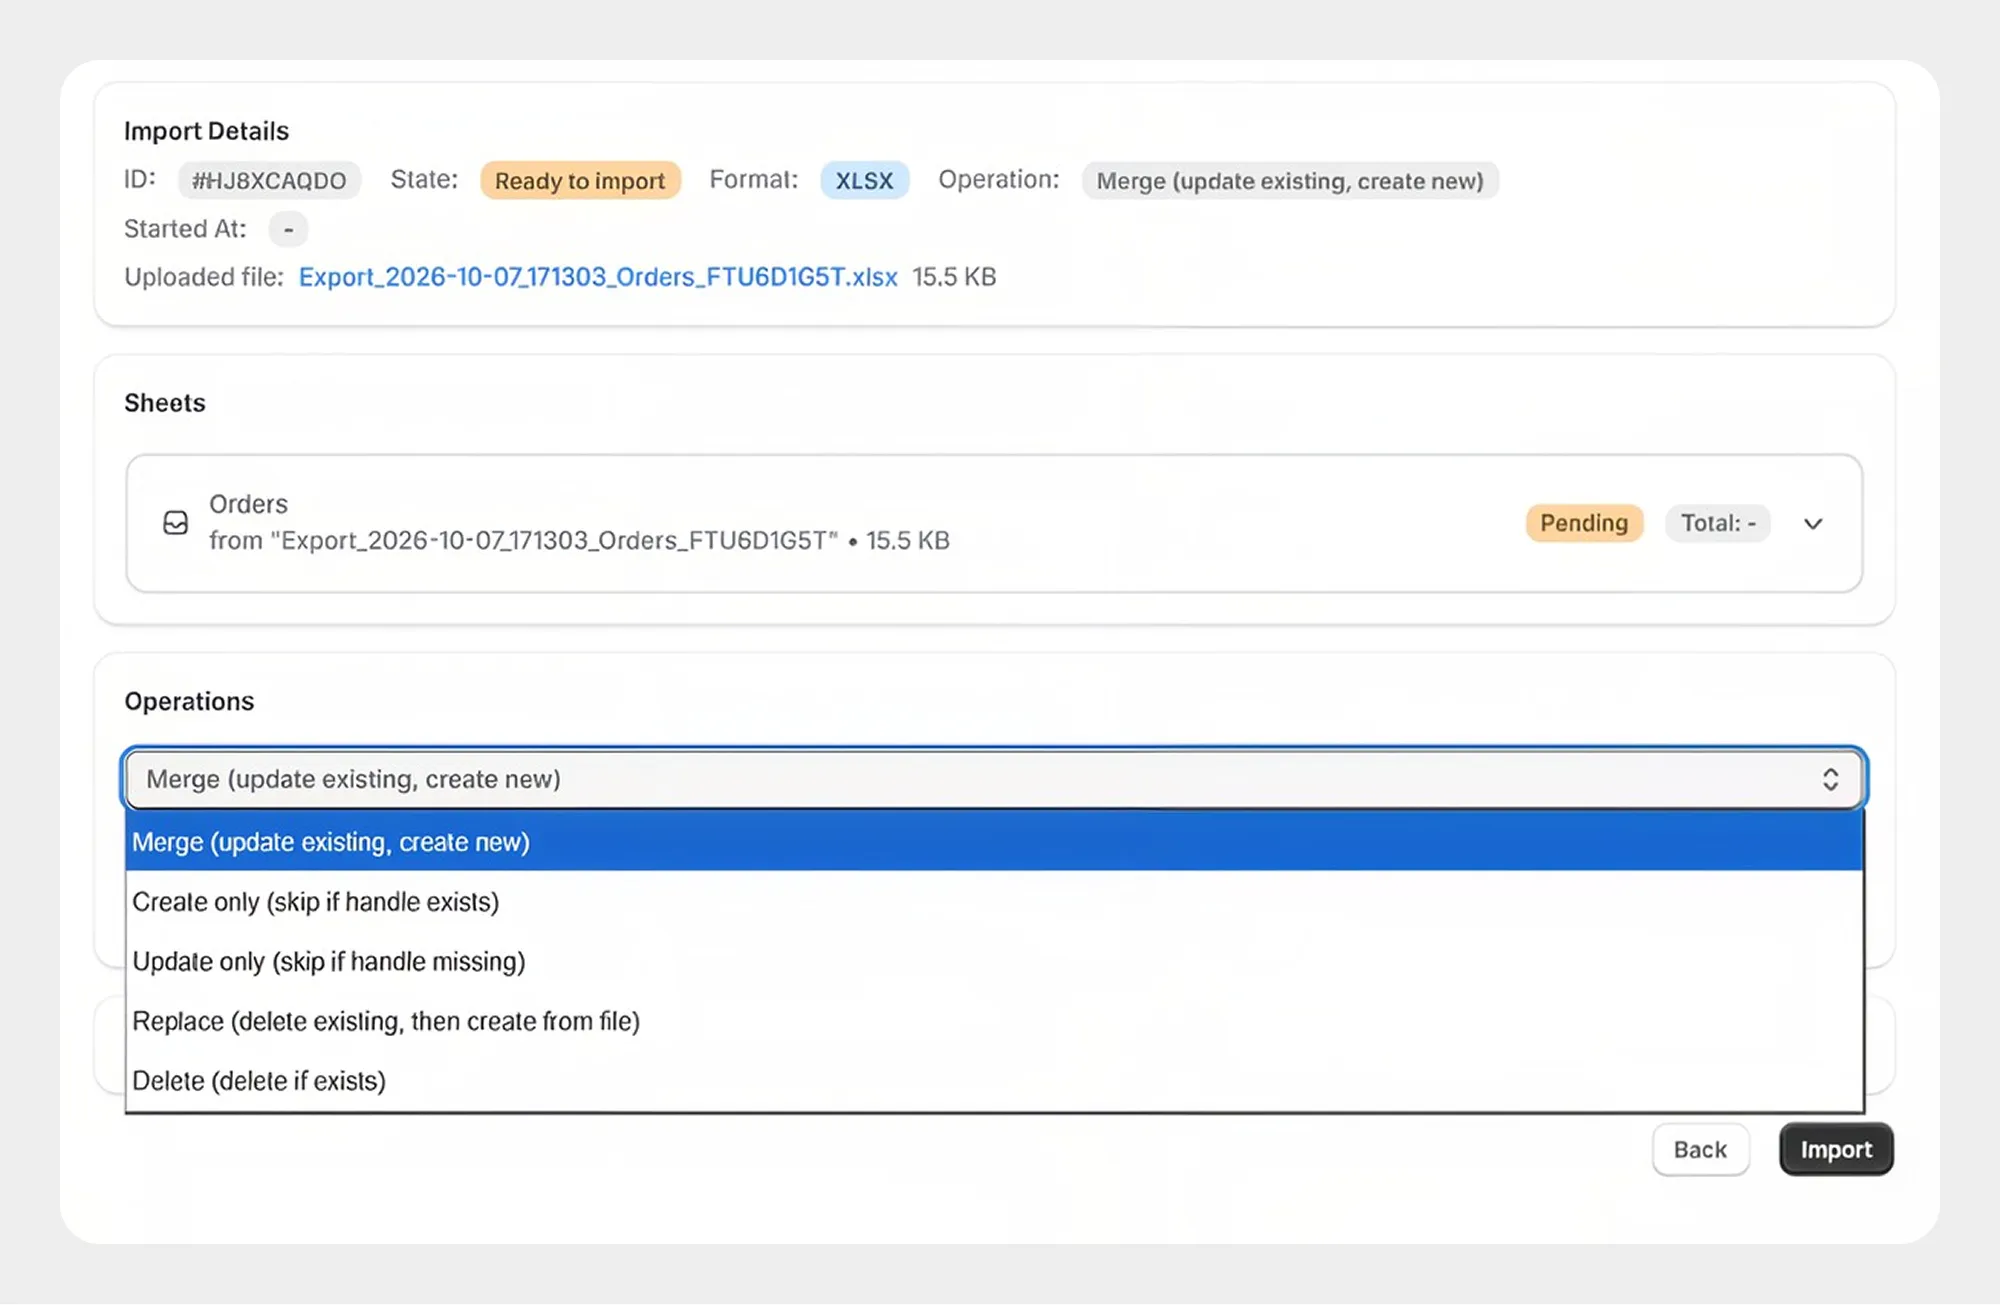
The selected operation determines how Migrato handles existing and new order records.
Important: Carefully select the operation before starting an order import, particularly when using Replace or Delete.
Step 6: Configure Import Options
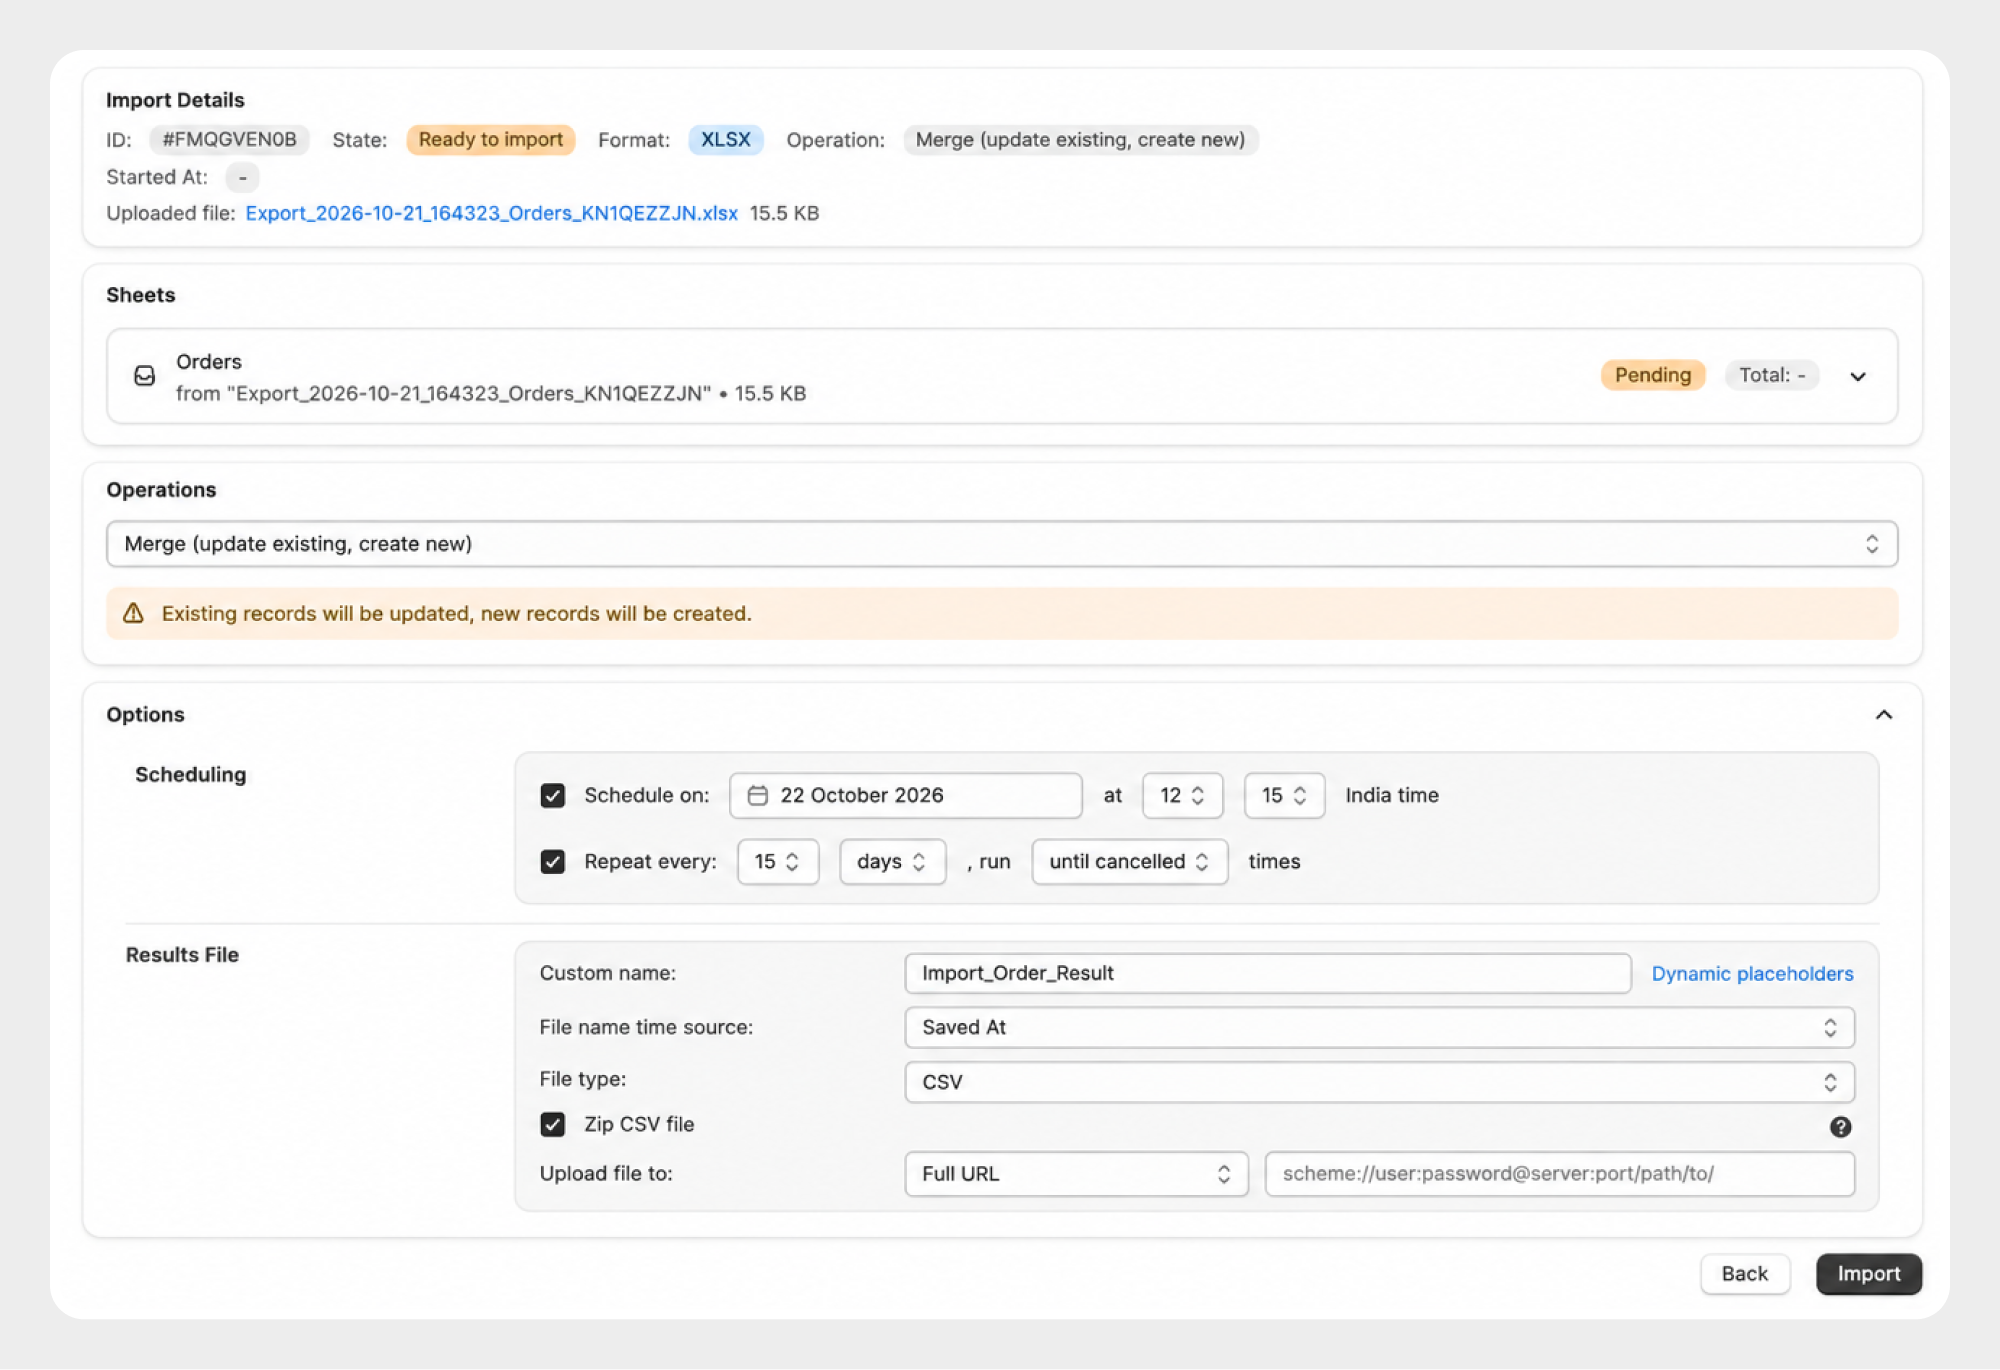
Open the Options section to configure additional settings available for the import.
Depending on the Migrato order import configuration, this section may include options such as scheduling and result-file settings.
Step 7: Schedule the Order Import
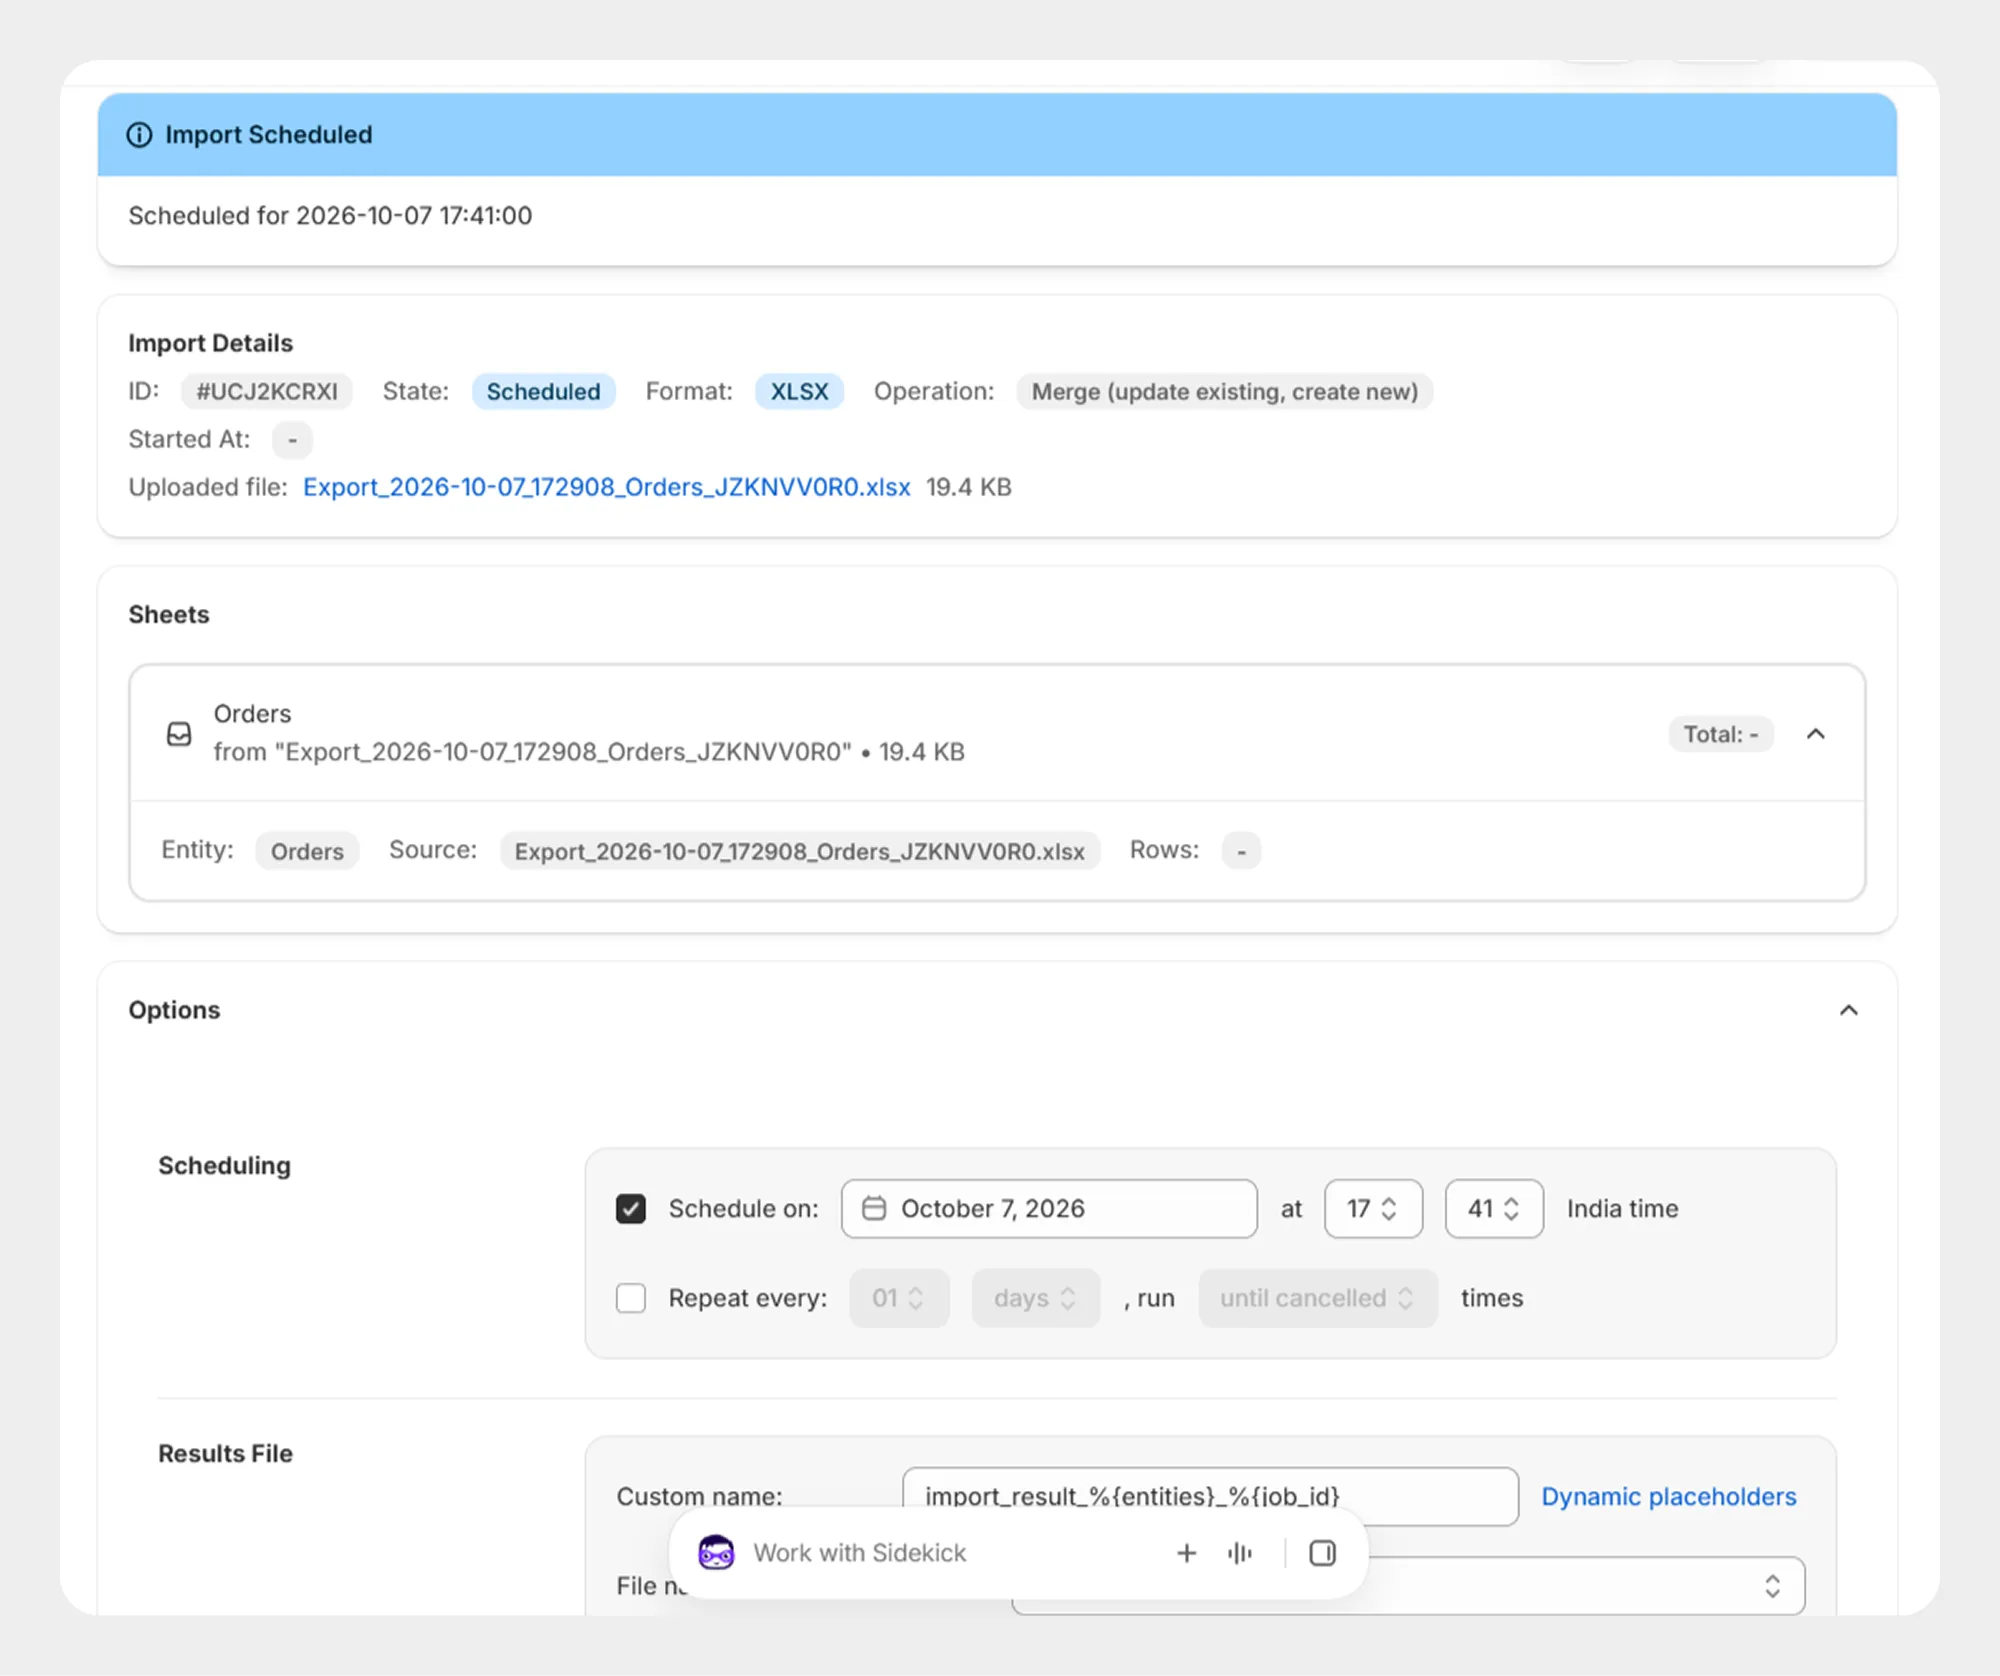
Migrato can schedule an import job when scheduling is enabled for the operation.
You can configure:
-
Schedule date
-
Schedule time
-
Repeat interval
-
Number of repetitions or run until cancelled
This is useful when order data needs to be imported repeatedly from an external source.
Step 8: Start the Order Import
After reviewing the file and selecting the required operation:
- Review the import details.
- Confirm the selected operation.
- Review the available options.
- Click Import.
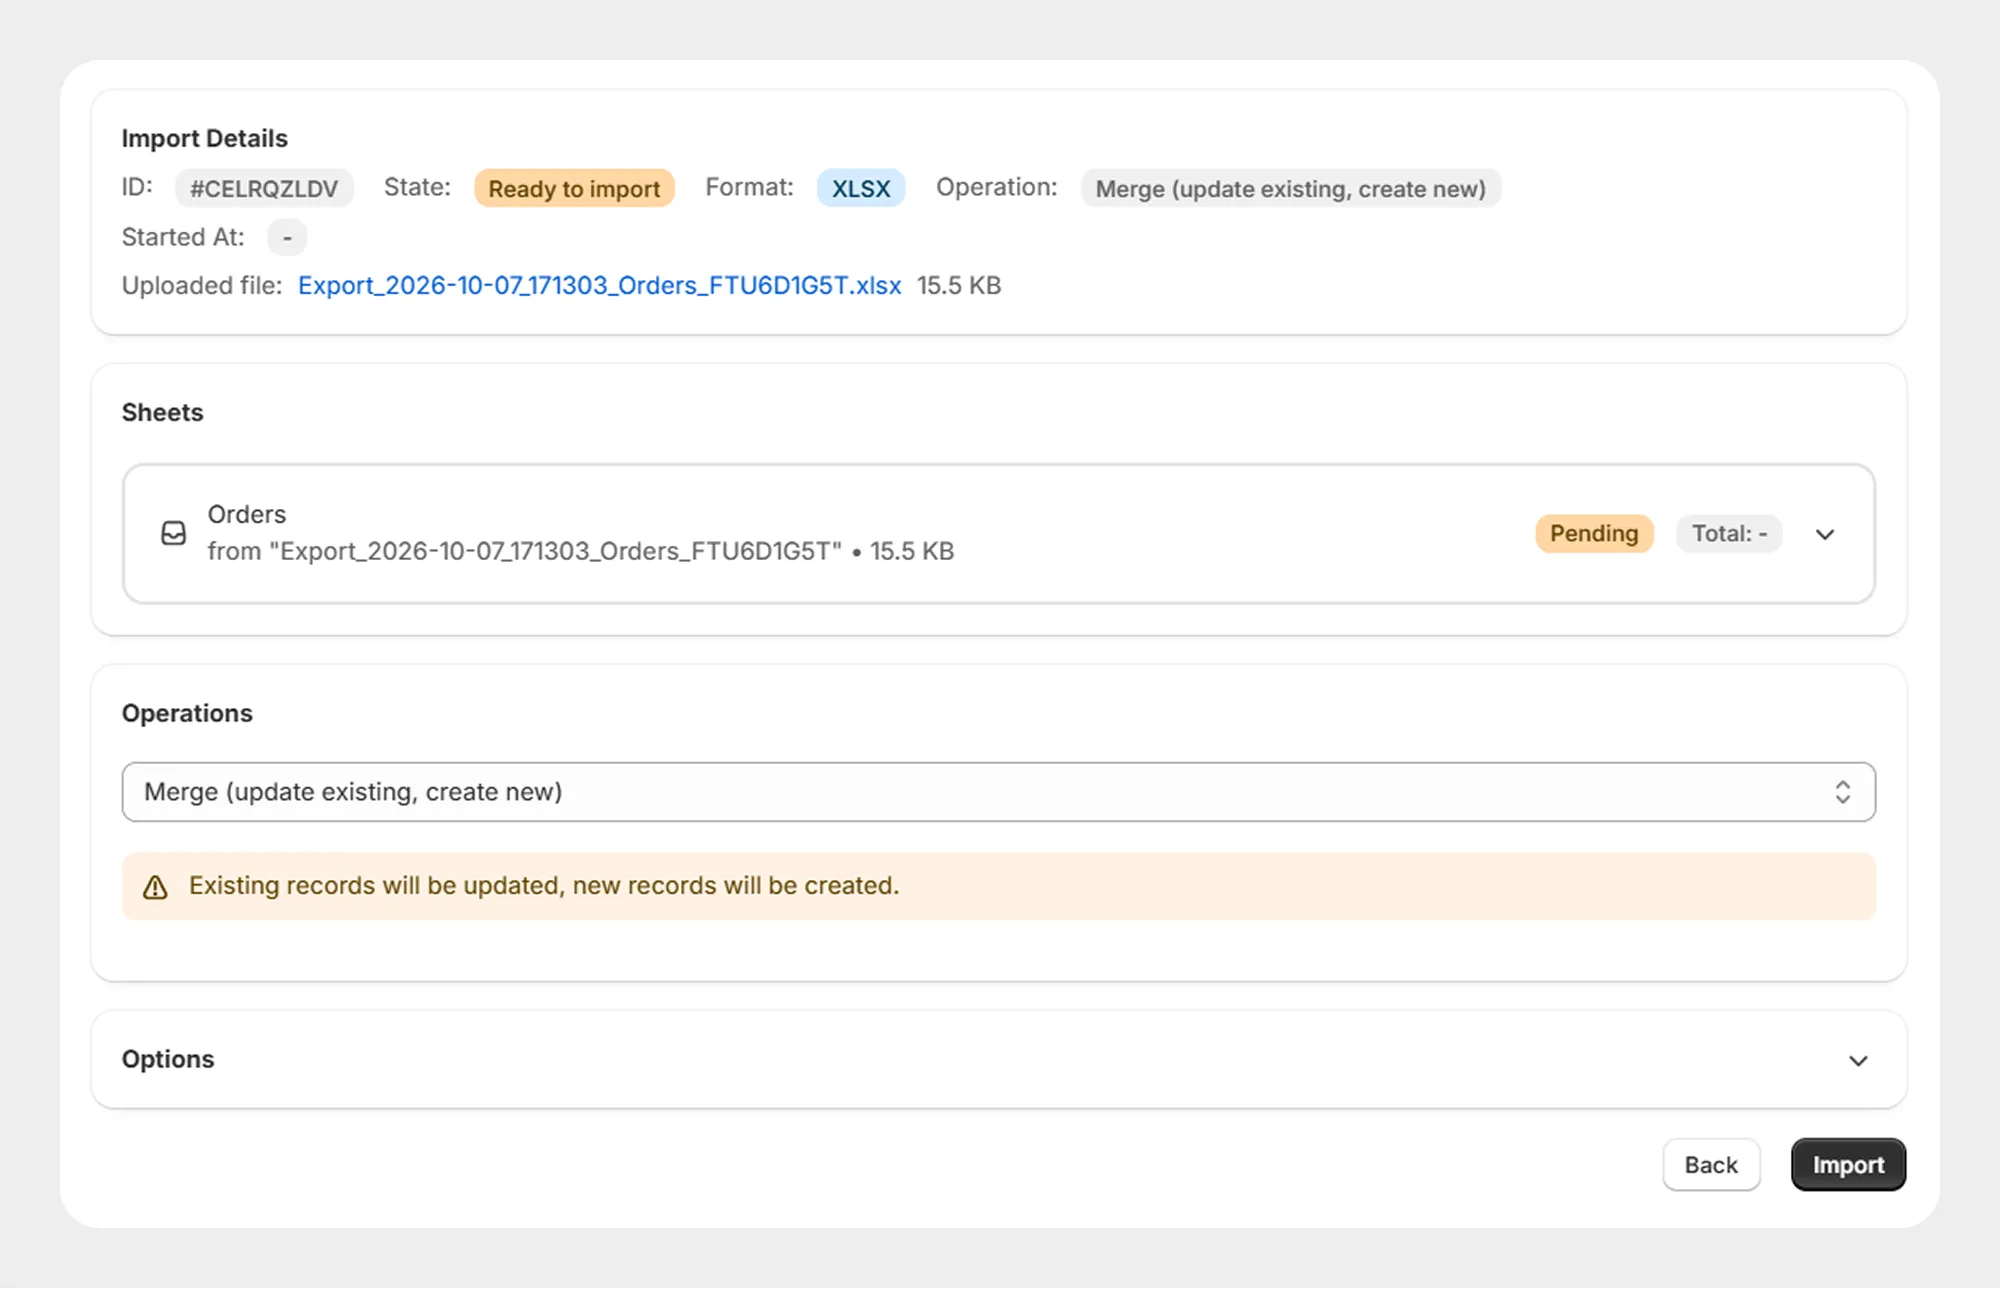
Migrato will begin processing the order import.
Step 9: Monitor the Import
Migrato processes the order import as a job and displays the current processing status.
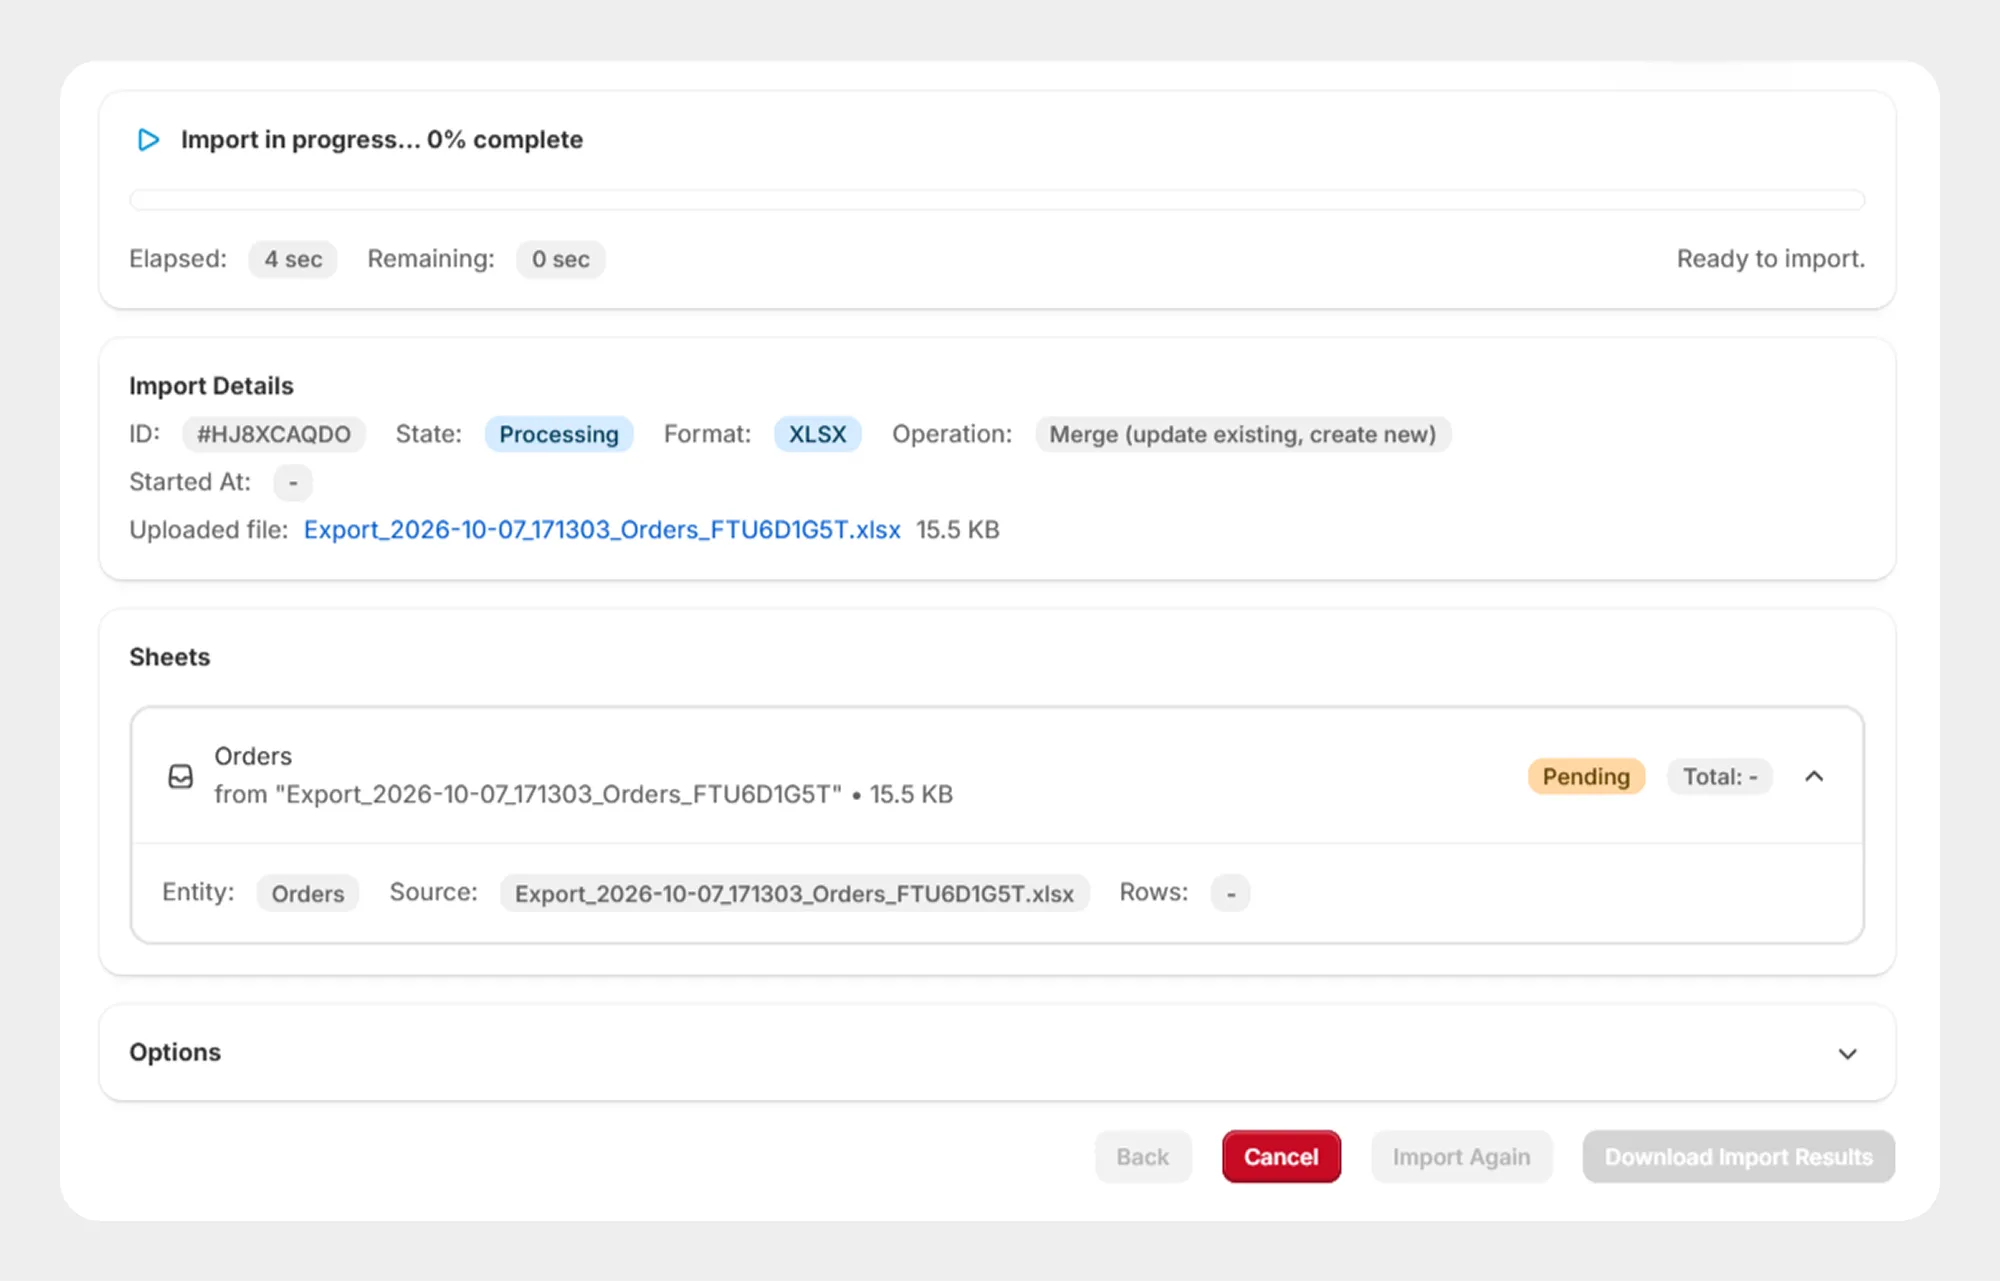
You can use the job information to track the progress of the import.
Step 10: Review Import Results
After processing is completed, review the import results.
The result information can include:
-
Import status
-
Total records
-
Successfully processed records
-
Failed records
-
Skipped records
-
Processing duration
-
Error information
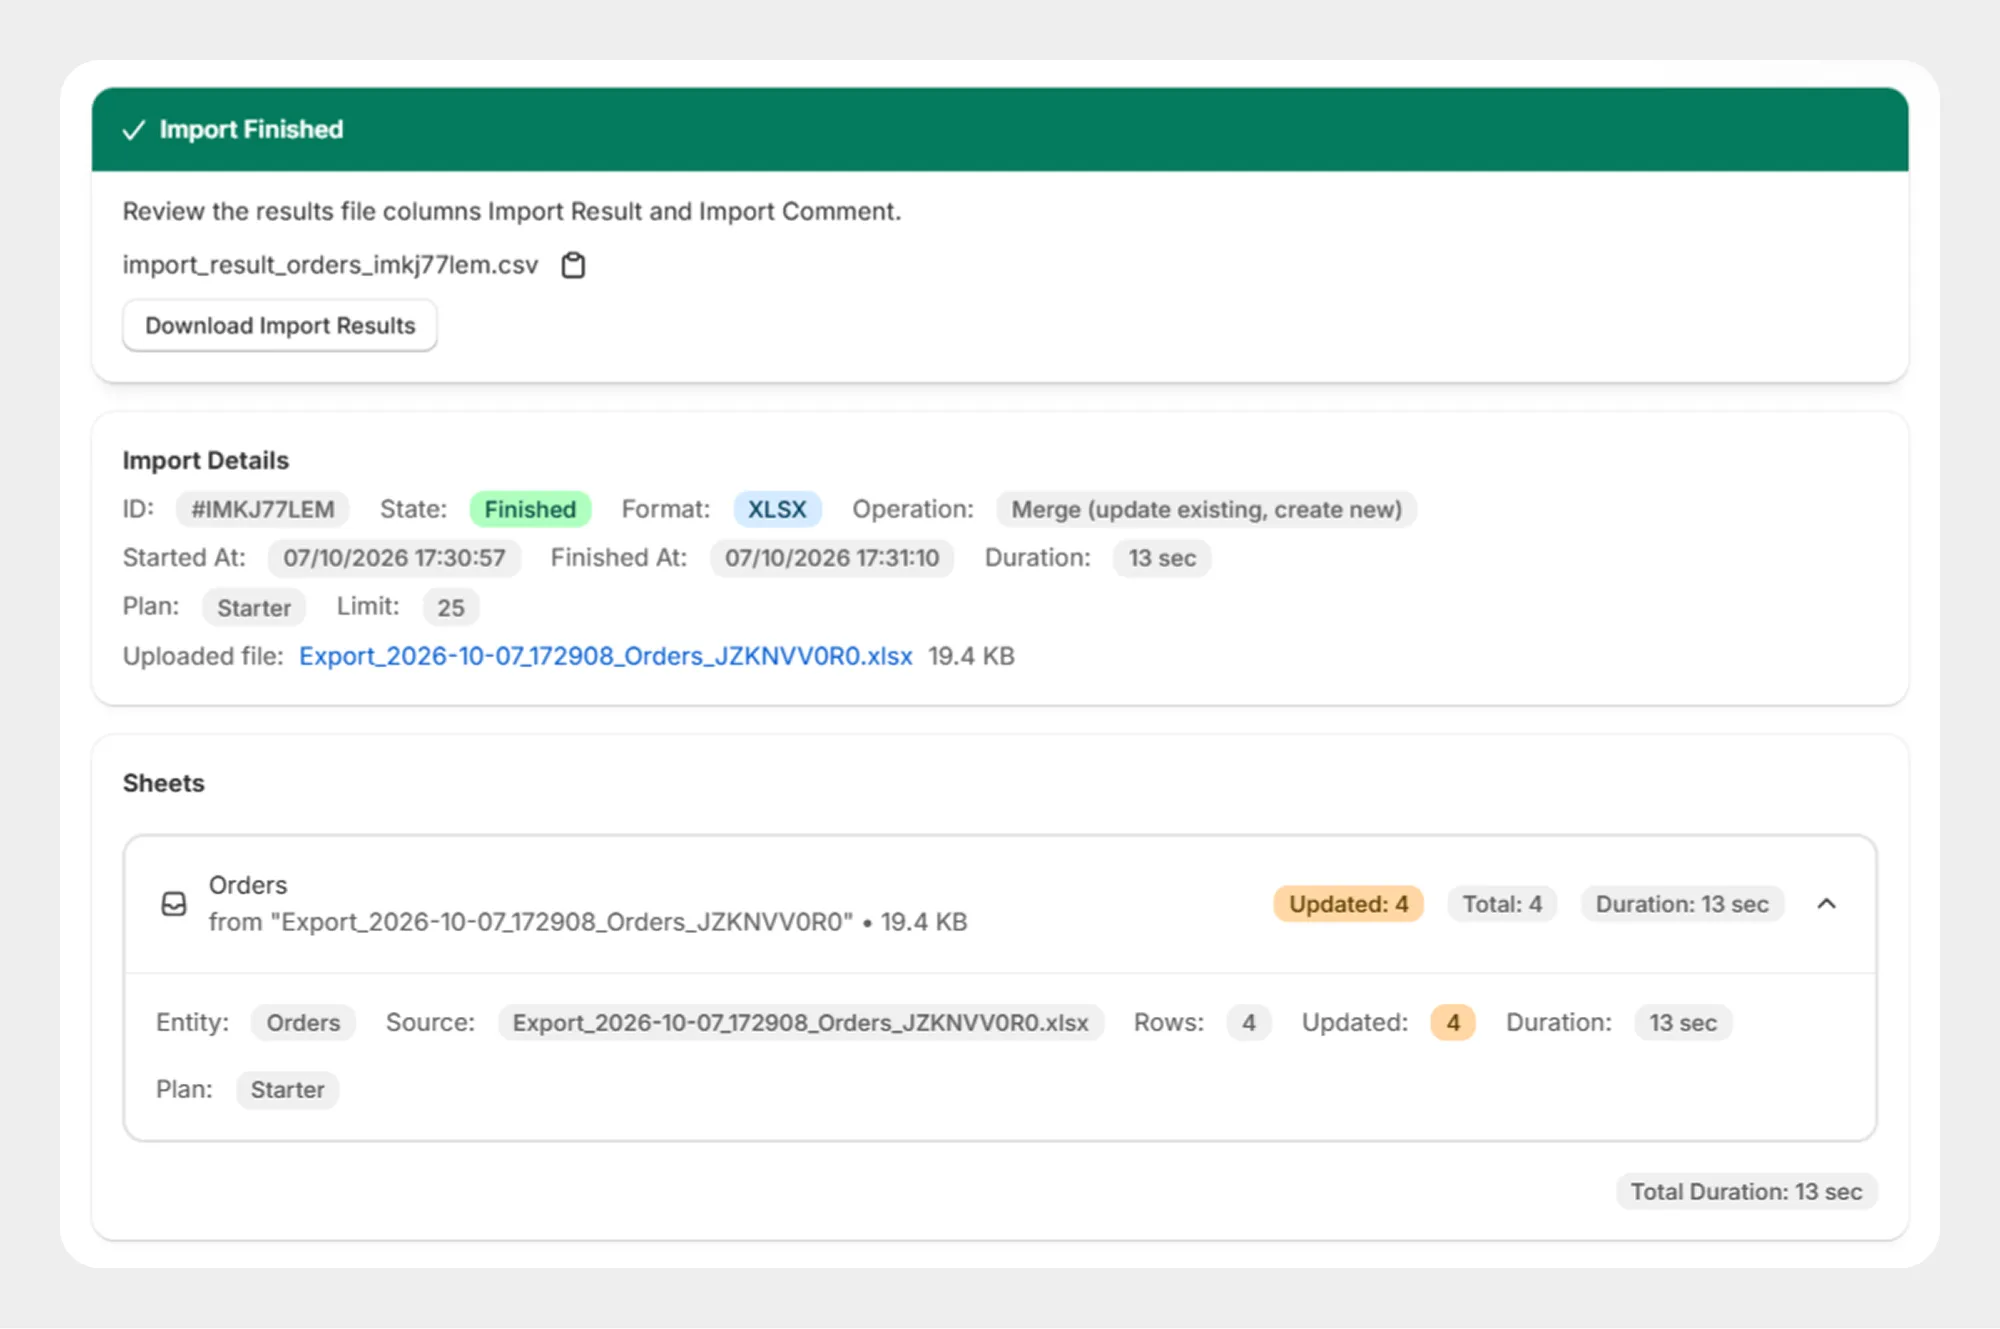
If any records fail, review the reported errors, correct the source file where required, and run the import again.
Export Orders
Migrato also allows you to export Shopify order data into a downloadable CSV or XLSX file.
This can be useful for:
-
Order reporting
-
Data analysis
-
Backup
-
Store migration
-
Data processing
-
External system integration
-
Record keeping
Step 1: Open Order Export
From your Shopify Admin:
- Go to Apps → Migrato.
- Open the Export section.
- Select Orders.
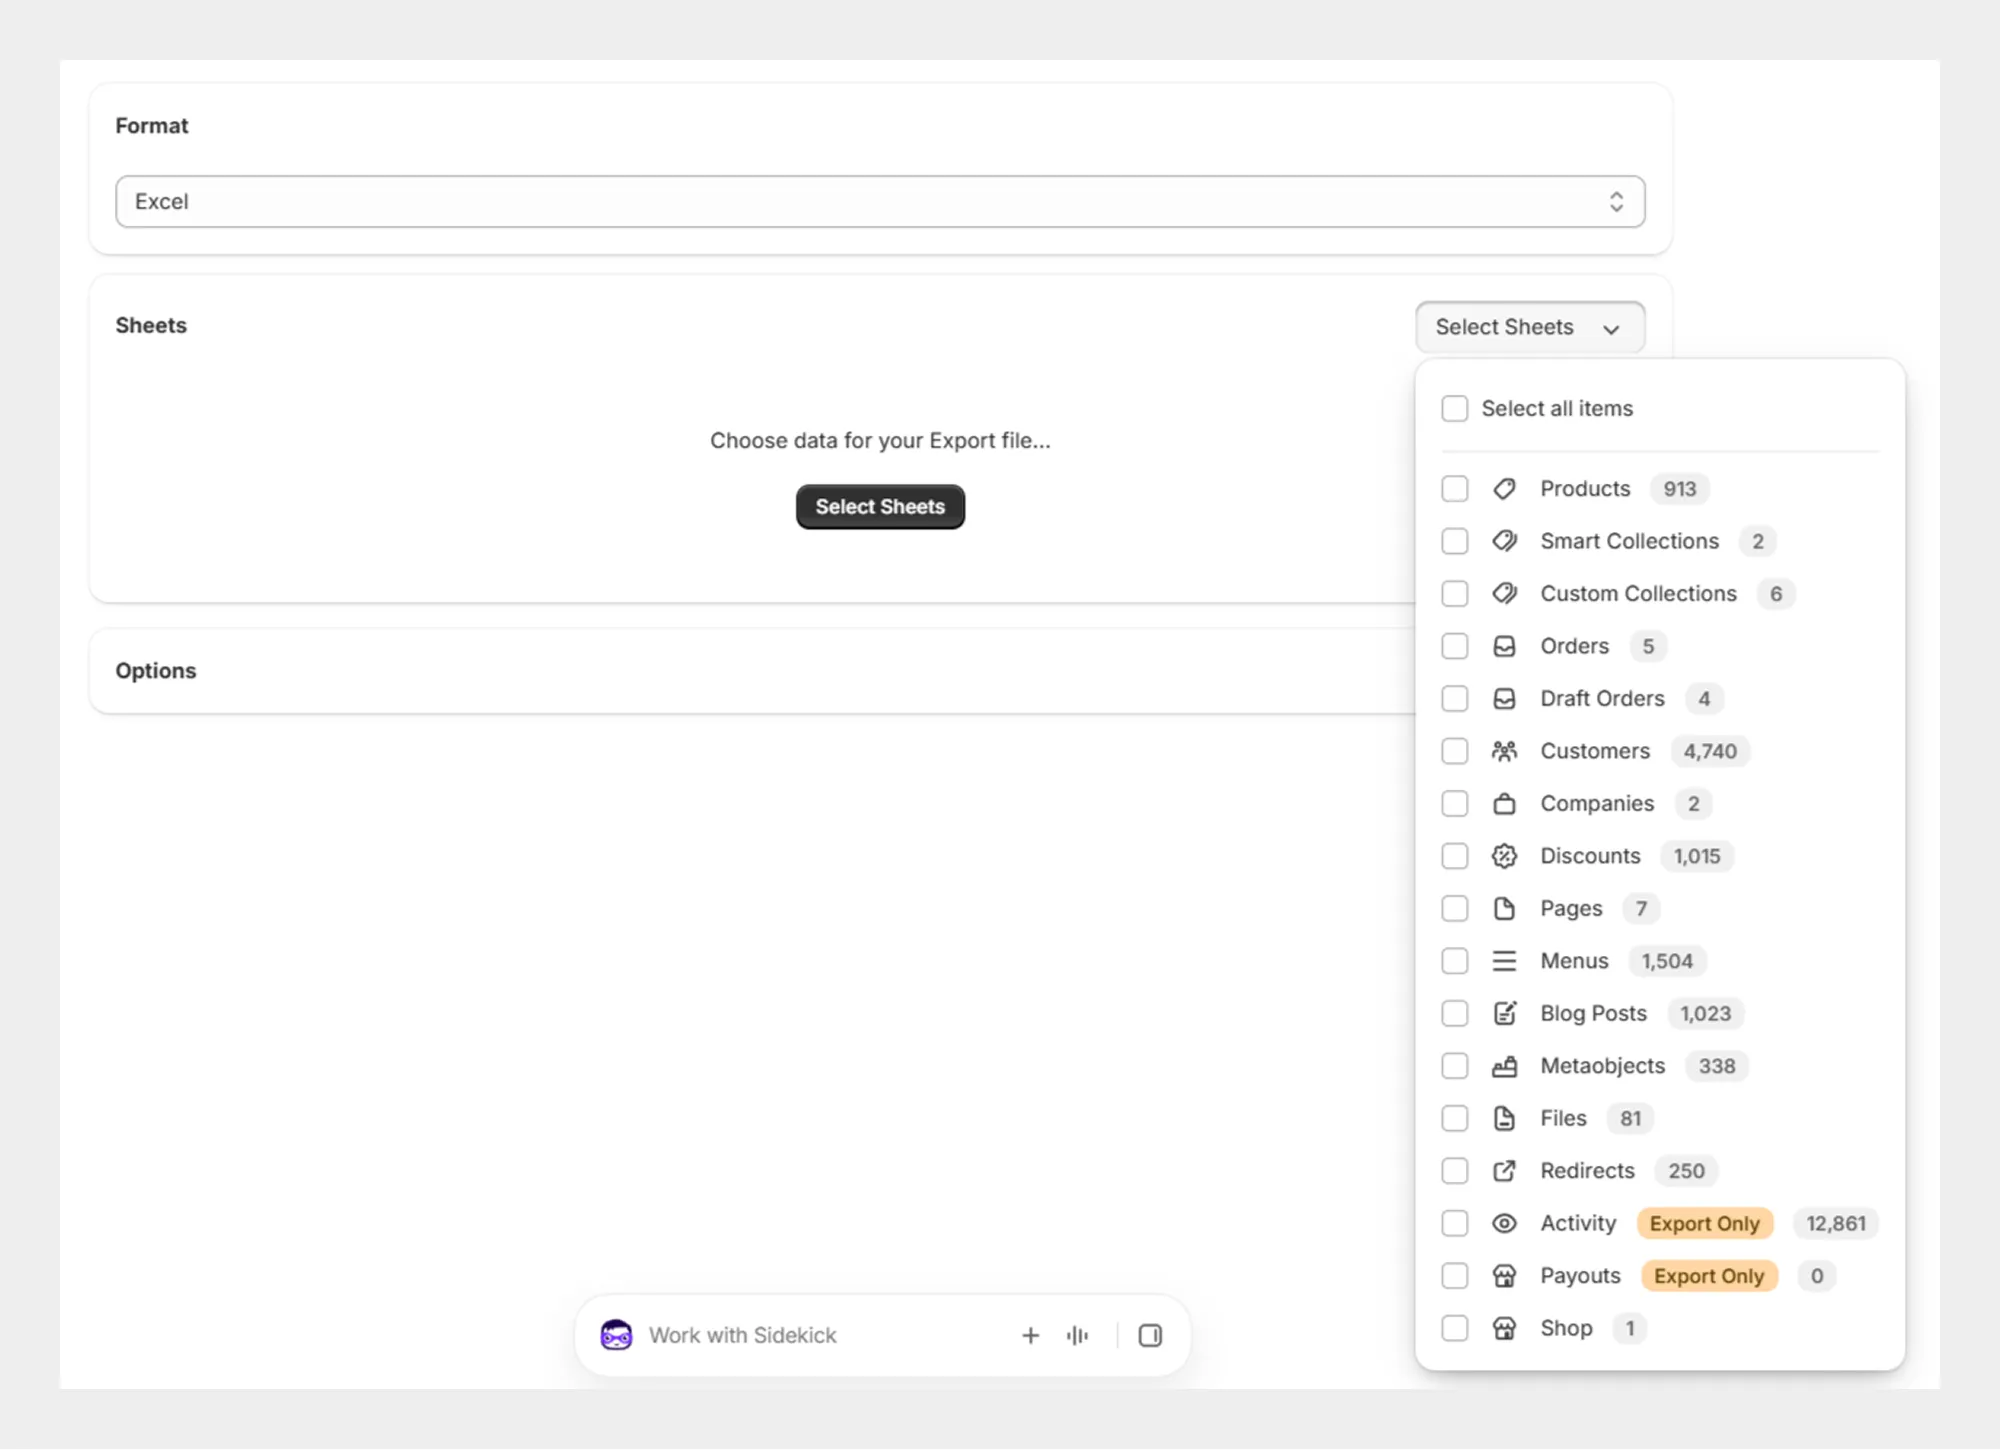
Step 2: Select Order Fields
Select the order fields you want to include in the export.
Depending on the available Migrato configuration, order data may be organized into different field groups.
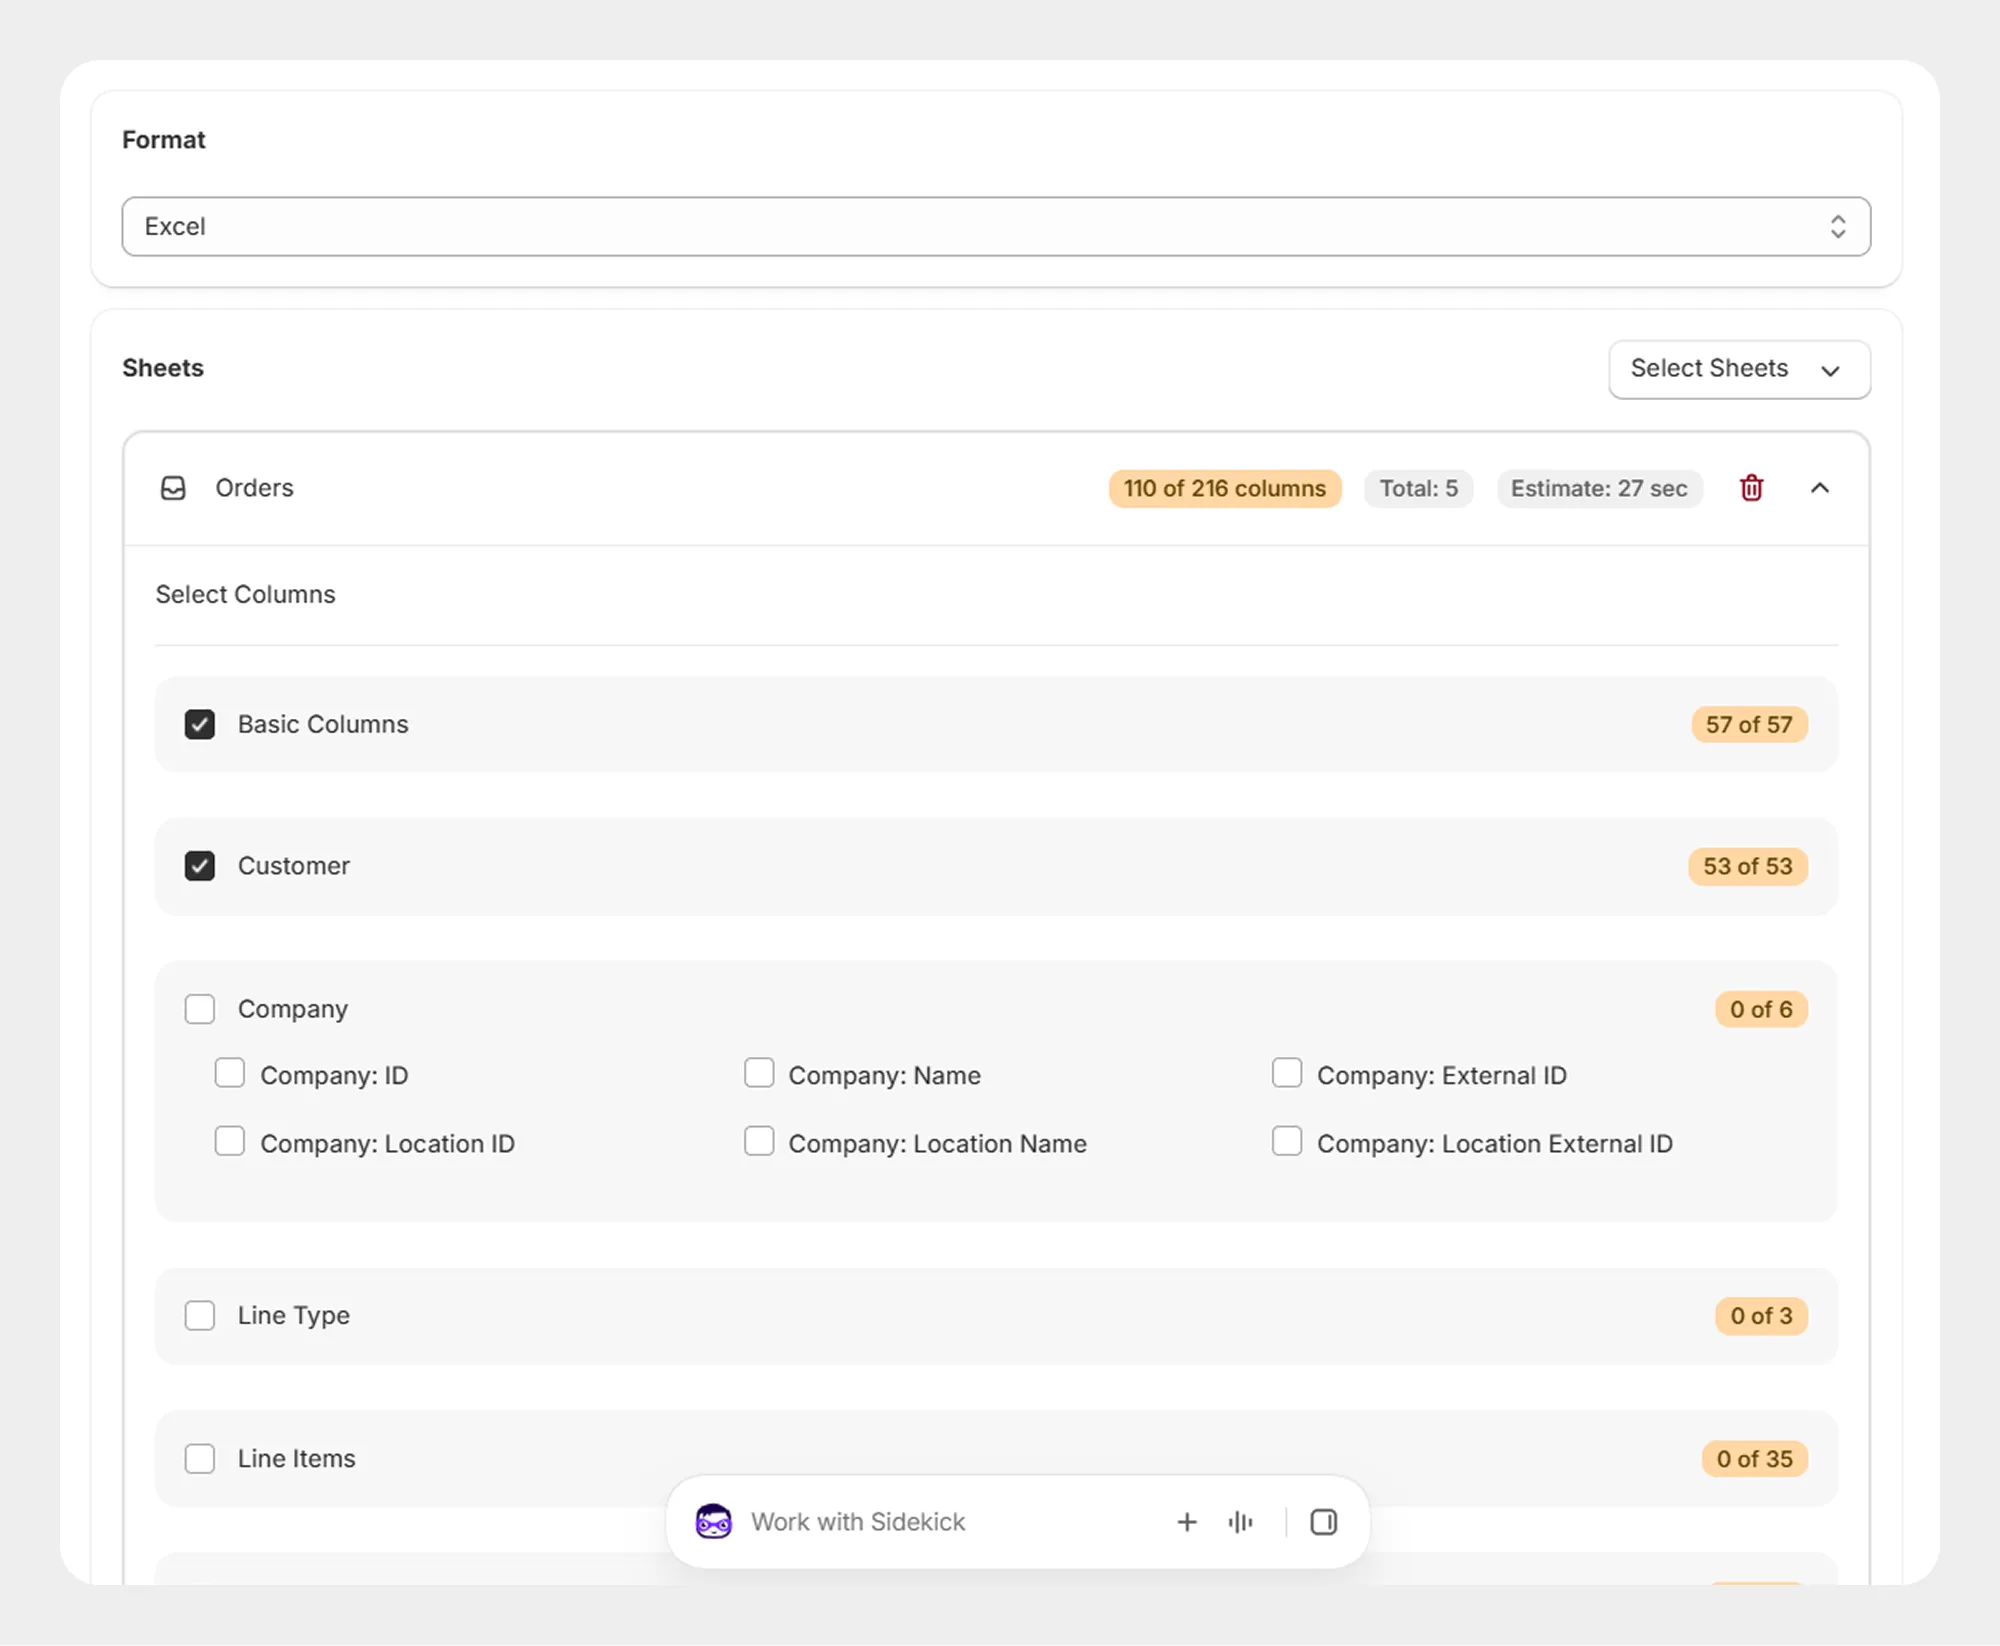
Select only the fields required for your export to keep the resulting file focused and easier to work with.
Step 3: Apply Order Filters
If you only need specific orders, use the Filters section to narrow down the export.
For example, you may filter orders using supported order information such as:
-
Order ID
-
Order name/number
-
Customer information
-
Financial status
-
Fulfillment status
-
Dates
-
Other supported order fields
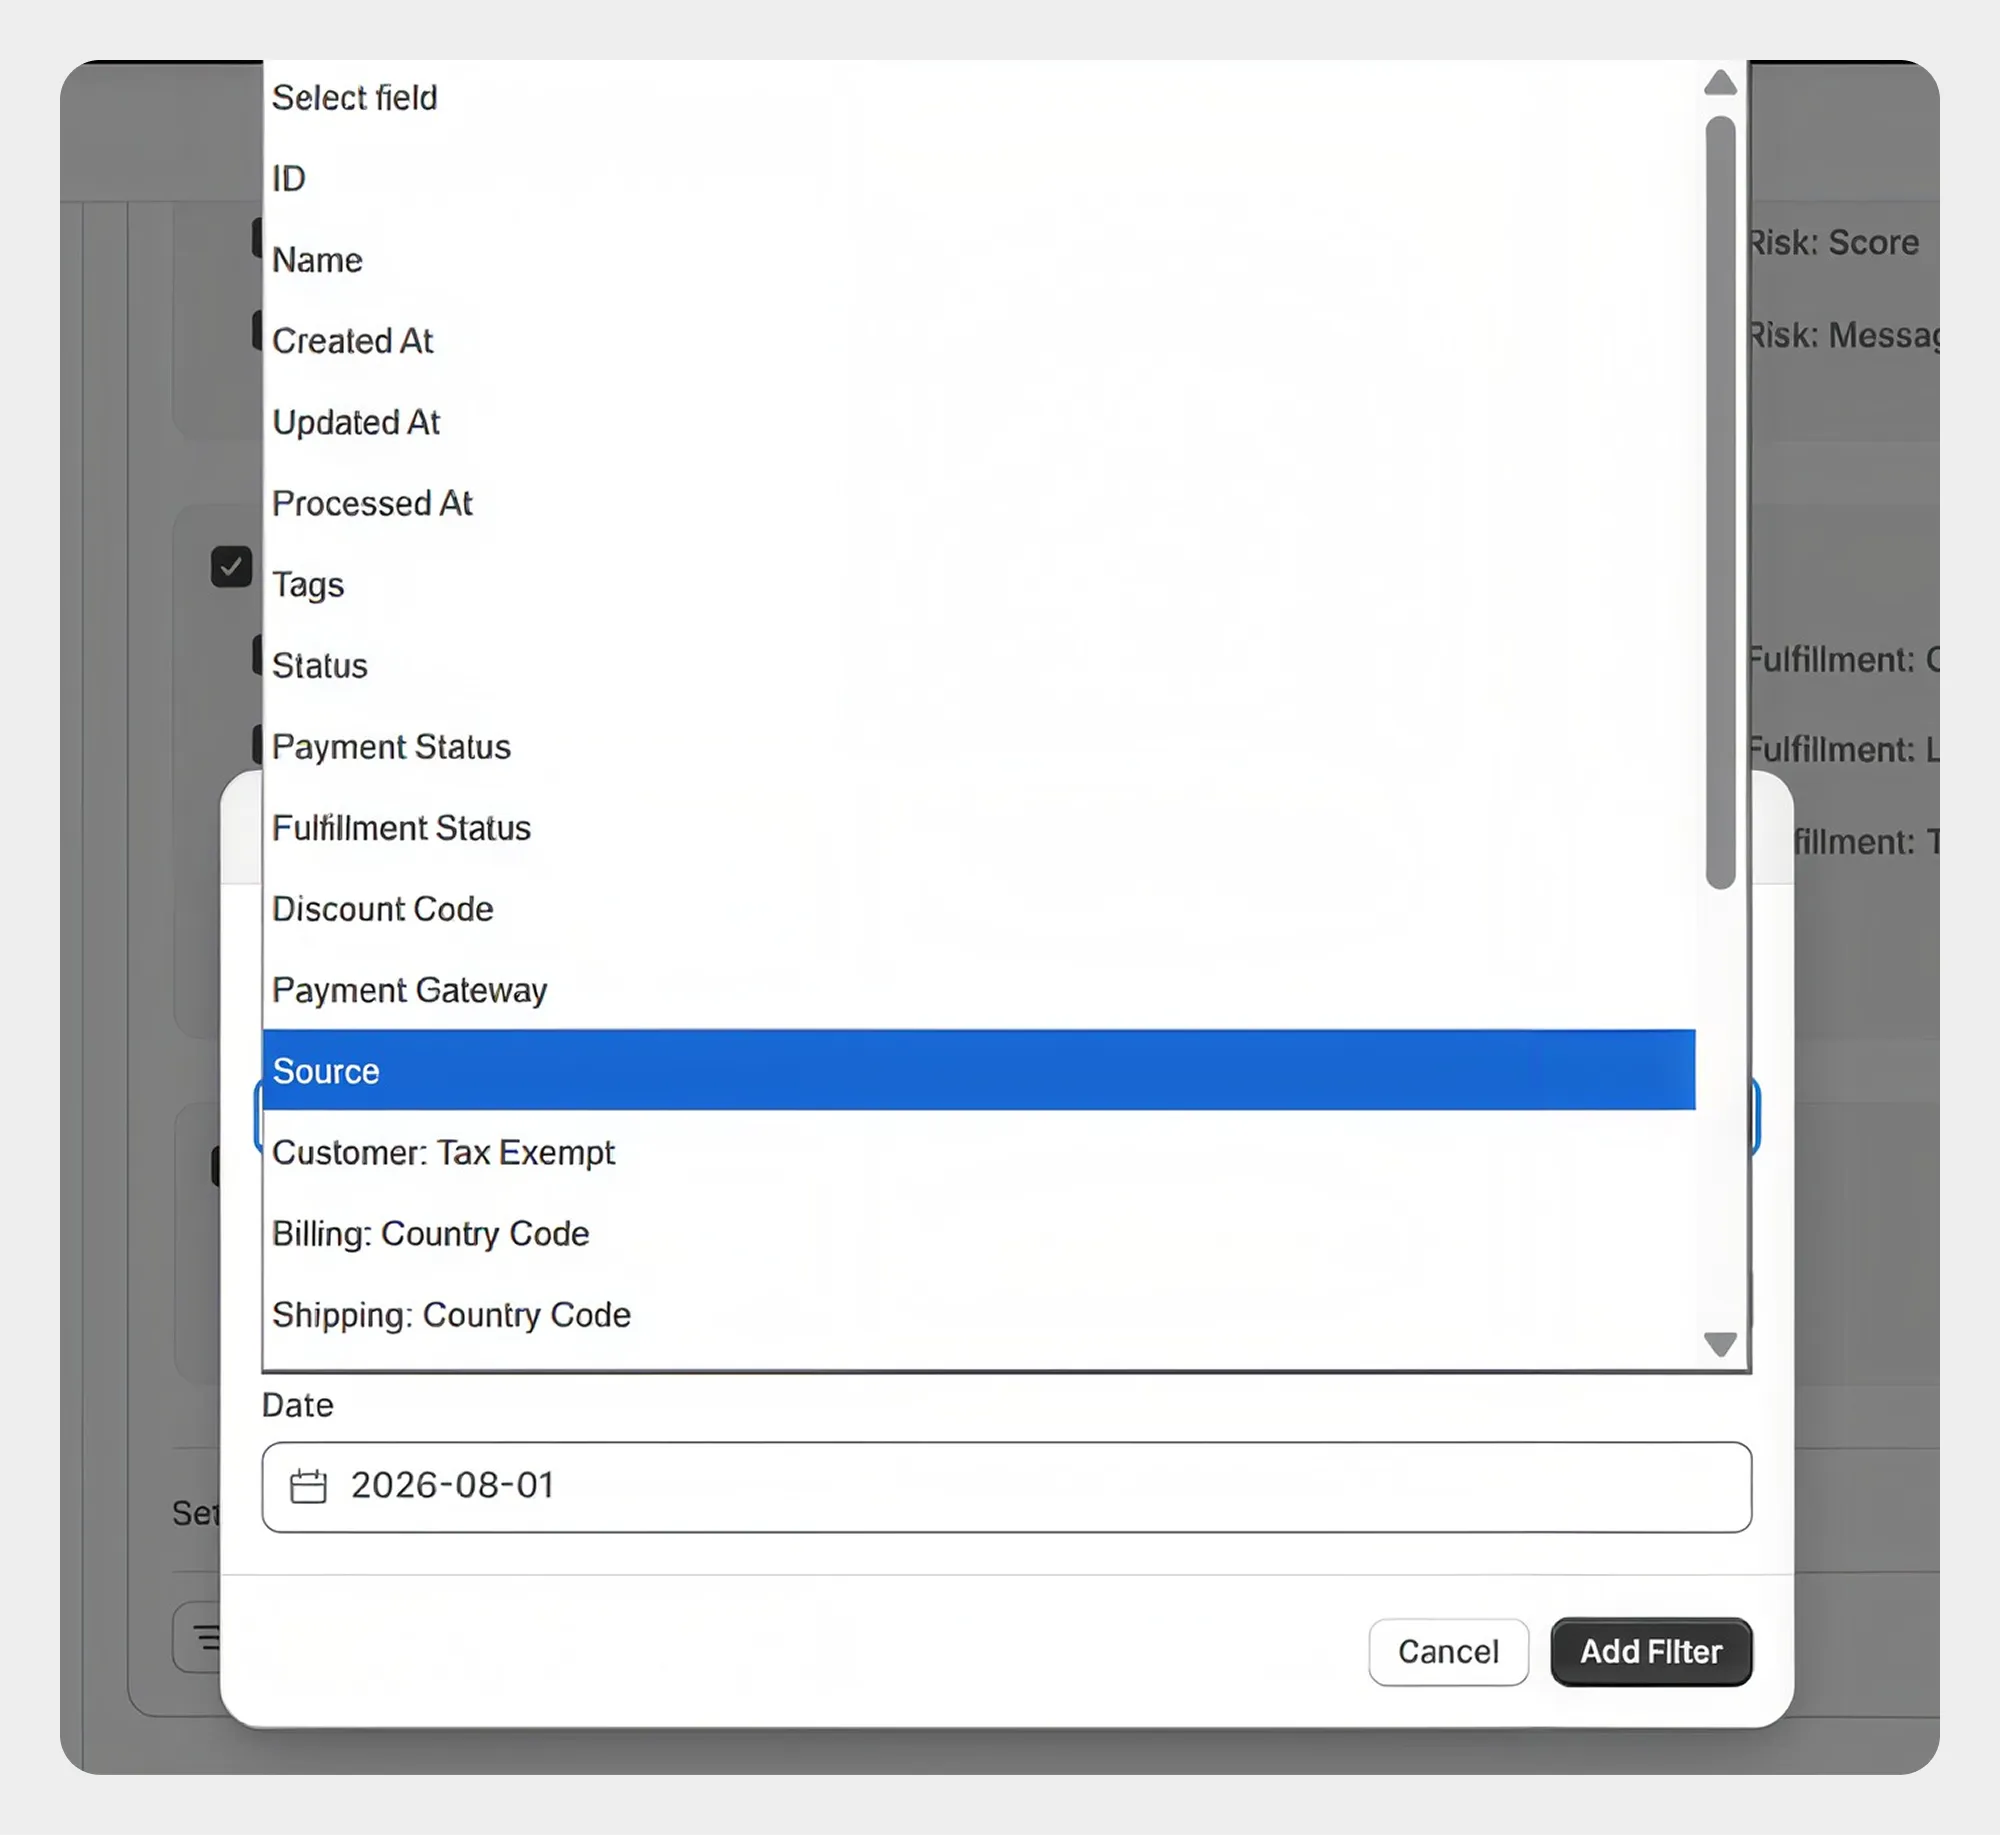
For complete information about available filters, see Filter Orders.
Step 4: Start the Export
After selecting the required fields and filters, start the export.
Migrato processes the selected order data and creates the export file.
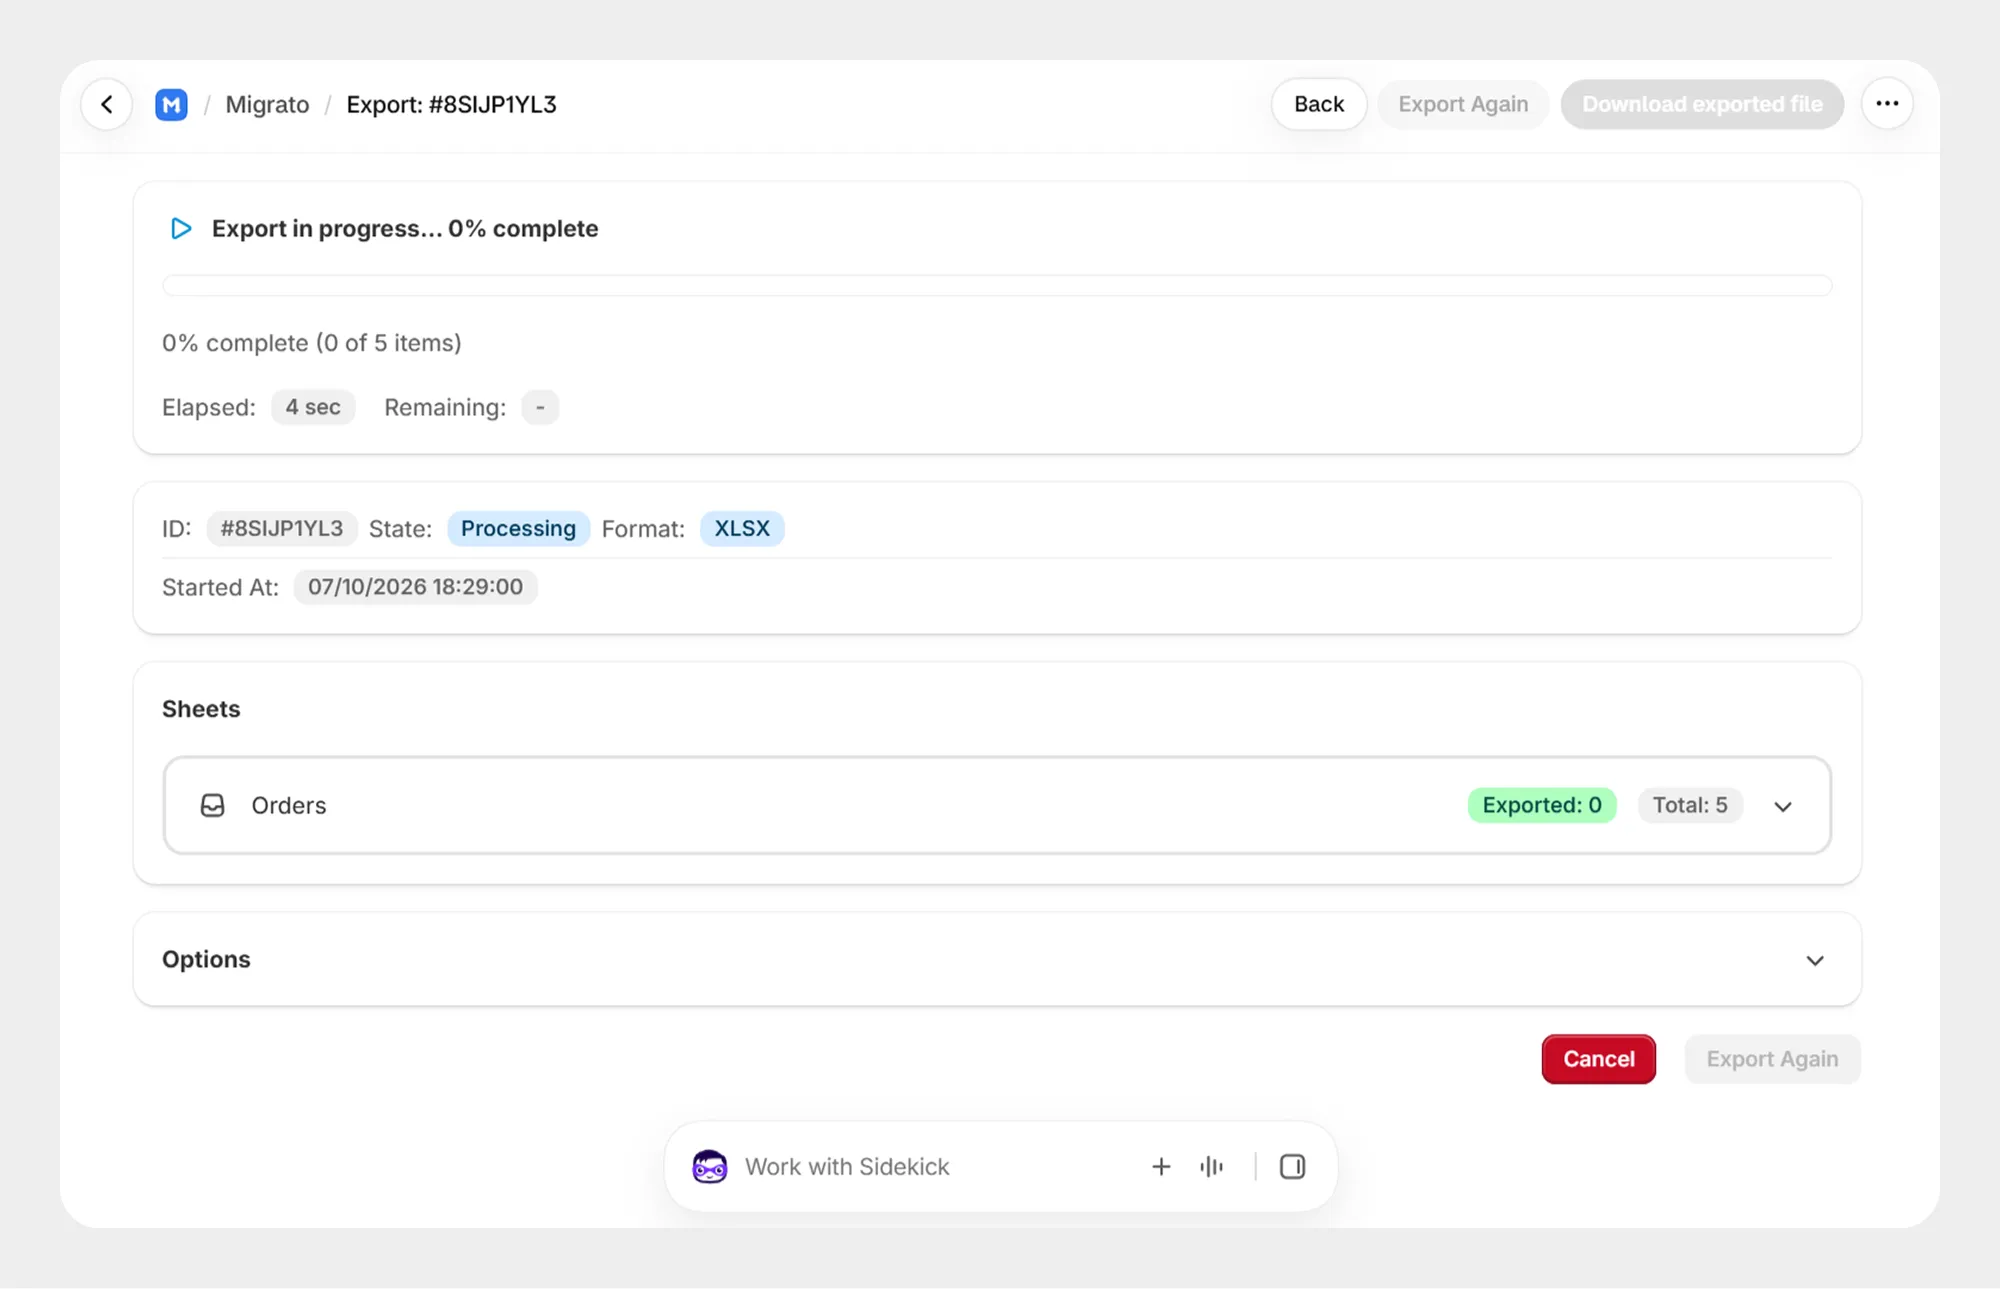
Step 5: Review the Export Result
After the export is completed, Migrato displays the export result.
The result page can display information such as:
-
Export status
-
Exported file name
-
File format
-
Number of records exported
-
Processing duration
-
Selected order fields
-
Applied filters
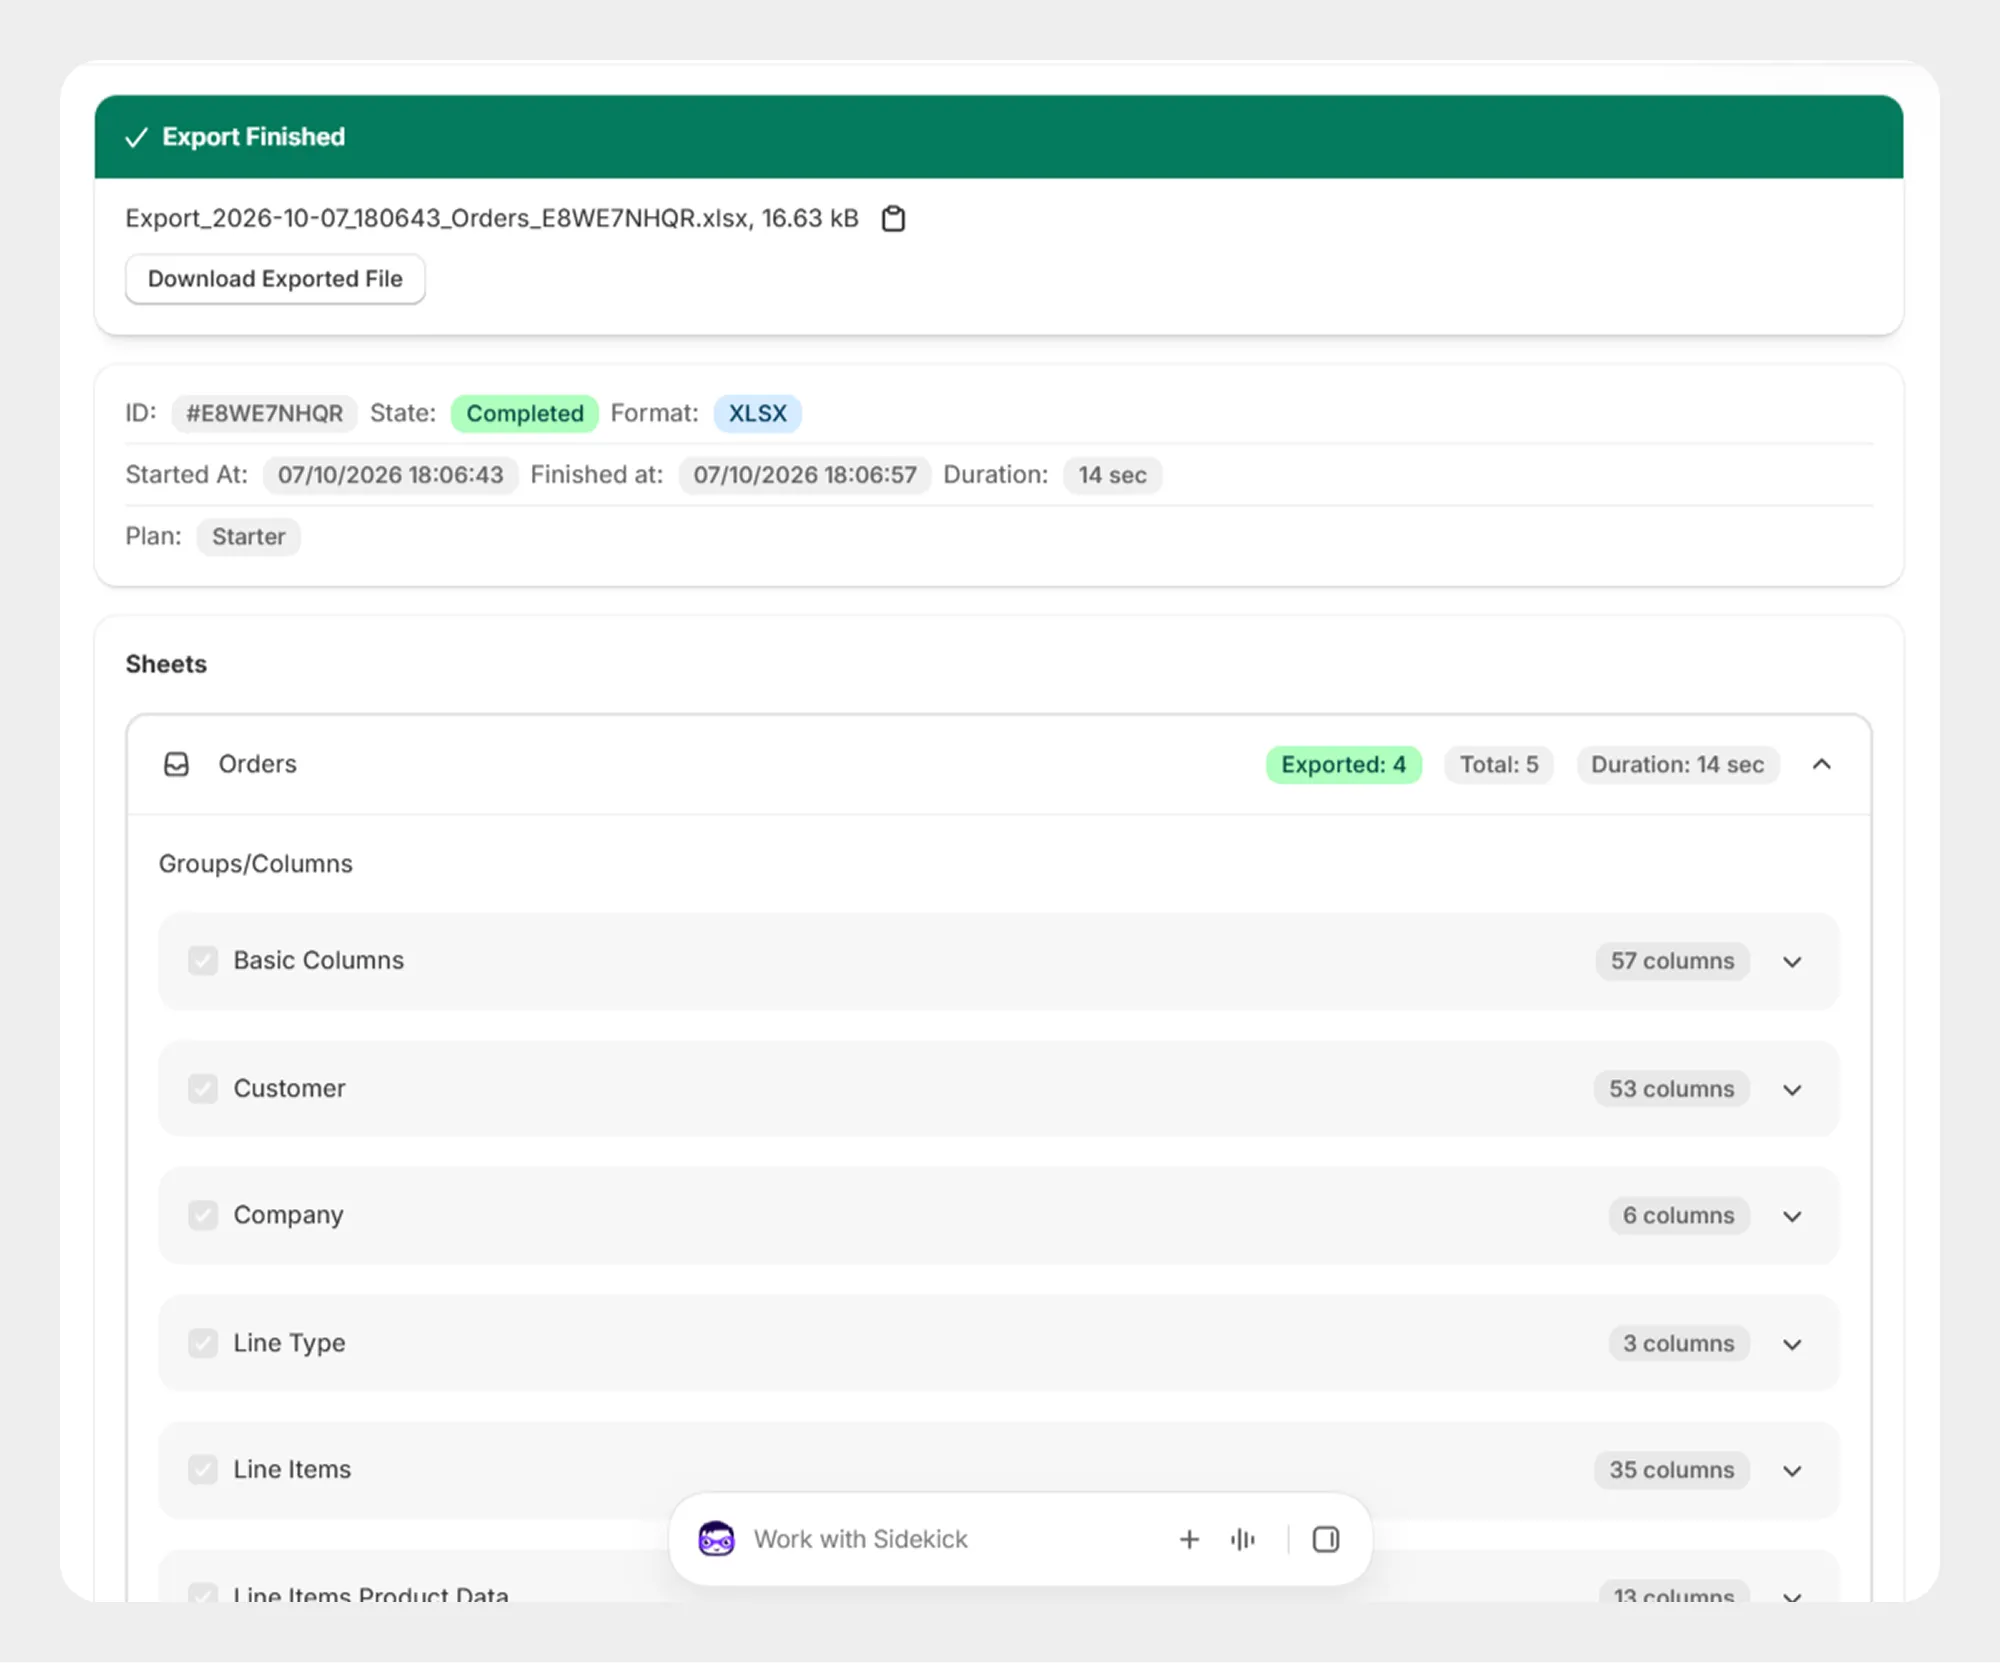
You can download the generated export file from the completed export screen.
Supported Order Data
Migrato's order import/export functionality is designed to work with supported Shopify order information.
Depending on the current Migrato order template, supported data may include:
-
Order information
-
Customer information
-
Financial information
-
Fulfillment information
-
Shipping information
-
Billing information
-
Line-item information
-
Transaction information
-
Discount information
-
Tax information
-
Other supported order fields
Note: The exact fields available for import and export depend on the current Migrato Order Template. Refer to Template Documentation for the complete field reference.
Important Notes for Order Import/Export
-
Always review the Order Template Documentation before preparing an import file.
-
Make sure the file follows the required Migrato structure.
-
Use a test file with a small number of records before processing a large order dataset.
-
Carefully review the selected operation before importing.
-
Take extra care when using Replace or Delete operations.
-
When importing from a URL, make sure the file is publicly accessible.
-
Review the import results and error information after processing.
 Install Migrato free
 Free plan forever