 Our first app, Migrato, is live on the Shopify App Store

Introduction to Migrato
Everything you need to import, export, update and migrate Shopify store data with CSV and Excel files – start here. 10 min read
 Updated 9 October 2026
 Applies to Migrato on all plans
Migrato is a Shopify bulk data management app that lets you import, export, update, delete, replace, merge and migrate Shopify store data using CSV and Excel (.xlsx) files.
You can manage Products and Variants, Customers, Orders, Draft Orders, Smart Collections, Custom Collections, Discounts, Inventory, Metaobject Definitions, Metaobjects, Metafield Definitions, Metafields, Locations, Pages, Blogs, Navigation Menus, Redirects, Files, Companies, Shop Data, Activity and Payouts. Migrato also supports FTP and SFTP connections, so you can work with files on external servers and automate recurring imports and exports with scheduled jobs.
 Installing the app
Install Migrato from the Shopify App Store in five steps.
Start Here
 Import data
Create, update, delete, replace or merge records from a CSV or XLSX file.
Read the guide
 Export data
Filters, file formats and what to do with the exported file.
Read the guide
 FTP/SFTP & scheduling
Connect a remote server and automate recurring jobs.
Read the guide
 Demo CSV files
Sample files and template documentation for every data type.
Download a file
 Best practices
Test first, keep a backup and verify the results.
Read the list
Before you begin
Make sure you have the following in place before you use Migrato.
-
 An active Shopify store
-
Migrato installed on your Shopify store
-
The required Shopify permissions to access and manage the data you want to process
-
A CSV or XLSX file, if you are planning to import data
-
FTP or SFTP server details, if you are planning to use a remote file server
If you are using Migrato for the first time, we recommend starting with a small test file before processing a large amount of data.
The Migrato workflow
Every job follows the same path. Depending on whether you are importing or exporting, some steps and options may vary.
- Select data. Choose the Shopify resource you want to manage.
- Choose operation. Import or export, then create, update, delete, replace or merge.
- Upload or configure data. Upload your file, or set filters and the file format for an export.
- Validate. Check the data for errors before it is processed.
- Process. Migrato runs the job and shows its progress and status.
- Review results. Check processed, successful and failed records in the job results.
Step 1: Open Migrato
After installing Migrato:
- Log in to your Shopify Admin.
- Go to Apps.
- Open Migrato.
- You are redirected to the Migrato dashboard, where you can reach the data management features and begin a new import or export job.
Step 2: Select the Shopify data
Choose the Shopify resource you want to manage: Products & Variants, Customers, Orders, Draft Orders, Smart Collections, Custom Collections, Discounts, Inventory, Metaobject Definitions, Metaobjects, Metafield Definitions, Metafields, Locations, Pages, Blogs, Navigation Menus, Redirects, Files, Companies, Shop, Activity or Payouts.
The available operations and fields may vary depending on the selected resource.
Refer to the individual resource documentation for detailed information about supported fields, templates, filters and operations.
Import Shopify data
Use Import when you want to create or modify Shopify data using a CSV or XLSX file. Migrato handles bulk operations such as creating new records, updating existing records, deleting supported records, replacing or merging supported data, and migrating data.
Step 3: Select Import
From the Migrato dashboard:
- Select Import.
- Select the Shopify resource you want to import.
- Choose the appropriate operation – Create, Update, Delete, Replace or Merge, depending on the resource.
Step 4: Prepare your import file
Prepare your CSV or XLSX file according to the template and field requirements for the selected resource.
- Product title, handle and description
- Vendor, product type, tags and status
- Variant information, SKU, price and inventory
- Images, SEO information and metafields
- Column headers are correct and required fields are included
- Data values are verified and there are no duplicate records
- IDs, handles, SKUs or other identifiers are verified where applicable
- Date and number formats are checked
- Unnecessary rows and columns are removed
- The file is saved in a supported format
- Download the demo CSV for your resource from the Demo CSV files page
- Read the matching template documentation for each column
- Add your data under the header row
Step 5: Upload the import file
Upload your prepared CSV or XLSX file to Migrato. After the file is uploaded, Migrato reads it and prepares the data for processing. Review the imported data and the available configuration options before continuing.
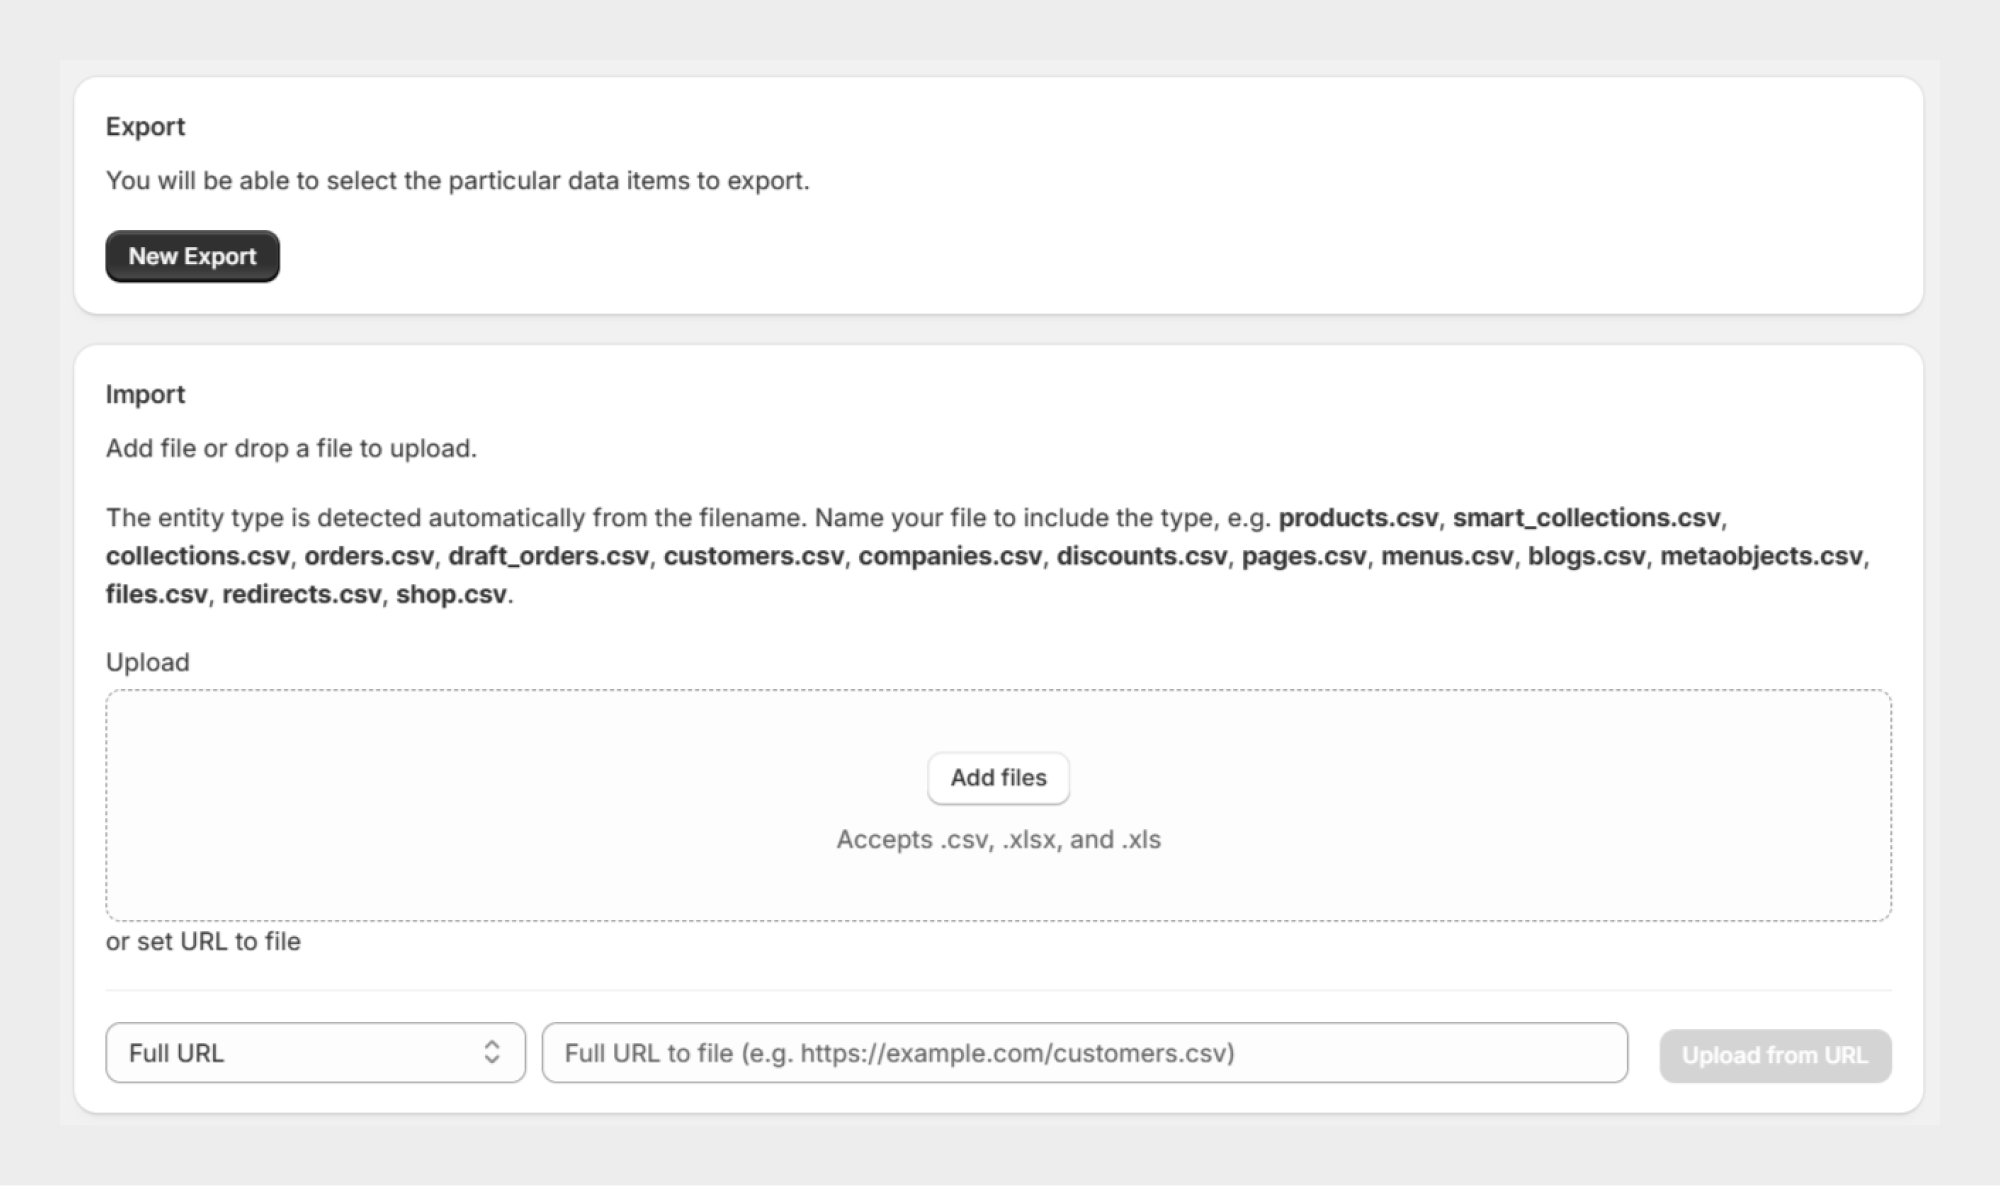
Step 6: Review and validate your data
Before starting the import, carefully review the data. Validation helps identify potential issues before the data is processed. Check for:
-
Missing required fields
-
Invalid values and incorrect formatting
-
Duplicate records and invalid identifiers
-
Unsupported data and resource-specific errors
If errors are identified, correct the source file and upload it again before proceeding. We recommend resolving validation errors before running a large import.
Step 7: Select the import operation
Select the operation that matches the purpose of your import.
Always review your file carefully before proceeding.
The available operations depend on the selected Shopify resource.
Step 8: Start the import
After reviewing your file and settings, start the import process. Migrato processes the data and displays the progress and status of the job. For large datasets, processing time may vary depending on the amount of data and Shopify’s API processing requirements.
Step 9: Review import results
After the import is completed, review the job results. You can use the job information to check:
-
Overall job status
-
Number of records processed
-
Successfully processed and failed records
-
Error details and processing information
Export Shopify data
Use Export when you want to retrieve Shopify data and save it as a CSV or XLSX file. Exported data can be used for data backup, bulk editing, reporting, data analysis, store migration, data transfer and external system processing.
Step 10: Select Export
From the Migrato dashboard:
- Select Export.
- Select the Shopify resource you want to export.
- Configure the available export options and apply filters if required.
- Select the output file format and start the export.
Step 11: Apply export filters
For supported resources, you can use filters to export only the data you need – particularly useful for large Shopify stores. Depending on the resource, you can filter by IDs, status, created date, updated date and resource-specific fields, narrowing the export to a specific group of records instead of your entire dataset.
Using filters can make large export jobs easier to manage and reduce unnecessary data processing.
Step 12: Select the file format
.csv.xlsxStep 13: Start the export
After configuring the export:
- Review your selected resource.
- Review the filters.
- Confirm the output format.
- Press Start export. Migrato processes the requested data and generates the export file.
Step 14: Download and review the export
Once the export is completed, download the generated CSV or XLSX file and verify that the exported information is correct. You can then:
-
Use it as a backup
-
Edit it and import it again
-
Use it for migration
-
Share it with another system
-
Use it for reporting or analysis
Import and export using FTP/SFTP
Migrato supports connecting to third-party FTP and SFTP servers. This is useful when Shopify data needs to be exchanged regularly with an external system. For example, you may receive product or inventory files from:
-
Suppliers
-
ERP systems
-
Warehouses
-
Internal systems and external data providers
Schedule import and export jobs
If you need to perform the same import or export regularly, Migrato lets you schedule supported jobs. Scheduled jobs are useful for:
-
Daily inventory updates
-
Recurring product imports
-
Supplier data synchronisation
-
Scheduled order exports and regular data backups
-
External system data exchange
FTP/SFTP file → Scheduled job → Migrato → Shopify, or Shopify → Scheduled export → FTP/SFTP server. For more information, see Scheduling import/export.
Monitor your jobs
Migrato provides job tracking and history so you can review previous import and export activities. Use the job history to monitor:
-
Job status and processing results
-
Successful and failed records
-
Error information
-
Previous import/export activities
Recommended workflow for your first import
If this is your first time using Migrato, we recommend following this workflow.
- Export existing data. Start by exporting a small amount of existing Shopify data.
- Review the export file. Open the CSV or XLSX file and understand the data structure.
- Download a demo or template file. Compare your exported file with the relevant Migrato template.
- Prepare a small test file. Create a file containing a small number of records.
- Run the import. Import the test file using the appropriate operation.
- Review the results. Check the Migrato job history and error information.
- Verify Shopify data. Open Shopify Admin and confirm that the imported or updated data is correct.
- Process the full dataset. Once the test is successful, proceed with the larger dataset.
Best practices
4 habits that keep every Migrato job safe.
 Always test before a large importDo not immediately upload thousands of records when using Migrato for the first time. Test with a small dataset first.
 Keep a backupBefore major Update, Delete, Replace or Merge operations, export the relevant Shopify data so you have a backup. Use the correct templateUse the appropriate Migrato template for the resource you are importing.
 Check your identifiersWhen updating records, make sure the identifiers in the import file match the Shopify records you want to modify.
Where to go next
If this is your first time with the app, follow these in order.
-
Install Migrato from the Shopify App Store
-
Take the feature walkthrough to see where everything lives
-
Download a demo CSV file for the data you want to import
 Free plan forever